Other functions selecting the video for, Rear display” 127, Operating the picture adjustment – Pioneer AVIC-F10BT User Manual
Page 127: Operating the pic, Selecting the video for “rear display, Other functions
Selecting the video for
“Rear display”
You can choose either to show the same
image as the front screen or to show the se-
lected source on the
“Rear display”.
% Touch [Rear Screen] on the “AV Source”
menu.
Each touch of [
Rear Screen] changes the set-
tings as follows:
! Mirror AV — The video on the front screen
of the navigation unit is output to the
“Rear
display
”
! Disc — The video and sound of the DVDs
are output to the
“Rear display”
! iPod — The video and sound of the iPod
are output to the
“Rear display”
! AV1 — The video and sound of AV1 are
output to the
“Rear display”
! AV2 — The video and sound of AV2 are
output to the
“Rear display”
p When [Mirror AV] is selected, the following
restrictions are applied to
“Rear display”.
— When selecting [Rear View] in the map
display, nothing is displayed.
— All sounds cannot be output for “Rear
display
”.
— When playing back video files on the ex-
ternal storage device (USB, SD), the
“Video image” is not output.
p When Disc is selected, the following restric-
tions are applied to
“Rear display”.
— When a CD or MP3/WMA/AAC disc is
set in the built-in DVD drive, only the
sound is output.
p When iPod is selected, the following restric-
tions are applied to
“Rear display”.
— The “Video image” and sound are output
only when the appropriate setting on
[
AV1 Input] is [iPod].
p When AV is selected, the following restric-
tions are applied to
“Rear display”.
— The “Video image” and sound are output
only when
AV1/AV2 has both video and
sound.
— The “Video image” and sound are output
only when the appropriate setting on
[
AV1 Input] or [AV2 Input] are
[
Video].
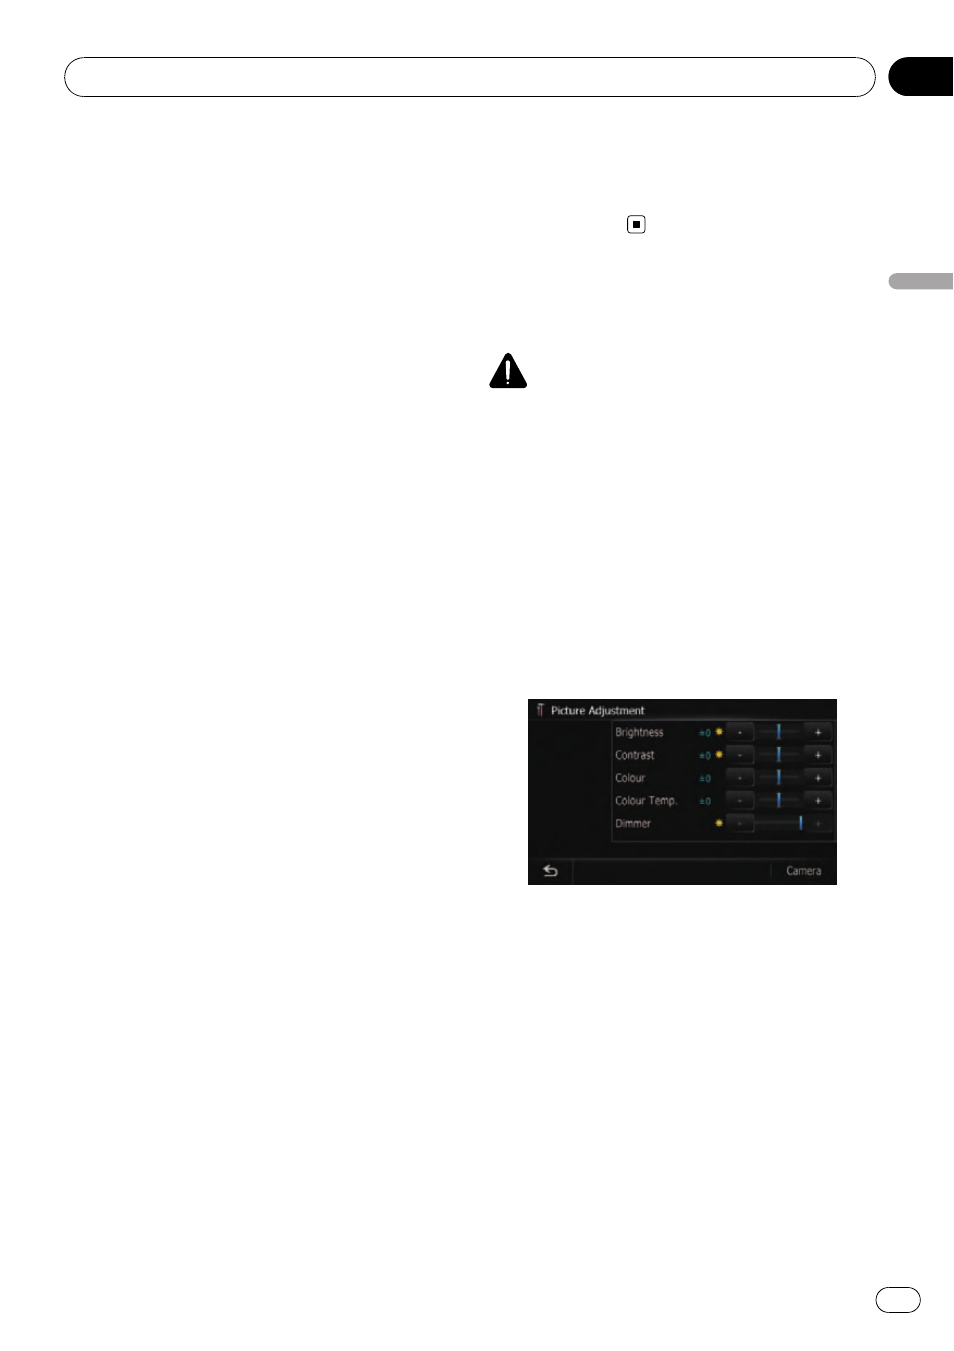
Operating the picture
adjustment
CAUTION
For safety reasons, you cannot use some of these
navigation functions while your vehicle is in mo-
tion. To enable these functions, you must stop in
a safe place and apply the handbrake. Refer to
“Important Information for the user” (a separate
manual).
You can adjust the picture for each source and
rear view camera.
1
Press and hold the MODE button.
Press and hold to display the
“Picture Adjust-
ment
” screen.
! Brightness — Adjusts the black intensity
! Contrast — Adjusts the contrast
! Colour — Adjusts the colour saturation
! Colour Temp. — Adjusts the tone of colour
(red is emphasised or green is emphasised)
! Dimmer — Adjusts the brightness of dis-
play
! [Camera] — Shows the picture adjustment
display for the rear view camera
p Touching [Source] while adjusting the rear
view camera image returns you to the pre-
vious screen.
Other functions
Engb
127
Chapter
28
Other
functions