How to operate the audio settings, Screen, Customising the audio settings items – Pioneer AVIC-HD3-II User Manual
Page 126: Using the equaliser 126, Av setting overview, How to operate the audio settings screen, Using the equaliser
Various settings are available with the audio
source according to your audiovisual needs.
This chapter describes the methods of chan-
ging the various settings and setting the LCD
panel.
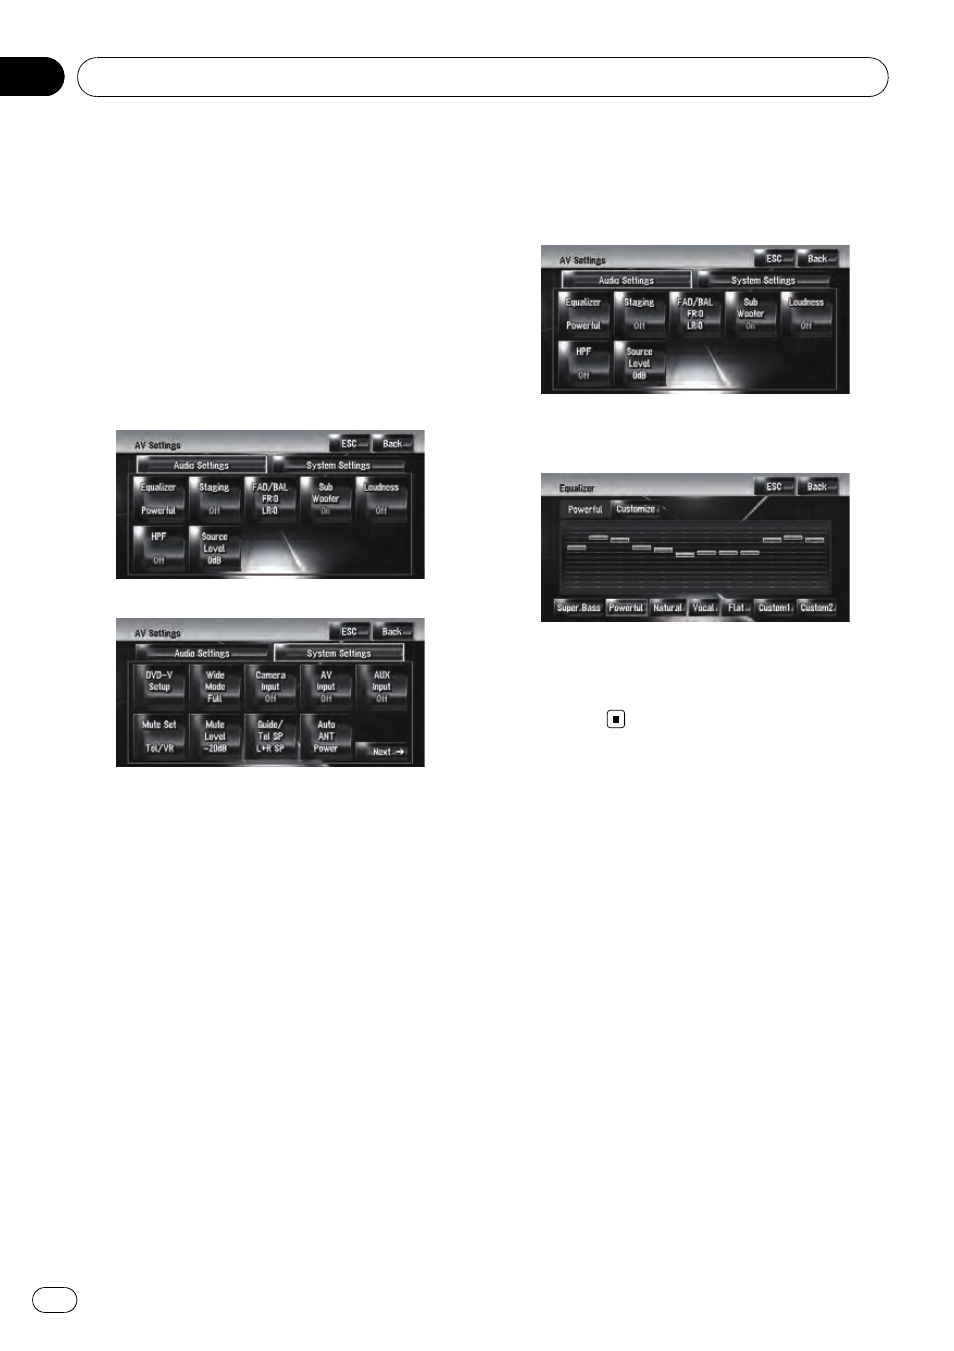
AV Setting Overview
The audio visual setting is divided into
[
Audio Settings] and [System Settings].
Audio Settings screen
System Settings screen
= For more details about “[Audio Settings]”,
refer to this page to page 130.
= For more details about “[System Settings]”,
refer to page 130 to page 137.
p When Preout (the subwoofer controller set-
ting in
System Settings menu) is Full, the
Non Fading will be displayed instead of
Sub Woofer.
= For details, refer to Setting the rear output
and subwoofer controller on page 136
When selecting the FM tuner as the source,
you cannot select [
Source Level].
How to Operate the Audio
Settings screen
1
Press AV button.
The Navigation screen changes to the Audio
source screen (of any source).
2
Touch [AV Settings].
The AV Settings screen appears.
3
Touch the item you want to change.
4
Change Setting.
(E.g. Equaliser screen)
p Touch [ESC] to return to the selected source
screen currently.
p Touch [Back] to return to the AV Settings
screen.
Customising the Audio
Settings Items
Using the equaliser
The equaliser lets you adjust the equalisation
to match vehicle interior acoustic characteris-
tics as desired.
Recalling equaliser curves
There are six stored equaliser curves which
you can easily recall. Here is a list of the
equaliser curves:
Customising the Audio Setting related with Audio Visual
Engb
126
Chapter
15