Swiftech H20 X20 EDGE SERIES User Manual
Page 9
Copyright Swiftech 2010
– All rights reserved – Last revision date: 8-17-10 - Information subject to change without notice – URL
Rouchon Industries, Inc., dba Swiftech
– 151 West Victoria Street, Long Beach, CA 90805 – Tel. 310-763-0336 – Fax 310-763-7095 - E Mail: [email protected]
9 of 16
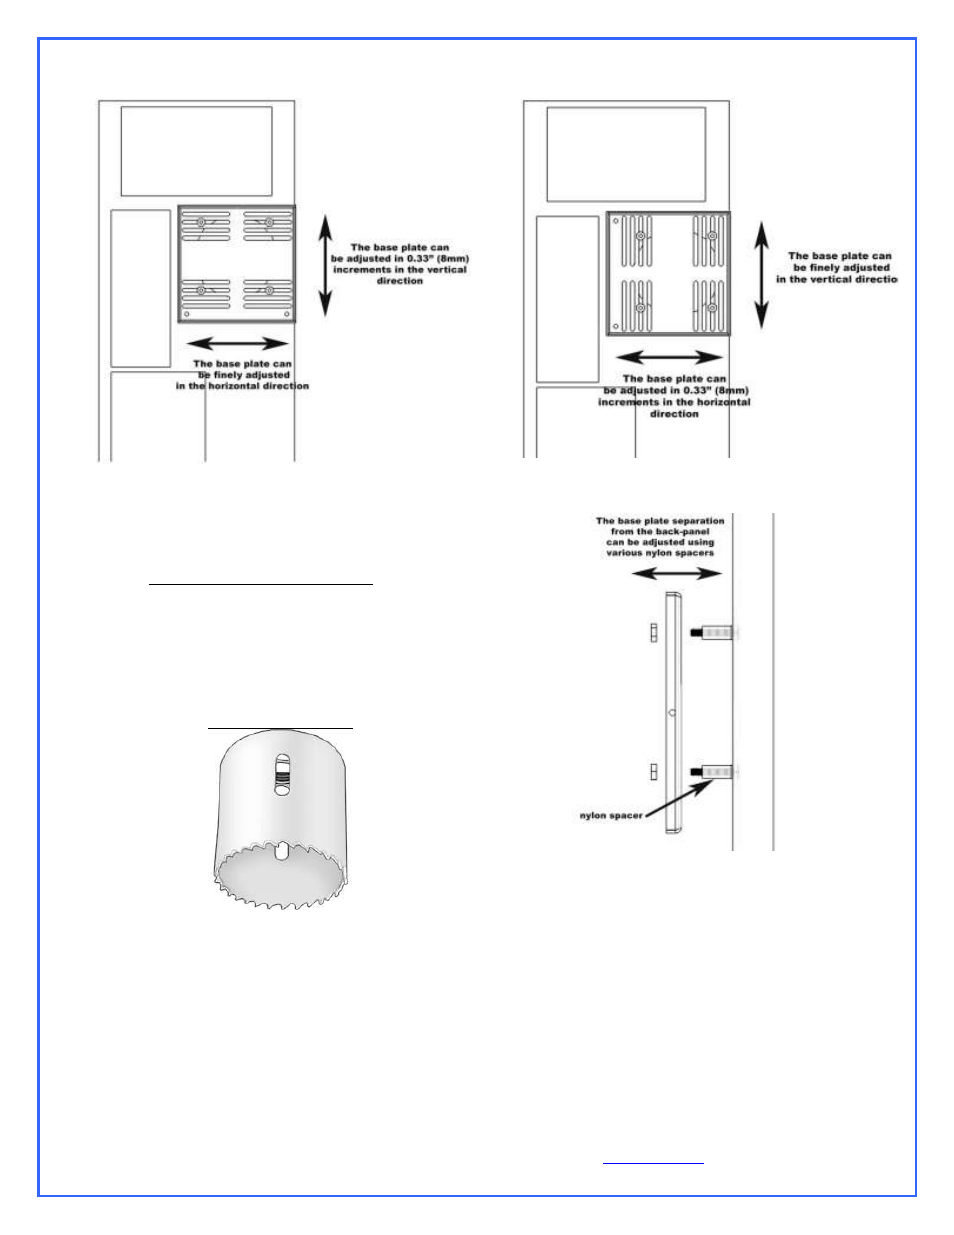
Securing the base plate at the desired location:
Once satisfied with the position, bolt down the Radbox
back-plate with the provided nuts.
Routing of the tubes thru the chassis:
Many of the current chassis offered on the market now
come with pre-drilled holes to route the tubing thru the
chassis. If your chassis does not have this feature, it will
be necessary to drill the holes yourself. Since the OD of
the tubing that comes with your kit is ¾” , we recommend
using a 1” (25mm) bi-metal hole saw (shown below) to
open up these holes. Once done, make sure to properly
deburr the edges of the hole to prevent damage to the
tubing.
Once the two holes are cut, de-burr the edges, and optionally
install grommets (not provided)
Install your radiator assembly onto the back plate and fasten
with the 4 provided short screws.
Finally, you need to route the fan wires through the back-
panel. This can be done easily with the provided PCI adapter
plate featuring a hole and grommet for protection of the wire as
shown below.
Fan speed adapters: please note that your kit includes fan
speed adapters that will allow you to tune the fan speed down
if desired. Please refer to the electrical installation chapter for
this purpose.