Preparing the coolant, Completing the installation, Filling-up the loop – Swiftech H20 X20 EDGE SERIES User Manual
Page 15
Copyright Swiftech 2010
– All rights reserved – Last revision date: 8-17-10 - Information subject to change without notice – URL
Rouchon Industries, Inc., dba Swiftech
– 151 West Victoria Street, Long Beach, CA 90805 – Tel. 310-763-0336 – Fax 310-763-7095 - E Mail: [email protected]
15 of 16
5.
P
REPARING THE COOLANT
Your kit comes with a 2 Oz (60ml) bottle of Swiftech’s specially formulated HydrX
concentrated coolant. This anti-freeze product was
formulated by the Valvoline Company for marine racing engines and its anti-corrosion and anti-fungal properties have been enhanced, whereas
the anti-freeze properties have been lowered. The product should be mixed to a 10% ratio exclusively with distilled water. Simply empty the
concentrated coolant into a 16 fl oz (1/2 liter) plastic bottle, and complete filling with distilled water. Your coolant is now ready for use.
Warning! Please keep this product away from children and animals; DO NOT DRINK this product, as it contains ethylene glycol which is
extremely toxic to human consumption. A bittering agent is included in the formulation to discourage ingestion of the product. The immediate
antidote in case of accidental ingestion is to drink a shot of whiskey or any other strong liquor such as gin or vodka; in case of
accidental exposure in the eyes, rinse abundantly with water. Consult with a Doctor immediately after accidental exposure or ingestion of the
product.
6.
C
OMPLETING THE INSTALLATION
After you fill-up the circuit, you will need to power-up your PSU in order to start-up the pump and complete the filling procedure. You must be
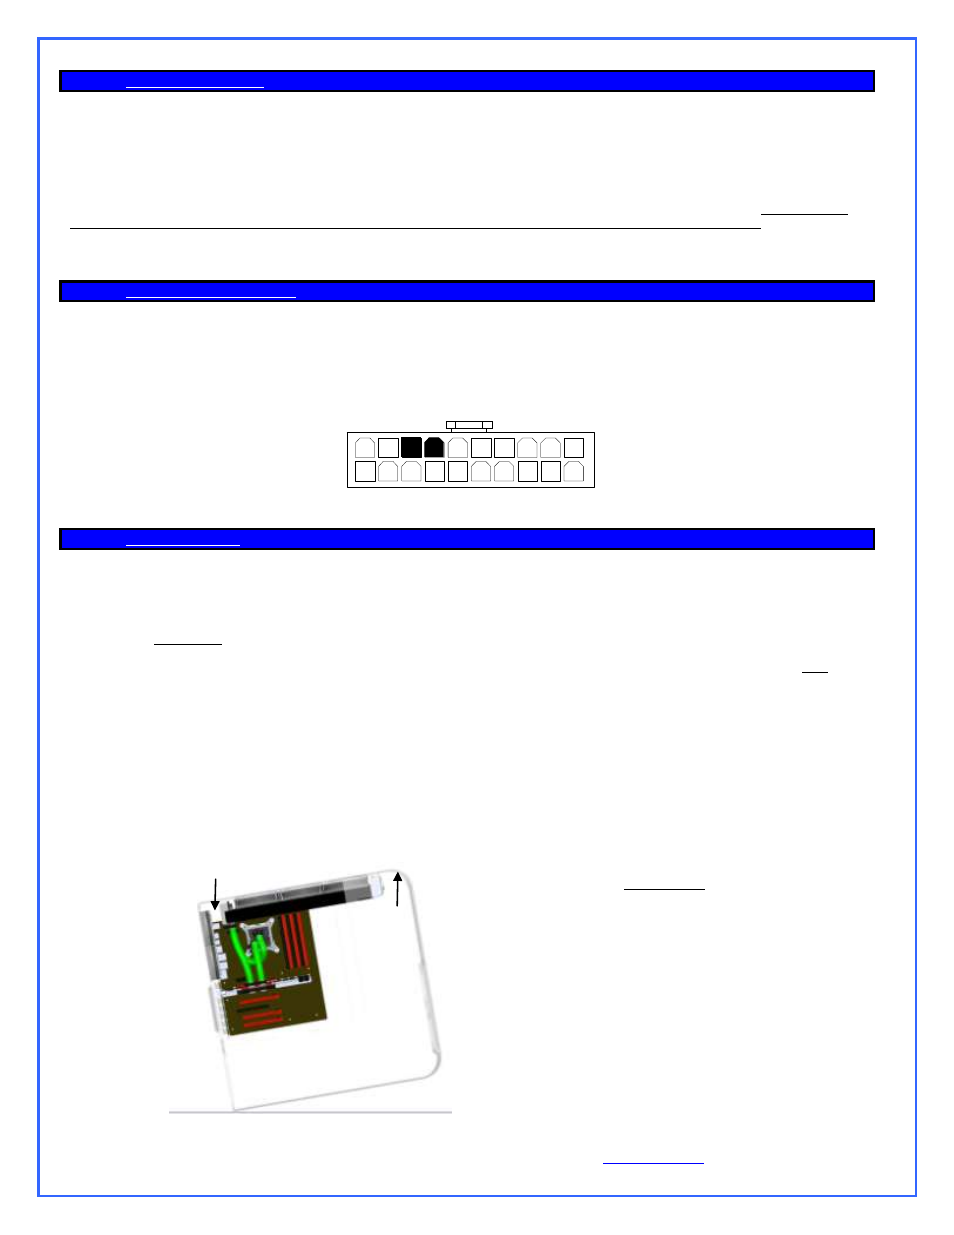
able to start the PSU without it being connected to the motherboard. While the Internet contains numerous references on how to use a paper-clip
to short-out pin 13 (black or any other black wire) and pin 14 (green wire) of the 20 pin ATX connector as shown below, we nonetheless
recommend instead using a power-supply tester. A wide variety of these common devices are available on the Internet (Google key w
ord: “PSU
tester”), and among Swiftech resellers.
13
14
7.
F
ILLING
-
UP THE LOOP
Simply pour the coolant that you prepared into the radiator reservoir
– carefully to avoid spills, allowing the circuit to fill-up
by simple gravity.
Once the reservoir is full, seal the fill port back with its cap in order to avoid any spills, and start-up the pump. Note that the
pump normally takes 2 to 3 seconds to start. Once the pump has started, the reservoir will quickly (within 1 second) empty itself.
Immediately turn off the pump, then top-off the reservoir with fluid to the maximum level, and restart the pump again. In a loop
composed of the CPU only, one refill will normally suffice. In a more complex loop with 1 or more VGA coolers in it, you might
need to refill 2 to 3 times. Warning Tip! When the radiator is completely full and you open the cap while the pump is NOT
working, it may overflow a little. Thus, always place an absorbing towel around the fill-port when you remove the cap. Conversely,
when the pump is running, it exerts a depression in the radiator, and the liquid will not overflow when you open-up the cap.
Once the reservoir is full, allow the system to run 10 minutes uninterrupted to clear all the micro-bubbles and foam, and
finally top-off the level one last time. If your system continues to foam up, turn-off the system and let it rest for a few minutes;
then restart it and let it run a little more; if the foam persists, then do not worry for now; once your leak-testing procedure has been
completed and you have re-installed all your components, you will be able to go into the BIOS and to slow the pump down to
minimum speed, and then let it run that way until all the bubbles are gone.
Important note regarding horizontal configurations: in configurations where the MCR Drive radiator is installed horizontally, it
is recommended to slightly tilt the system when you first fill-up from a completely empty state, in such a fashion that the reservoir
will be higher than the pump, as shown below. This will help the pump expelling any pocket of air located in the upper portion of
its impeller cavity, and allow it to prime properly. You may safely rest the case back down on the second refill and thereafter.
Applicable to horizontal installations only:
1.
Fill-up the reservoir with coolant
2.
Close the cap
3.
Tilt your system as shown so that the
reservoir is higher than the pump
4.
Startup the pump for 2 to 3 seconds
5.
Turn-off the pump
6.
Rest the case back flat on your bench
7.
Open the cap
8.
Top-off the level in the reservoir
9.
Close the cap
10. Restart the pump
11. Allow system to run 10 minutes
12. Inspect level, and refill as necessary