Guidelines – Allied Telesis AT-TQ2450 User Manual
Page 37
AT-TQ2450 Wireless Access Point Installation Guide
37
Installing the Access Point on a Wall of Ceiling with the AT-BRKT-J26
Bracket
This section contains the procedure for installing the access point on a
wall or ceiling with the optional AT-BRKT-J26 bracket.
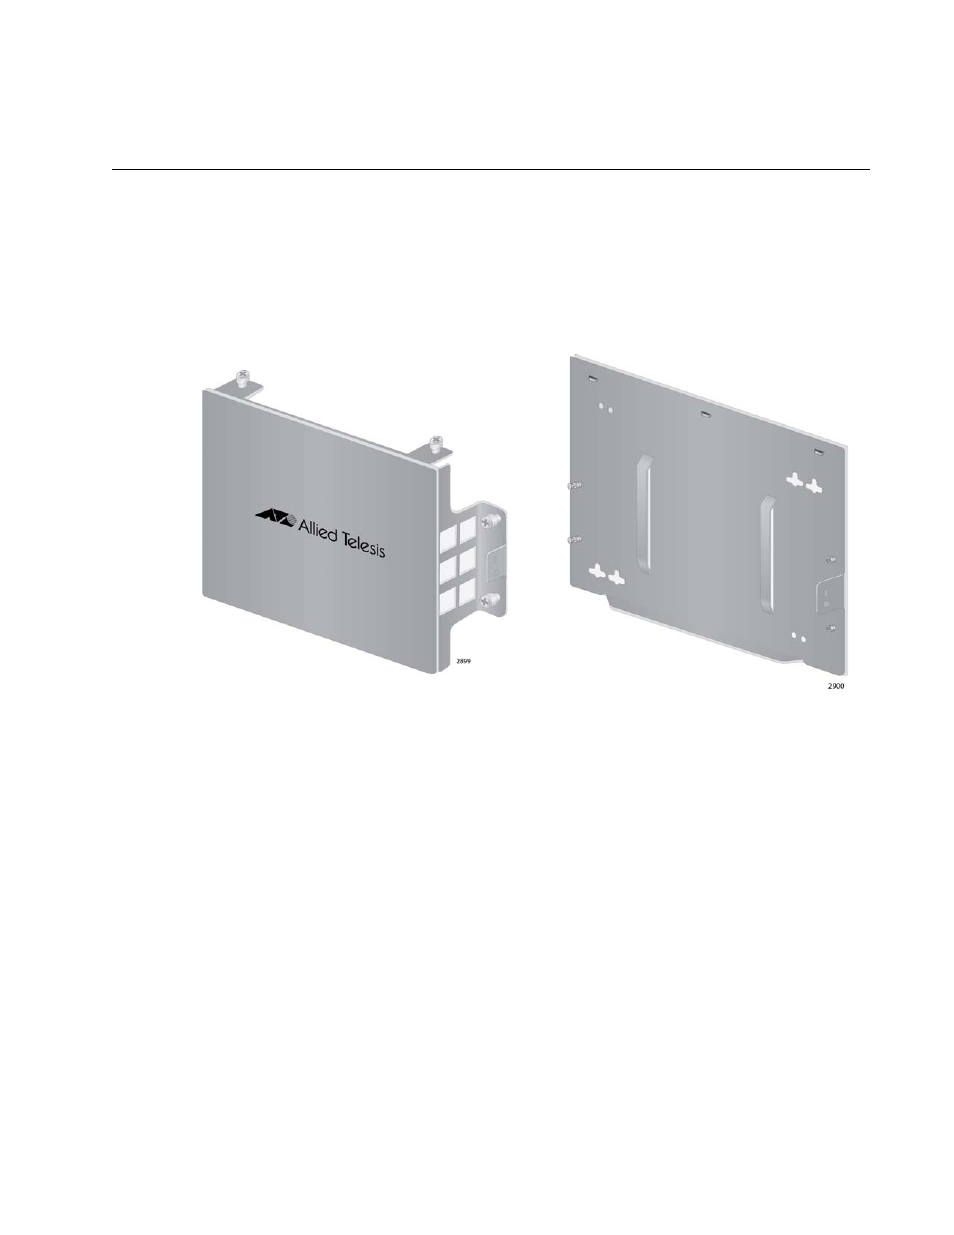
The bracket consists of top and bottom panels. Refer to Figure 13. The
bottom panel attaches to the wall or ceiling and the top panel secures the
access point to the bottom panel.
Figure 13. Top and Bottom Panels of the AT-BRKT-J26 Bracket
Guidelines
Please review the following guidelines before you begin to install the
access point:
If you are installing the access point on a wall, you may orient the unit
such that the LED panel is facing to the left, right, or down. However,
you may not install the unit with the LED panel facing up because that
could impede heat dissipation from the unit, which could result in
overheating.
When the access point is assembled on the bracket, the LED panel
faces the metal flange on the bottom panel. Refer to Figure 14 on page
38. When installing the bottom panel on the selected wall location, you
may orient it such that the flange is to the left, right, or down.
Top Panel
Bottom Panel