DAVIS Anemometer Transmitter Kit Installation User Manual
DAVIS Thermometers
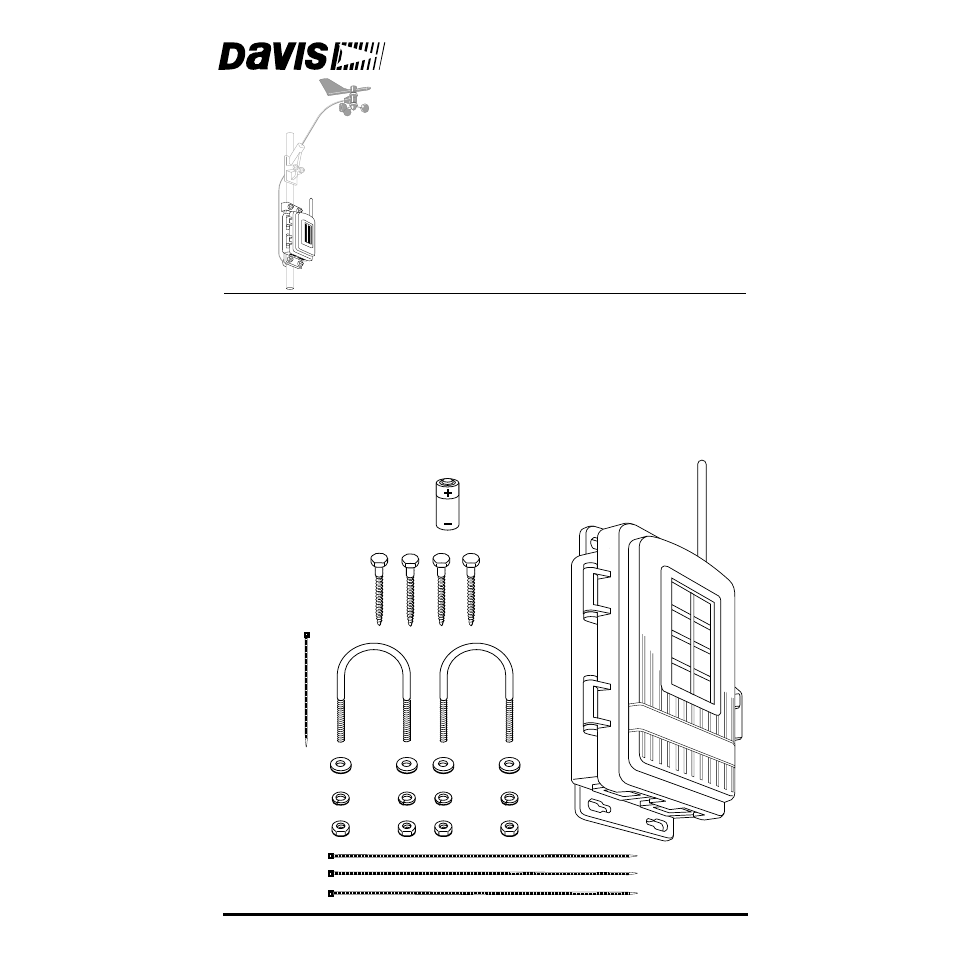
Table of contents
Document Outline
- This manual describes how to install the Anemometer Transmitter Kit for Wireless Vantage ProTM. T...
- Components
- Tools for Setup
- Installation Steps
- Removing the Anemometer from its Current Location
- This step assumes that your ISS is already mounted. If it is in a high location such as a rooftop...
- Disconnecting Anemometer from ISS Transmitter
- Reassembling Radiation Shield
- 1. Slide the two open plates over the threaded studs.
- 1. Remove the black rain collector cone from its base by rotating cone counter-clockwise until it...
- 2. Using an adjustable wrench or 7/16" wrench, remove the hex nuts and washers holding the anemom...
- 3. Remove the hex nuts and washers holding the rain collector side on the pole.
- 4. Using the washers and hex nuts, fasten the rain collector side back onto the pole.
- 5. Put the rain collector cone back on.
- If Your Anemometer is Mounted by Itself
- Preparing the Anemometer Transmitter
- 1. Insert the 3-volt lithium battery into the battery holder, matching the “+” sign on the batter...
- 2. Push the end of the anemometer cable up through the square black grommet into the transmitter ...
- 3. Plug the end of the anemometer cable into the receptacle labeled “WIND” on the SIM.
- 4. Using the 4" black plastic cable tie provided, secure the anemometer cable inside the shelter.
- 5. Locate the DIP switches. You will work with them during the next installation step.
- 1. Insert the 3-volt lithium battery into the battery holder, matching the “+” sign on the batter...
- Sensor Interface Module on Anemometer Transmitter
- ID Code
- Switch 1
- Switch 2
- Switch 3
- DIP Switches in Top-right Corner of SIM (Illustration has been enlarged for clarity)
- Setting Console/Receiver(s) to Same ID
- 1. Put your console into Setup Mode — press and hold the DONE key and press the DOWN arrow key.
- 2. Press the DONE key to move on to Screen 2: Selecting Transmitters.
- 3. Press the LEFT or RIGHT arrow key, or the STATION key, to scroll through transmitter IDs.
- 4. Press the GRAPH key to change the type of station assigned to that transmitter ID.
- 5. To exit Setup Mode, press and hold the DONE key.
- Viewing Current Wind Data
- If You Do Not See Current Wind Readings
- TEST mode
- 1. The DIP switches were not correctly set on the transmitter.
- Choosing a Location for the Anemometer Transmitter
- Testing Transmission from Proposed Location
- Mounting the Anemometer Transmitter
- Mounting Anemometer on a Pole
- Mounting Anemometer on a Vertical Surface
- Mounting Transmitter Shelter on a Pole
- Mounting transmitter Shelter on a Post
- DIP Switches in Top-right Corner of SIM (Illustration has been enlarged for clarity)