Testing transmission from proposed location, Mounting the anemometer transmitter, Mounting anemometer on a pole – DAVIS Anemometer Transmitter Kit Installation User Manual
Page 10
Page 10
T
ESTING
T
RANSMISSION
FROM
P
ROPOSED
L
OCATION
It is very important to test reception from the proposed location before perma-
nently mounting the anemometer transmitter shelter.
Place the transmitter shelter at the intended mounting site, or have someone
hold it there, so you can walk around with the console/receiver for a few min-
utes. Rotating the antenna may help to improve reception.
Test wireless reception anywhere you might want to use or mount your con-
sole/receiver now or in the future. Take your time. If you aren’t picking up
strong signals where you intend to place your console, better to move the
transmitter shelter now than after it has been mounted. Experiment.
If you have irregular terrain in the area, it may interfere with the signal. For
example, if the transmitter is mounted downhill from the console/receiver, the
ground may block a wide angle of the transmitted signal.
M
OUNTING
THE
A
NEMOMETER
T
RANSMITTER
As shown in the ISS manual, the anemometer can be mounted either on a pole
or on a vertical surface such as a fencepost. Remember to mount it so the ane-
mometer arm is extending northward. (Otherwise, you will need to re-orient
the wind vane. See Appendix C in your ISS manual for instructions.) The trans-
mitter shelter also can be mounted on a pole or on a vertical surface.
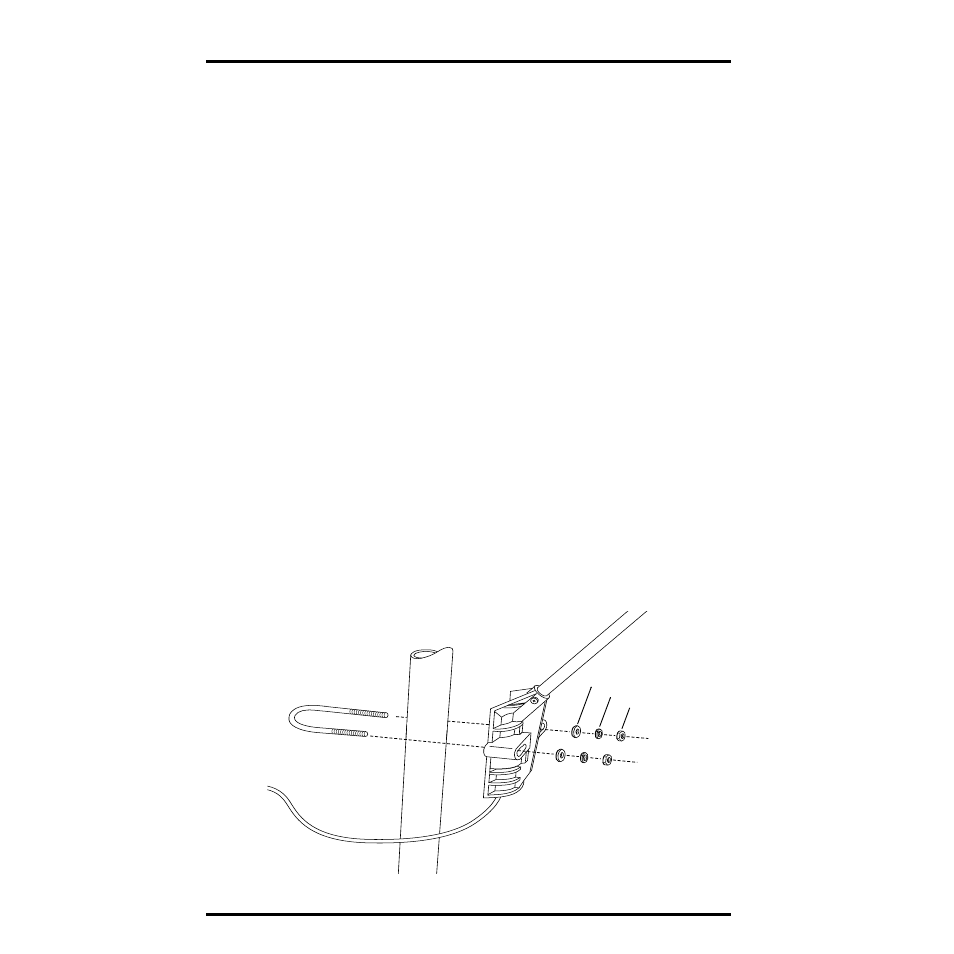
Mounting Anemometer on a Pole
1. While holding the mounting base against the pole, place a U-bolt around the pole and
through the two holes in the base.
2. Place a flat washer, a split washer and a hex nut on each of the bolt ends.
M
OUNTING
A
NEMOMETER
ON
A
P
OLE
U-Bolt
1/4" Flat Washer
1/4" Lock Washer
1/4" Hex Nut