Mounting the sensor mounting arm, Mounting the sensor mounting arm on a wooden post – DAVIS Sensor Mounting Arm for GroWeather, EnviroMonitor, Weather Monitor & Wizard User Manual
Page 12
Page 12
Sensor Mounting Arm
15. Secure the cable clamp and cable in place using an #8 flat washer and an #8-32 hex
nut.
Tighten the hex nut until the cable is held snugly within the cable clamp.
Note: When you attach (or reattach) the Radiation Shield beneath the anemometer, you will find
that one of the Radiation Shield’s mounting screws is between the U-bolts/saddle, and will be
difficult to access. You will need a nut driver or socket wrench in order to tighten this nut.
M
OUNTING
THE
S
ENSOR
M
OUNTING
A
RM
You may mount the sensor arm on a wooden post, onto a small pipe with an
outside diameter between 1” and 1-1/4“ (25 mm and 31 mm), or onto a large
pipe with an outside diameter between 1-1/2” and 2-3/8” (38 mm and 60 mm).
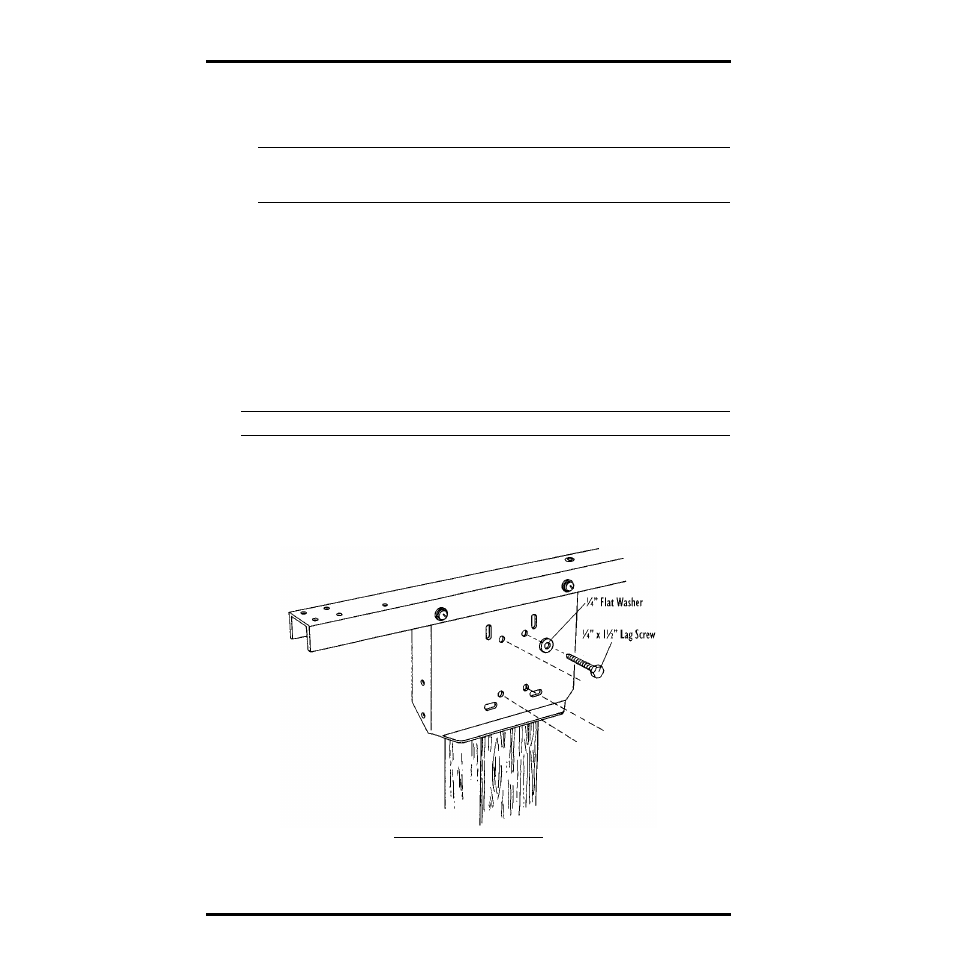
Mounting the Sensor Mounting Arm on a Wooden Post
To attach the Sensor Mounting Arm to a wooden post, you will need the sensor
arm assembly (with mounting bracket and sensors attached), four 1/4” x 1-1/2”
lag screws, and four 1/4” flat washers.
Note: The Sensor Mounting Arm must be mounted at the top of the post.
1. Position the back of the mounting bracket against the post.
2. Secure the mounting bracket to the post using the four 1/4” x 1-1/2” lag screws and the
four 1/4” flat washers.
Tighten until the mounting bracket and sensor arm are held securely in
place.
M
OUNTING
ON
A
W
OODEN
P
OST