Parts, Installation – JKS OGS170 User Manual
Page 2
JKSOGS170
JKS Rear Tackbar Relocation Bracket Installation
2 Page
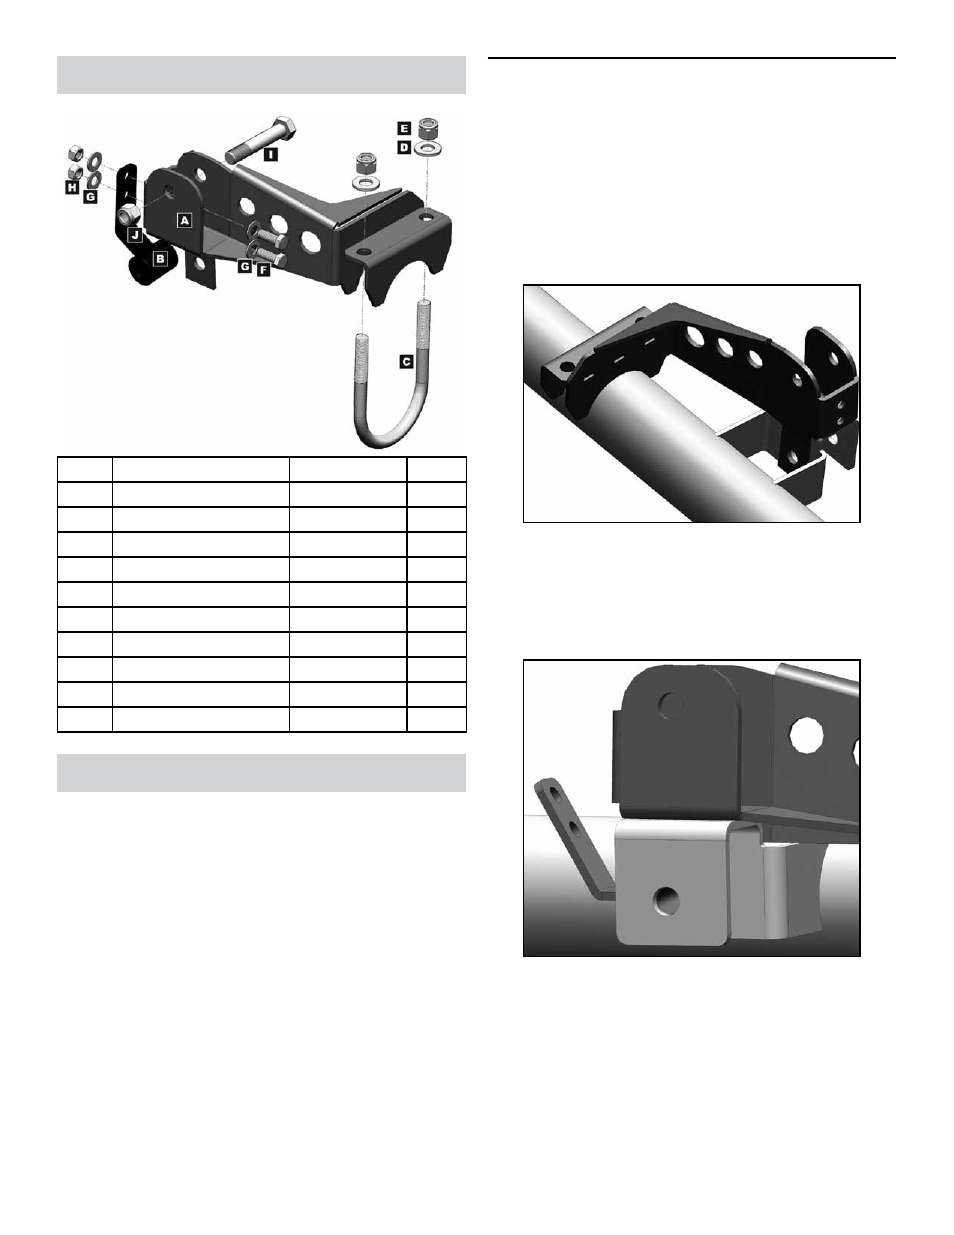
Parts
Description
Part #
QTY
A
Relocation Bracket
03034
1
B
Riser Brace
03035
1
C
U-Bolt
123250500R
1
D
1/2” Flat Washer
33086
2
E
1/2” Nylock Nut
37130
2
F
3/8” x 1” Bolt
13105
2
G
3/8” Flat Washer
33082
4
H
3/8” Ovalok Nut
37264
2
I
M14 x 80mm Bolt
11113290
1
J
M14 Nylock Nut
11129042
1
Installation
1. REMOVE REAR TRACK BAR
Raise and support the vehicle with jack stands
positioned in front of the rear lower suspension
arm brackets.
Raise and support the rear axle housing with a
hydraulic jack.
HINT: The axle housing should be
evenly supported, with the suspension at normal
ride height to relieve any tension from the mount-
ing bolts.
Remove the track bar mounting hardware from the
axle bracket. Retain hardware.
Loosen the track bar bolt and nut at the frame
bracket but do not remove hardware.
Remove the rear track bar from the factory axle
bracket pocket and move out of way.
2. MOUNT RELOCATION BRACKET TO
FACTORY AXLE BRACKET
To ensure a proper fit, clean any dirt, debris or
grease from surface of factory track bar bracket
and axle tube.
Position Relocation Bracket (A) directly above fac-
tory axle bracket. Make sure lower mounting tab
on Relocation Bracket rests against forward face
of factory axle bracket and radius edges rest on
axle tube.
Using the supplied U-Bolt (C), 1/2” Flat Wash-
ers (D) and 1/2” Nylock Nuts (E), loosely fasten
Relocation Bracket to axle tube.
Do not tighten
U-Bolt nuts yet.
Insert Riser Brace (B) into factory axle bracket
pocket exactly as illustrated below.
With hole in Riser Brace (B) aligned with original
track bar mounting hole, insert the original track
bar mounting bolt through the factory bracket,
Riser Brace and mounting tab of Relocation
Bracket (A).