Installation – JKS 3104 User Manual
Page 2
JKS3100 - JKS3104
JKS Quicker Disconnect Installation
2 Page
Installation
1. REMOVE ORIGINAL EQUIPMENT (OE)
SWAYBAR LINKS
Remove front swaybar drop links and mounting
hardware per the factory service manual instruc-
tions for your vehicle.
2. INSTALL UPPER TAPERED POST
Mount the tapered Stainless Steel Post (C) on
outboard side of the swaybar, ensuring small
Click Pin holes are horizontal or parallel with the
ground.
Apply medium strength threadlocker to the tip of
1/2” x 1-1/4” Bolt (A).
Secure tapered post to swaybar by inserting the
1/2" x 1-1/4” Bolt (A) and 1/2” Lock Washer (I) from
the inboard side and tighten to 65 ft-lb. using a
torque wrench.
HINT: A small Philips head screwdriver or punch
inserted into the Click Pin hole will enable you
to prevent the tapered Stainless Steel Post from
rotating when tightening the mounting bolt.
3. INSTALL LOWER TAPERED POST
Locate the original lower drop link U-bracket on
the axle housing. Insert the gold colored steel OE
Bracket Spacer (J) into the U-bracket.
IMPORTANT: The supplied OE Bracket Spacers must
be installed to prevent the U-bracket from collapsing
when the mounting bolt is tightened.
Apply medium strength threadlocker to the tip of
1/2” x 2-1/2” Bolt (K).
Insert the 1/2” x 2-1/2” Bolt (K) with 1/2” Lock
Washer (I) completely through the holes in U-
bracket and OE Bracket Spacers (J) from the
inboard side of bracket.
Thread the tapered Stainless Steel Post (C) on to
the 1/2” x 2-1/2” Bolt (K) from the outboard side
of U-bracket, ensuring small Click Pin holes are
horizontal or parallel with the ground.
Tighten the 1/2" x 2-1/2” Bolt (K) to 65 ft-lb. us-
ing a torque wrench.
HINT: A small Philips head
screwdriver or punch inserted into the Click Pin
hole will enable you to prevent the tapered Stain-
less Steel Post from rotating when tightening the
mounting bolt.
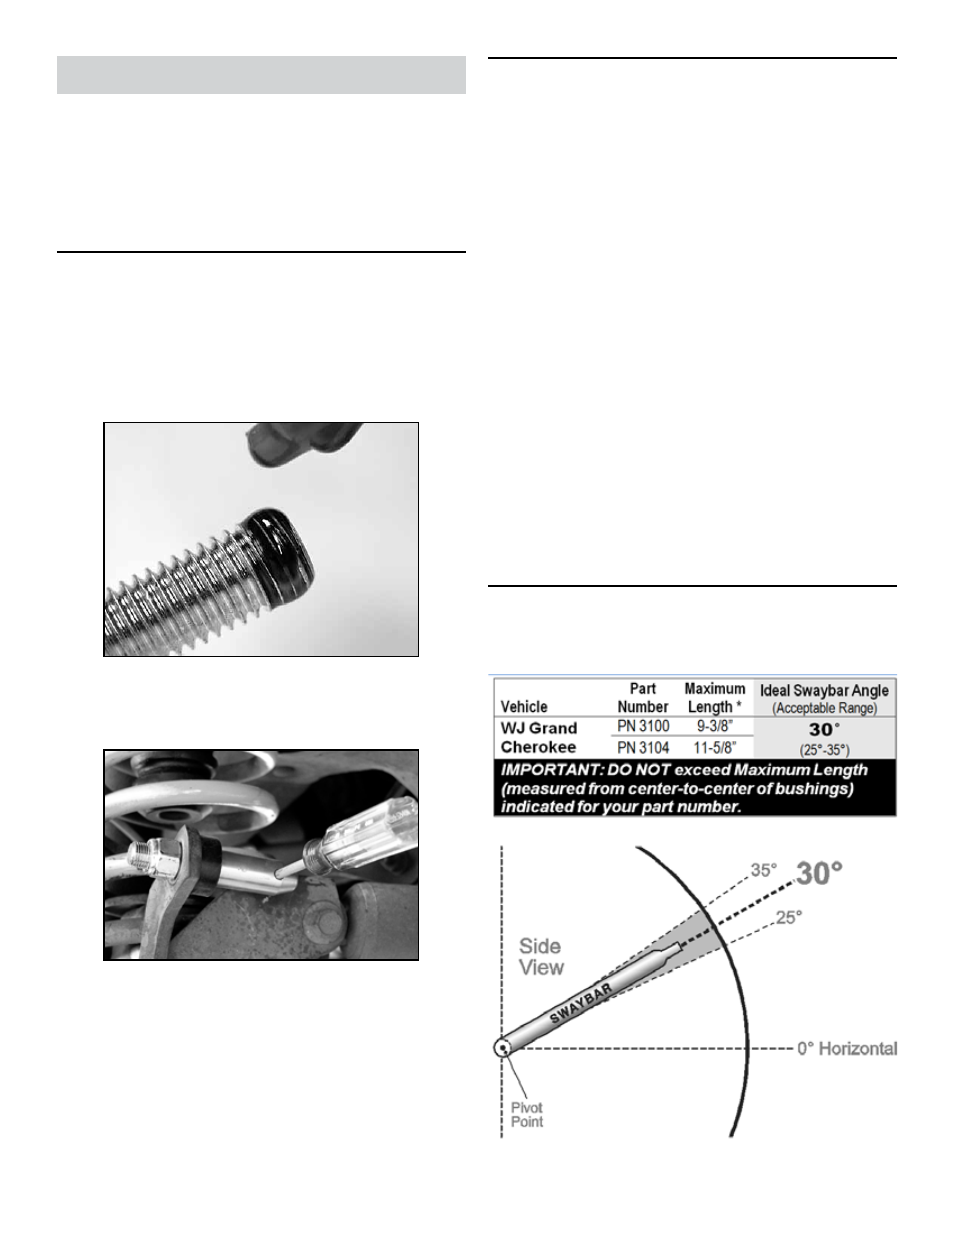
4. SET QUICKER DISCONNECT LENGTH
Determine the Ideal Swaybar Angle for your ve-
hicle according to the following chart.