Figure 41 setting the ssid, 41 setting the ssid, Figure 41 – HP StorageWorks XP Remote Web Console Software User Manual
Page 80: Step 13
80
Volume Management for the XP128/XP1024
If the boundary area of the selected LDEV number has an SSID, the Install CV confirmation dialog box
.
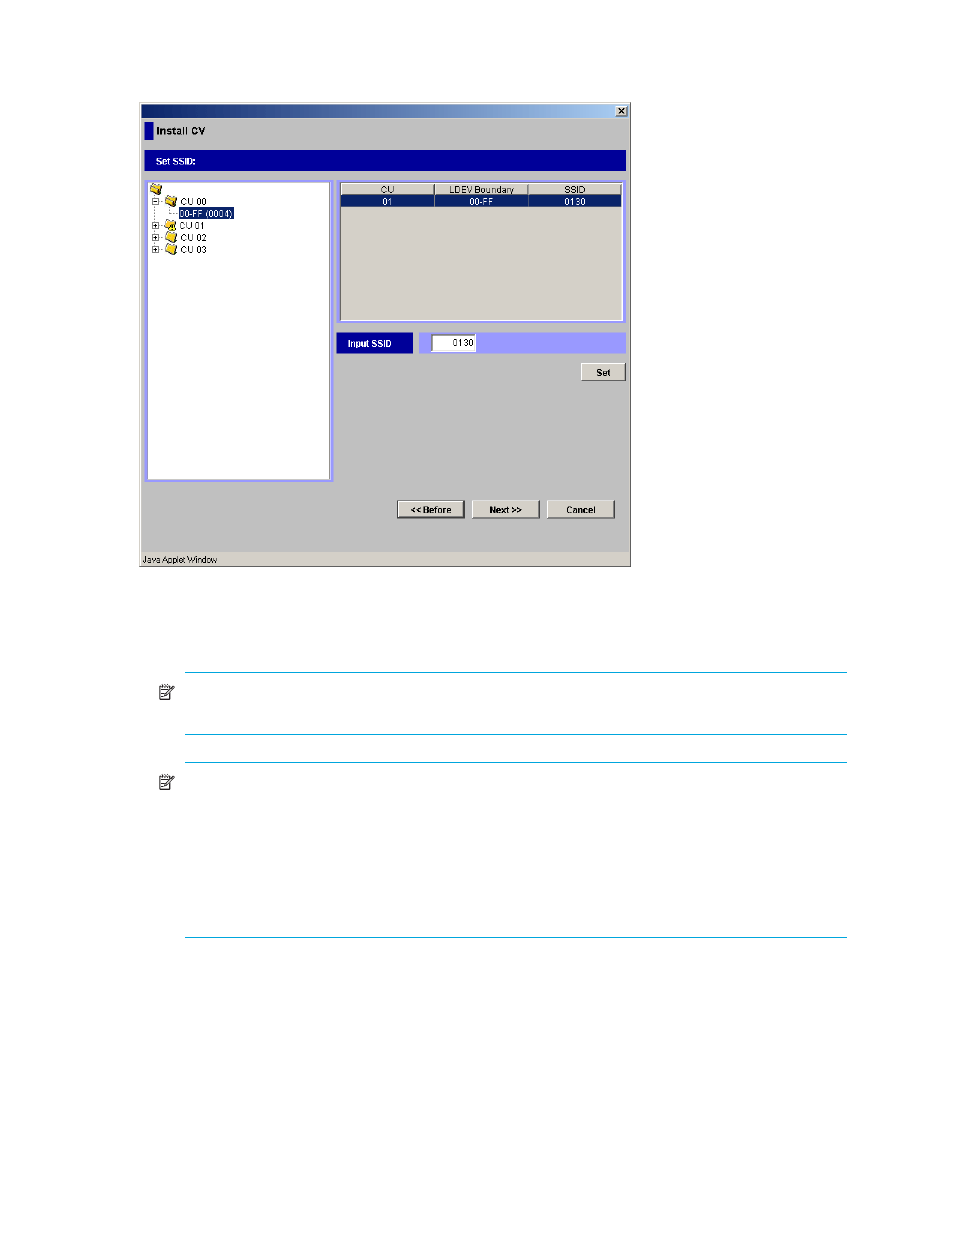
Figure 41
Setting the SSID
13.
In the SSID setting area, select a CU number to assign an SSID to, enter a new SSID in the Input SSID
box, and click Set. The SSID is displayed in the SSID box of the SSID setting area. Repeat this step until
all the SSIDs are set.
NOTE:
You can enter the SSID only when logged in as a user in the StorageAdmin group with full
array access.
NOTE:
The SSID of another SLPR is used check box is displayed only when you logged in as a
user in the StorageAdmin group with full array access and when there are two or more SLPRs.
When the SSID of another SLPR is used check box is selected, you can select the number of an SSID
that does not exist in an SLPR to which the parity group does not belong. When the check box is
cleared, you can only select the number of the SSID in the SLPR to which the parity group belongs.
You cannot enter the number in the Input SSID box when the SSID number of another SLPR is used
check box is cleared.
14.
After setting all the SSIDs, click Next. The Install CV confirmation dialog box is displayed.