Step 4 – HP StorageWorks XP Remote Web Console Software User Manual
Page 76
76
Volume Management for the XP128/XP1024
b. Select one of methods by clicking Specify capacity and number, Divide free space by number,
Divide free space by capacity, or Set remaining space as volume.
NOTE:
If there are two or more free spaces in the VDEV, only the Specify capacity and number
option is available.
c. Specify the capacity of the volume and/or the number of volumes according to the selected
method. For example:
• If you selected Specify capacity and number, enter the capacity, either in MB, Cyl, or blocks, in
the Capacity box and the number of custom volumes in the Number box.
• If you selected Divide free space by number, enter the number of custom volumes in the Number
box.
• If you selected Divide free space by capacity, enter the capacity in the Capacity box.
• If you selected Set remaining space as volume, go to
The Install CV Volume function allocates custom volumes in the order in which the function finds
sufficient free space for the custom volumes, so for optimum space allocation you should allocate
custom volumes in descending order of capacity.
d. Click Set. The pane displays the selected custom volumes.
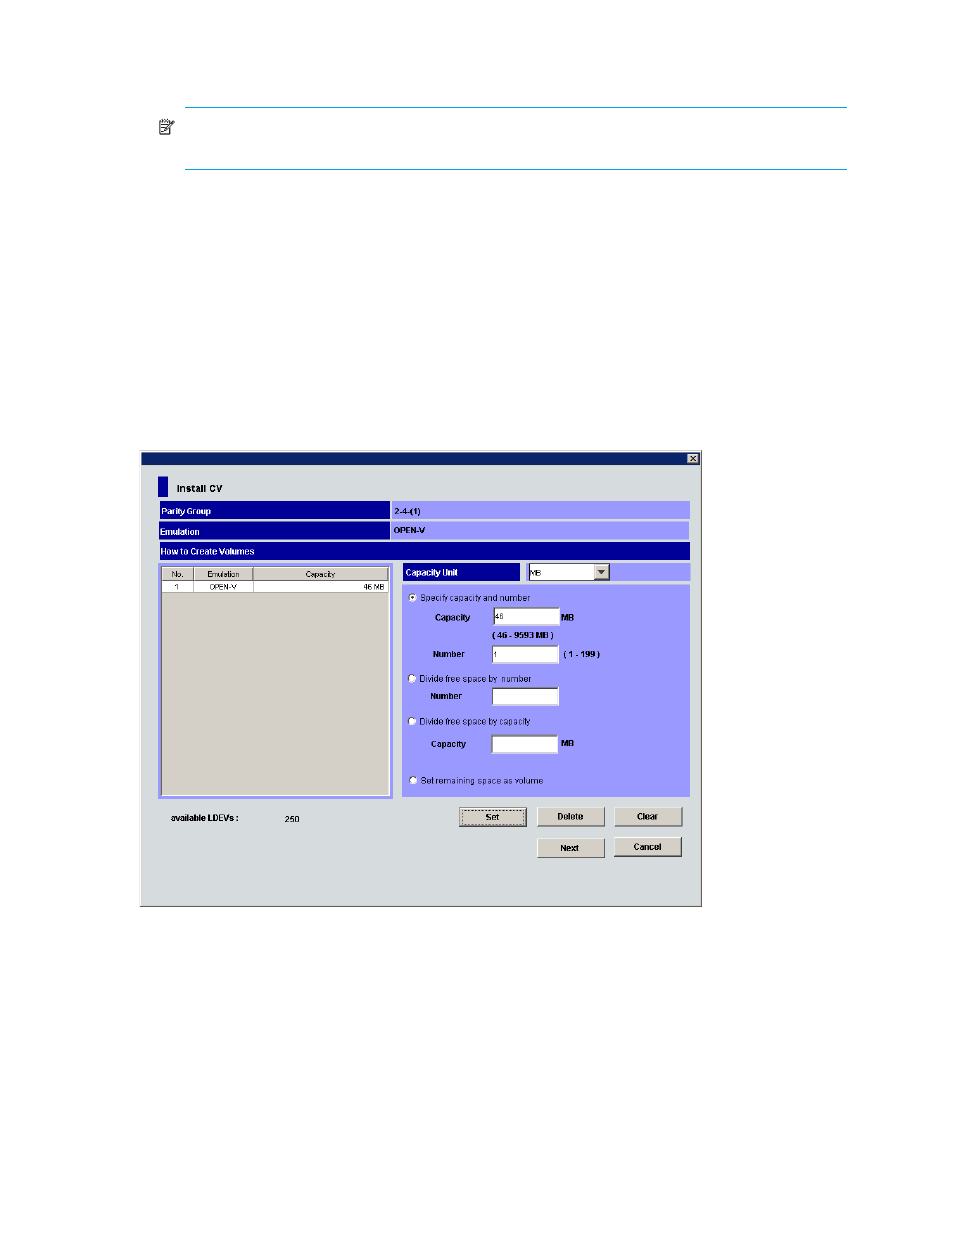
Figure 37
Install CV pane (1) for OPEN-V after clicking Set
e. To create other custom volumes, repeat
through
f. To delete a custom volume, select the custom volume, click Delete, and then click OK to the
confirmation message. To delete all custom volumes, click Clear, and then click OK. Go to
4.
From the Install CV pane (1) for other than OPEN-V, do the following:
a. In the Emulation Type list, select the emulation type.
b. In the Capacity box, enter the capacity of the custom volume you want to create. Use MB or blocks
for open systems and cylinders (Cyl) for mainframe volumes. The available capacity range
(minimum - maximum) appears to the right of the Capacity box. The value can be increased
incrementally by one MB or block (open systems) or by one cylinder (mainframe systems).