Applying isl kit labels, Installing interswitch fibre channel cables, Installing interswitch ethernet cables – HP 9000 Virtual Library System User Manual
Page 42
Applying ISL Kit Labels
Locate the labels supplied in the interswitch link kit contents.
As you install each cable in the following sections, apply the appropriate label to each cable end.
NOTE:
The labels for interlinking the switches use “A” to indicate rack 1 and “B” to indicate
rack 3. For example, an Ethernet cable label will read, “SW6600–24A port 22 TO SW6600–24B
port 22.”
Installing Interswitch Fibre Channel Cables
1.
Locate the Fibre Channel cables included in the interswitch link kit contents.
2.
Remove the black cover from each XPAK.
3.
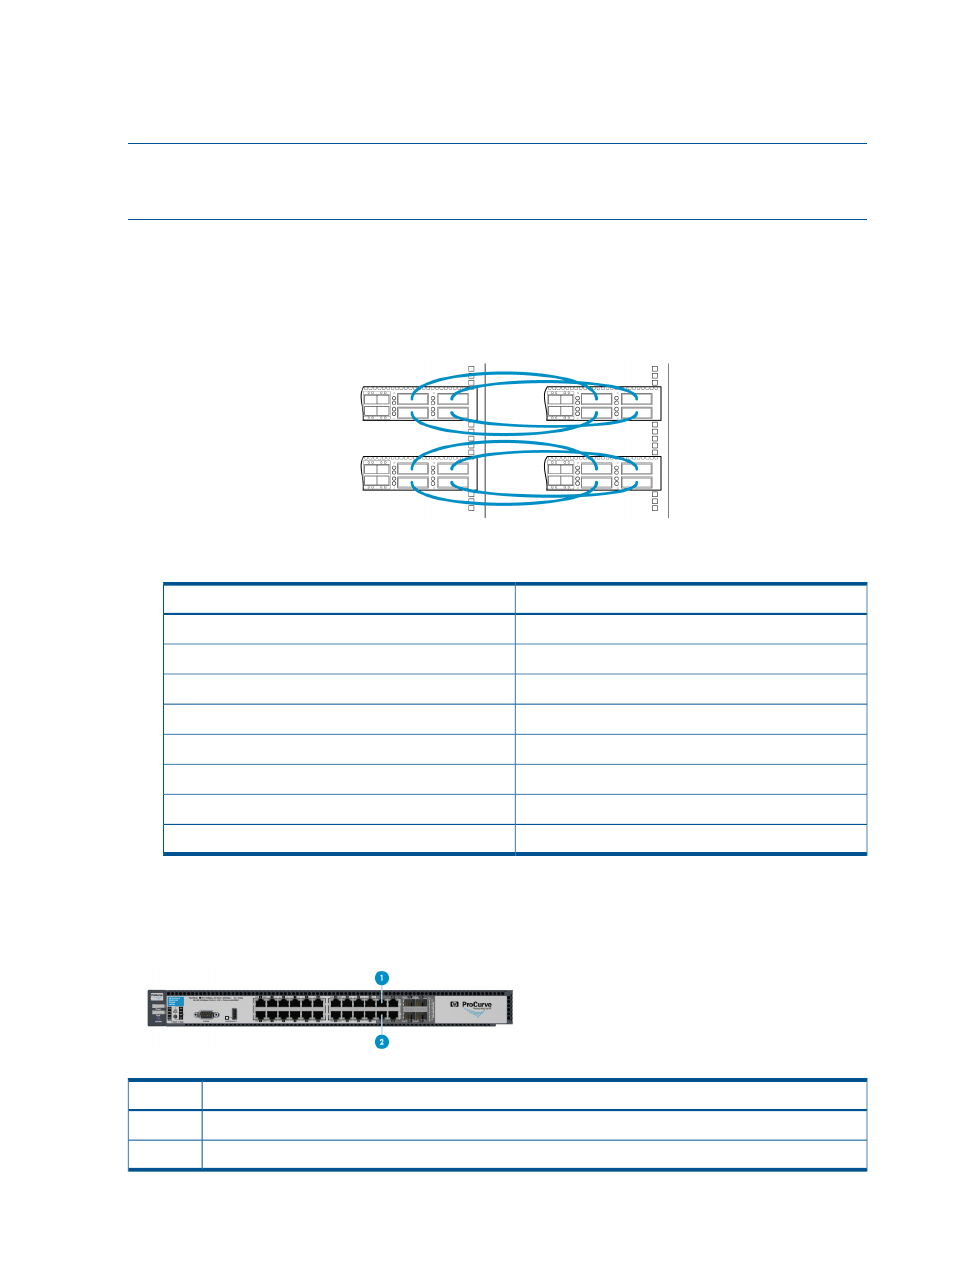
Connect the Fibre Channel cables from the switches in rack 1 to the switches in rack 4.
To identify individual ports in the image above, see
Installing XPAK Transponders (page 41)
.
To Rack 4
From Rack 1
Switch 1 port 20
Switch 1 port 20
Switch 1 port 21
Switch 1 port 21
Switch 1 port 22
Switch 1 port 22
Switch 1 port 23
Switch 1 port 23
Switch 2 port 20
Switch 2 port 20
Switch 2 port 21
Switch 2 port 21
Switch 2 port 22
Switch 2 port 22
Switch 2 port 23
Switch 2 ort 23
4.
Secure Fibre Channel cables to one side of the rack with a Velcro® tie.
Installing Interswitch Ethernet Cables
Description
Item
Port 21
1
Port 22
2
42
Hardware Installation