Specify scaling, enlarge/reduce and print, P.510 – Canon imagePROGRAF iPF9400S User Manual
Page 510
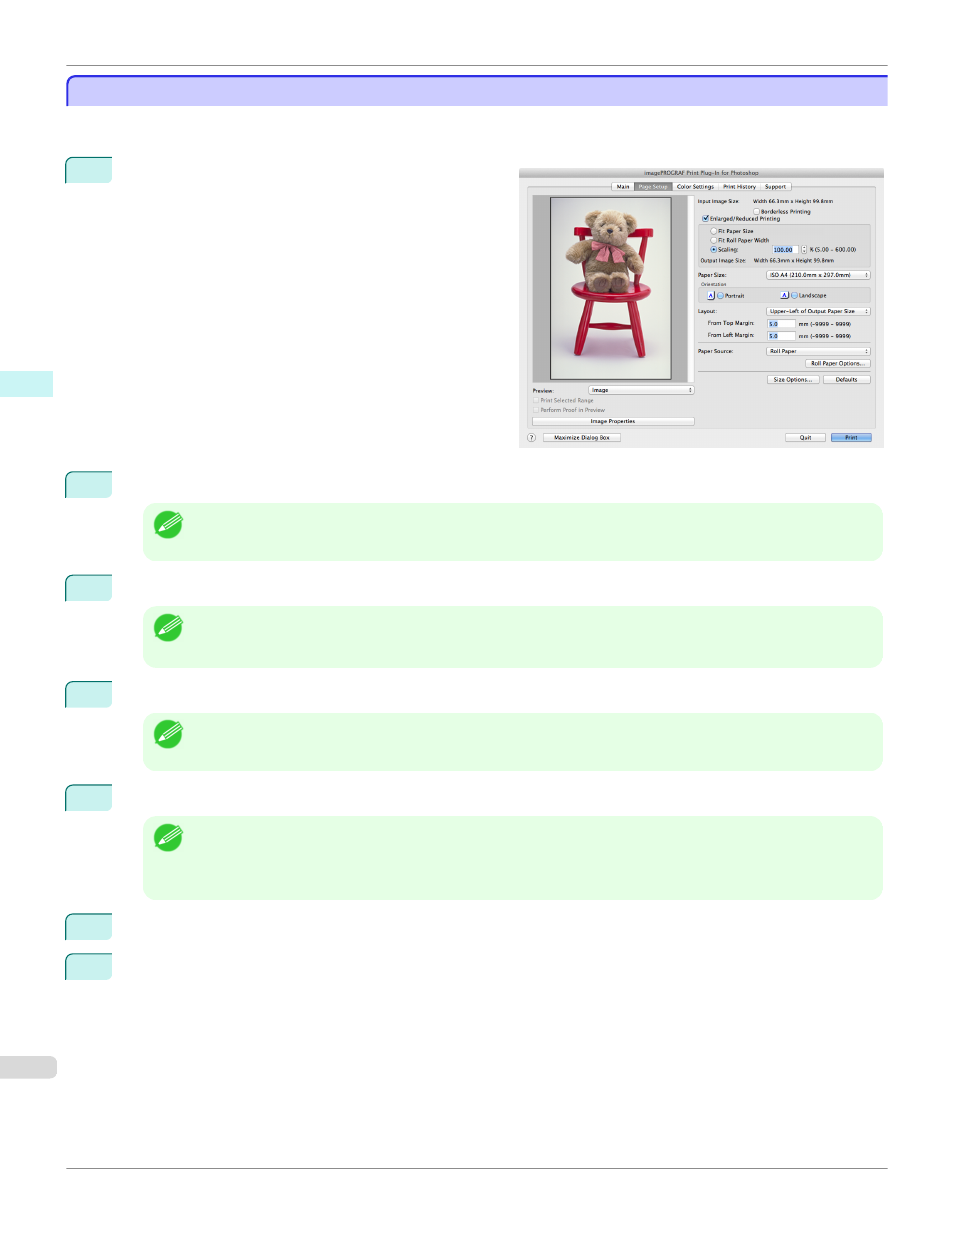
Specify Scaling, Enlarge/Reduce and Print
Specify Scaling, Enlarge/Reduce and Print
You can specify scaling to enlarge/reduce an image and print. This is useful when you wish to print an image at a spe-
cific size.
1
Display the Page Setup sheet.
2
Select the size of the media that you want to print in Paper Size.
Note
•
This is not displayed when a checkmark is placed in Borderless Printing.
•
Fit Roll Paper Widthis set in Enlarged/Reduced Printing.
3
Select either Portrait or Landscape as the media orientation for the image in Orientation.
Note
•
When you select Portrait, the image on the media prints as it appears on the screen.
•
When you select Landscape, the image on the media prints rotated 90 degrees.
4
Click the Enlarged/Reduced Printing check box on.
Note
•
This is not displayed when a checkmark is placed in Borderless Printing.
5
Select Scaling and input the scaling factor or drag the four corners of the image in the Preview display.
Note
•
You can specify scaling rate in intervals of 0.01%.
•
You can specify a range between 5.00-600.00%.
•
The size of the width and height proportionally grow when the image is enlarged/reduced.
6
Either drag the image on the Print Area Layout preview, or set the print position Layout.
7
Click the Print button.
Printing begins at the set scaling rate.
Specify Scaling, Enlarge/Reduce and Print
iPF9400S
Mac OS X Software
Print Plug-In for Photoshop / Digital Photo Professional
510