Configuring binding (excel) – Canon imagePROGRAF iPF9400S User Manual
Page 360
9
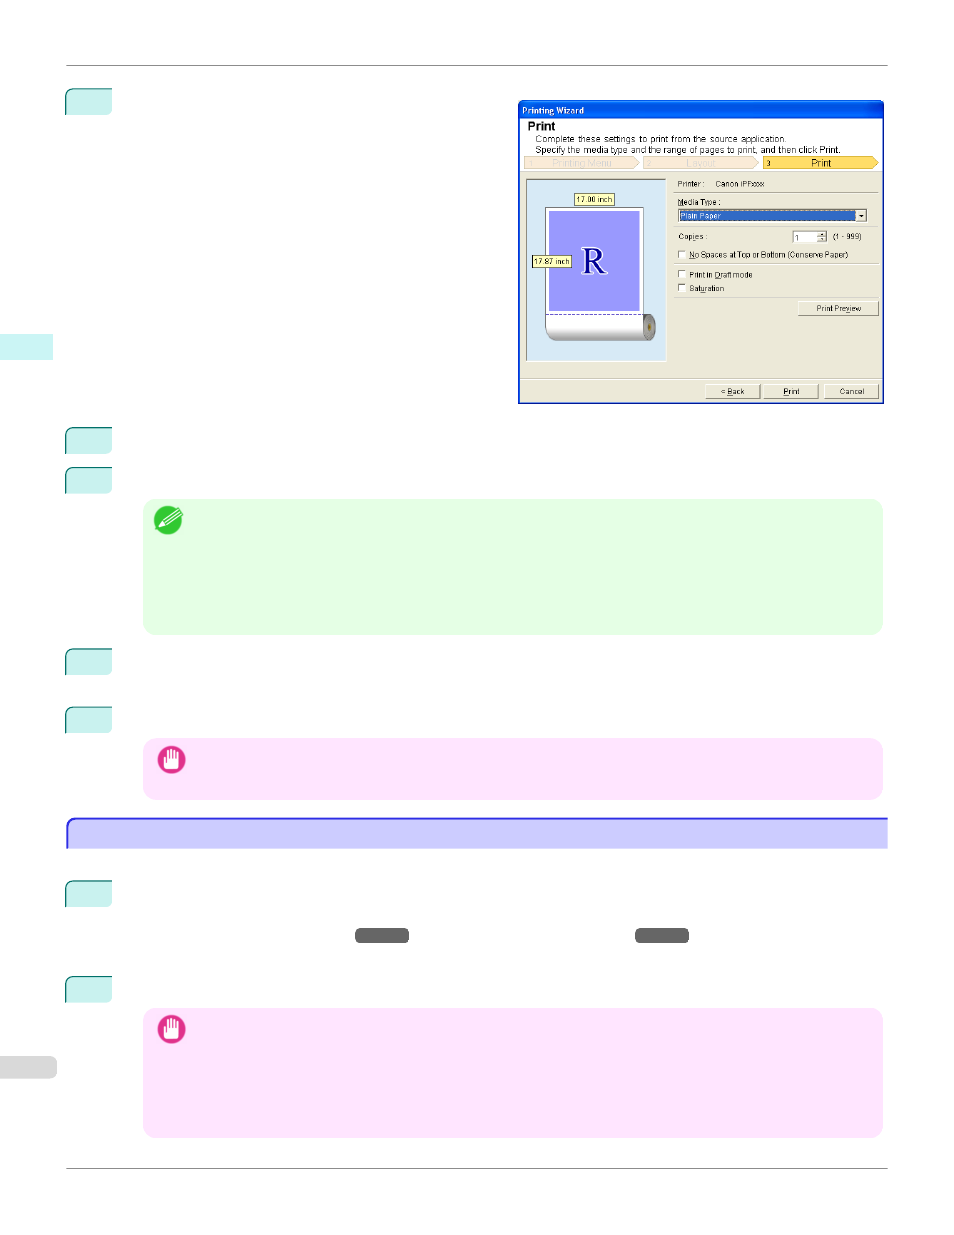
Select Next.
10
Select Media Type.
11
Enter Copies.
Note
•
When Print in Draft mode is selected, printing is fast but the print quality is poor.
•
When Saturation is selected, you can print posters, etc., vividly.
•
Press the Print Preview button to display the preview screen. You can check and make changes to the layout in the
preview screen.
•
When you print to the edge of the roll width, the maximum print length is 18.0m.
12
If the upper and lower margins are too wide, check No Spaces at Top or Bottom (Conserve Paper).
The upper and lower margins can be checked in Print Preview.
13
Press Print to start printing.
Important
•
If divided into plural pages, try reducing the data size or the range you select.
•
You cannot run Print or Print Preview if you select it for a worksheet with no data displayed.
Configuring Binding (Excel)
Configuring Binding (Excel)
You can configure Binding margins for binding printouts.
1
Configure the settings up to Layout Selection in the Layout screen in Print Entire Sheet or Print Selected
Area.
Refer to Print Entire Sheet (Excel)
and Print Selected Area (Excel)
for the configuration meth-
ods.
2
Click the Binding Settings button.
Important
•
You cannot click the Binding Settings button in the following situations.
•
When the Image Size is set to 100%
•
When a graph is selected
•
When page breaks have been set
•
When a sheet or cell is protected
Configuring Binding (Excel) (Windows)
iPF9400S
Windows Software
Print Plug-In for Office
360