Milestone Analytics 2.2 Dacolian LPR User Manual
Page 23
Milestone XProtect Analytics 2.2 – Dacolian LPR; Administrator’s Manual
www.milestonesys.com
Page 23
Dacolian LPR Administrator
Camera location: Optionally specify physical location of the selected camera;
helpful in large installations.
Minimum Confidence Level: Specify a value between 1 and 1000. The value
determines the lowest acceptable confidence level for license plate recognition. If in
doubt, use a value around 600. Using a minimum confidence level value of 600 will
mean that XProtect Analytics should be at least 600/1000 certain that it has read a
plate correctly before the data can be used for further processing; if less than
600/1000 certain about a plate, data will be discarded.
Tip: Do not use a very high minimum confidence level (e.g. 950) to begin with, as
this can lead to very little or no license plate recognition data to work with. Once
you have worked with your LPR connection for a while you can adjust the minimum
confidence level.
Transact source: Select required Transact source. The source has been configured
in XProtect Transact's Administrator application. For more information, see page
12.
Include alert image: Lets you select whether you want images of detected
license plates to be sent to Transact or not. Selecting this option will ensure that
the image, including any annotations, stays in the Transact database even if the
surveillance system's recording database itself is deleted. However, selecting this
option also means Transact will run slightly slower than usual, and that you cannot
correct annotations to the image. If in doubt, do not select this option.
3. Wait until a vehicle is captured by the camera. When the vehicle is in a position allowing its
license plate to be read, click the Refresh button below the two reference image positions.
A still image from the selected camera will now appear in the right reference image
position.
You will use this still reference image
for fine-tuning your analytics
configuration in the following. It is
therefore important that the image is
realistic. If you are not happy with the
image, you may have to repeat this
step a number of times until you get a
realistic image.
4. When ready, click the Configuration... button. This will open the Intrada ALPR Settings
Editor.
5. Select the General tab. On the General tab, select the User defined option, click the
button, and select your reference image. When you captured the reference image in step 3,
it was automatically saved as .jpg file which has a name matching the name of your LPR
connection (you specified this name in step 2).
Example: If the LPR connection is called MyConnection, select the file C:\Program
Files\Milestone\Milestone XProtect
Analytics\plugin\DacolianLPR\MyConnection.jpg.
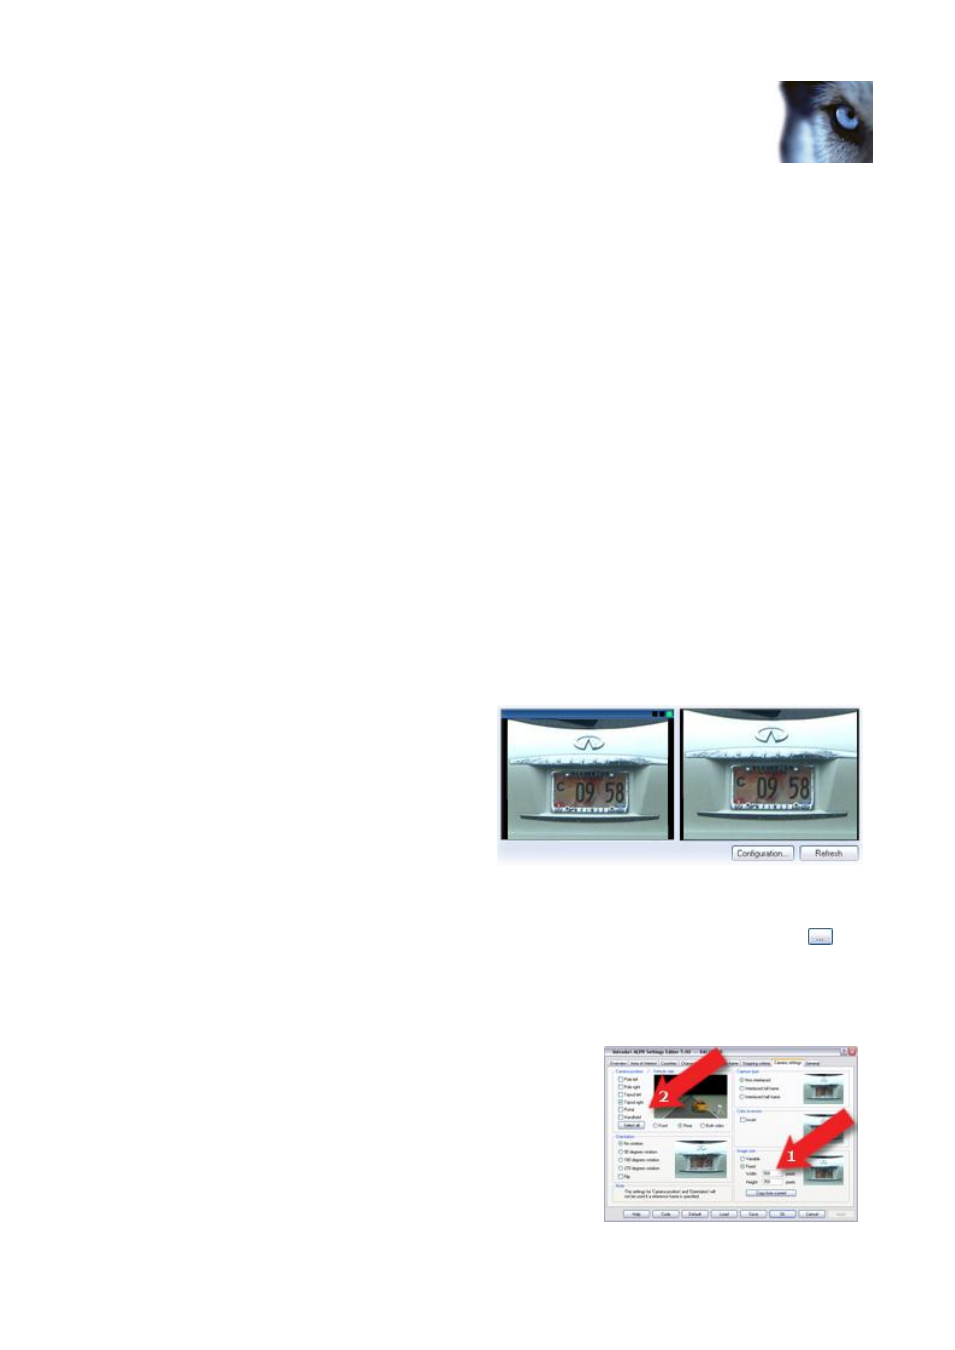
6. Select the Camera settings tab. In the lower right
part of the tab, select Fixed image size, and click the
Copy from current button.
Then go to the top left part of the tab, and clear any
camera positions not relevant for the camera you are
working with.