2 attaching the sampling tube and external filter – LumaSense Technologies INNOVA 1412i User Manual
Page 35
Chapter 4
______________________________________________________________________
_____________________________________________________________________________
BE6025-15
1412i Photoacoustic Gas Monitor
LumaSense Technologies A/S
Page 35 of 202
number of days, the Monitor will automatically change the period to
7 days. However, if you do not set a pre-defined monitoring period,
the Monitor will just store as much data as possible before starting to
overwrite the “oldest” stored measurement results.
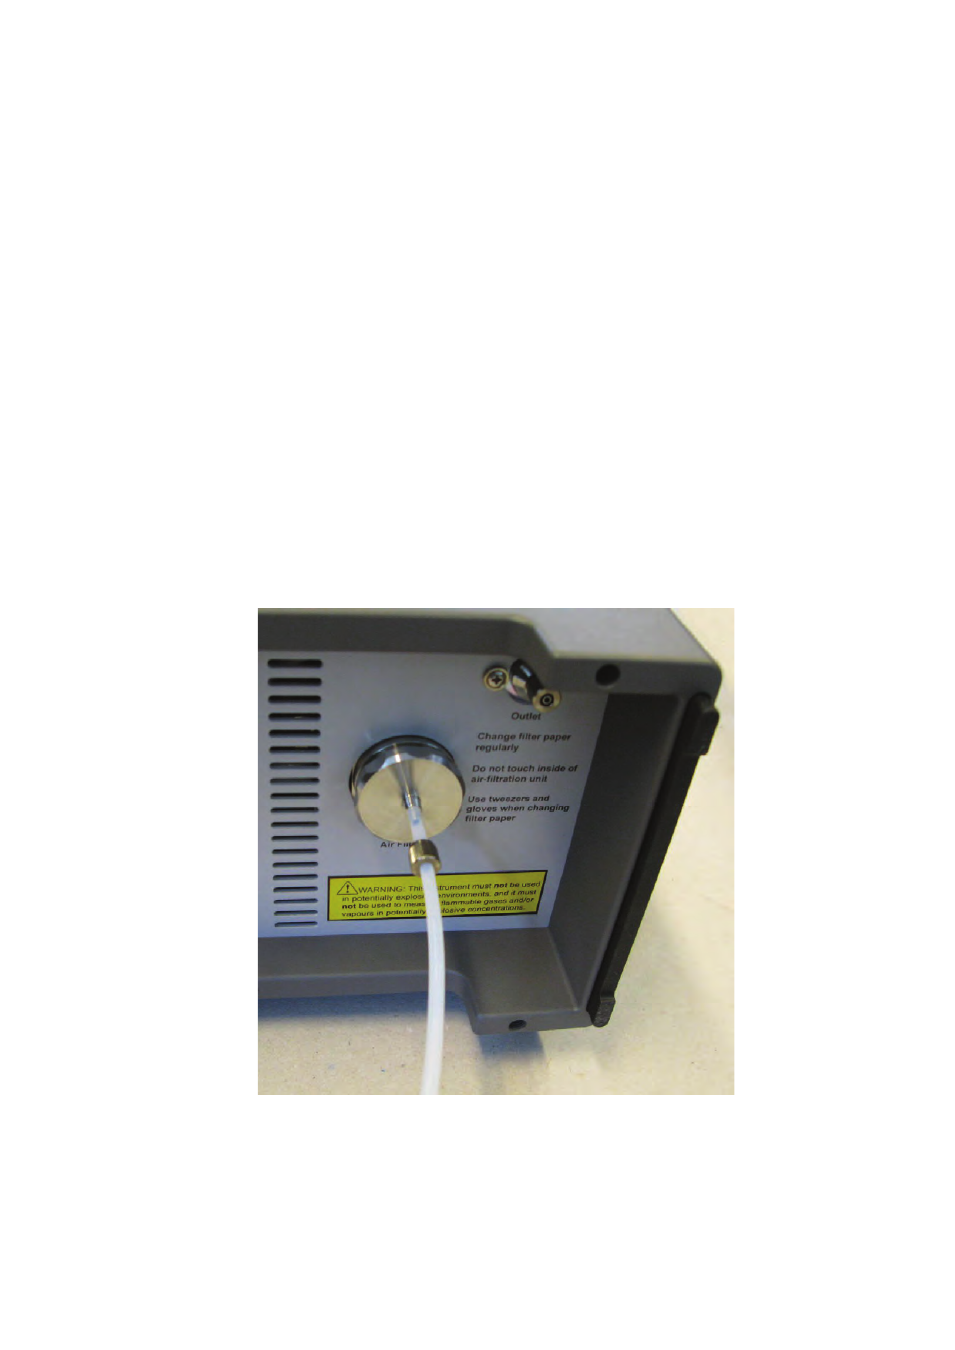
4.2 Attaching the Sampling Tube and External Filter
1 Cut a short section of sampling tube of Poly-Tetra-Fluoro-
Ethylene (Teflon) tubing
size 4/3 mm, (optional accessory).
2 Using Fig.4.3 and the instructions below, attach one end of this
tube to the air-inlet stub on the back-panel of the Monitor.
Push one end of the Teflon tubing through the non-threaded end
of the nut.
Hold the end of the tubing between the fingers and gently push
the tubing over the end of the Monitor’s air-inlet stub as far as it
will go.
Note: if the tubing is bent/broken during this procedure, remove
the tubing from the stub and repeat this step using an
undamaged length of tubing.
Screw the threaded-nut firmly onto the end of the air-inlet stub.
Fig.4.3 Attaching tubing to the air-inlet stub and the external filter
3. Attach the other end of the sampling tube to the external air-filter
which is provided as an optional accessory.