Fig. 18, Detail d, Detail a detail b – Hired-Hand RollSeal Rollup Curtains: ROLLUP CURTAIN SYSTEM Rev 11-05 User Manual
Page 26: Detail c
Part No. 4801-5138 Rev 11-05
Rollup Curtain System
Page 26
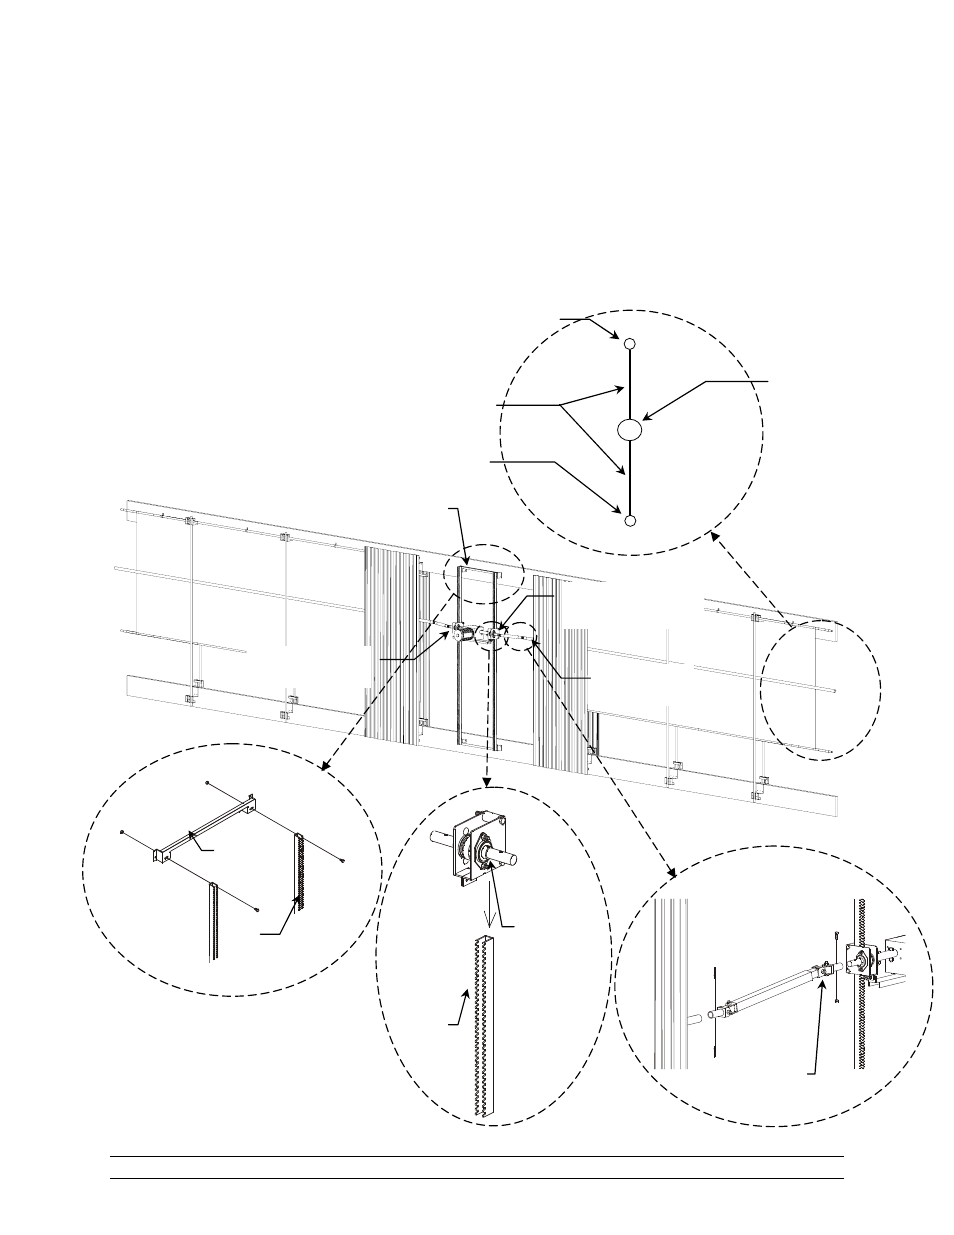
11. Rollup Drive – Single Rack Mount / Center Drive Curtain Option
1. Before mounting the Rollup Drive to the building, attach the Rollup Drive Rack (1059-6004), Rack Mounting
Bracket (0404-5141) to the top and bottom of the racks with 3/8-16 HEX screws (1004-1426) & nuts (1001-
1457) provided as shown in Detail A .
2. Attach the Right & Left Pinion Assemblies (6419-0100/0104) down the Drive Racks. See Detail B.
3. Attach the drive to the pinion assembly as shown in Figure 18. Refer to Sections 9 through 12, Figures 9
through16 for the appropriate drive installation.
4. Attach the Rollup Drive to the Curtain Pipe using Universal Joints (6419-0204) as shown in Detail C.
5. Assemble Curtain, Drive Shaft and Tension Pipe as shown in Detail D.
6419-0204
Universal Joint
6419-0100
Pinion Assembly Right
6419-0104
Pinion Assembly Left
Detail D
Center Curtain Pocket
contains the Drive
Shaft.
Top Curtain Pocket is clamped to
the upper wall.
Bottom Curtain pocket contains a
tension Pipe.
Curtain
0404-5141
Rack Mounting Bracket
Mounting
Bracket
Detail A
Detail B
Pinion
Assembly
Rack
Rack
Detail C
Universal Joint
Fig. 18