HTP ELP-199 User Manual
Page 74
74
LP-294 REV. 2.20.14
The combustion chamber insulation in this product contains ceramic fiber material. Ceramic fibers can be converted to
cristobalite in very high temperature applications. The International Agency for Research on Cancer (IARC) has concluded,
“Crystalline silica inhaled in the form of quartz or cristobalite from occupational sources is carcinogenic to humans (Group
1).”
Avoid breathing dust and contact with skin and eyes.
Use NIOSH certified dust respirator (N95). This type of respirator is based on the OSHA requirements for cristobalite
at the time this document was written. Other types of respirators may be needed depending on job site conditions.
Current NIOSH recommendations can be found on the NIOSH website:NIOSH approved respirators, manufacturers, and phone numbers are also listed on this website.
Wear long-sleeved, loose fitting clothing, gloves, and eye protection.
Apply enough water to the combustion chamber lining to prevent dust.
Wash potentially contaminated clothes separately from other clothing. Rinse clothes washer thoroughly.
NIOSH stated First Aid.
Eye: Irrigate immediately.
Breathing: Fresh air.
B. COMBUSTION CHAMBER COIL CLEANING INSTRUCTIONS FOR BOILER
*Before beginning this procedure, you must have on hand the following items:
a nylon, stainless steel or brass brush (not steel)
an FDA approved liquid lime scale remover, in a spray bottle
gloves and eye protection
1. Shut down the Boiler by using the following steps:
a. Turn off power to the boiler. Close the gas valve. Turn down the thermostat, or disconnect the
thermostat connection
from the low voltage terminal strip. Wait for the boiler to be cool to the touch.
b. Disconnect the condensate piping from the outside connection, (not from the Boiler side), so flow from condensate reservoir
can be observed.
c. Disconnect electrical connections from the gas valve, spark electrode, flame rectification probe, and two wire leads to the
combustion blower.
d. Disconnect the wire harness connected to the combustion blower motor. Disconnect the green thermocouple wire from the
control board, located near the blower outlet to the combustion system.
e. Use an adjustable wrench to loosen and remove the gas flex line from the burner.
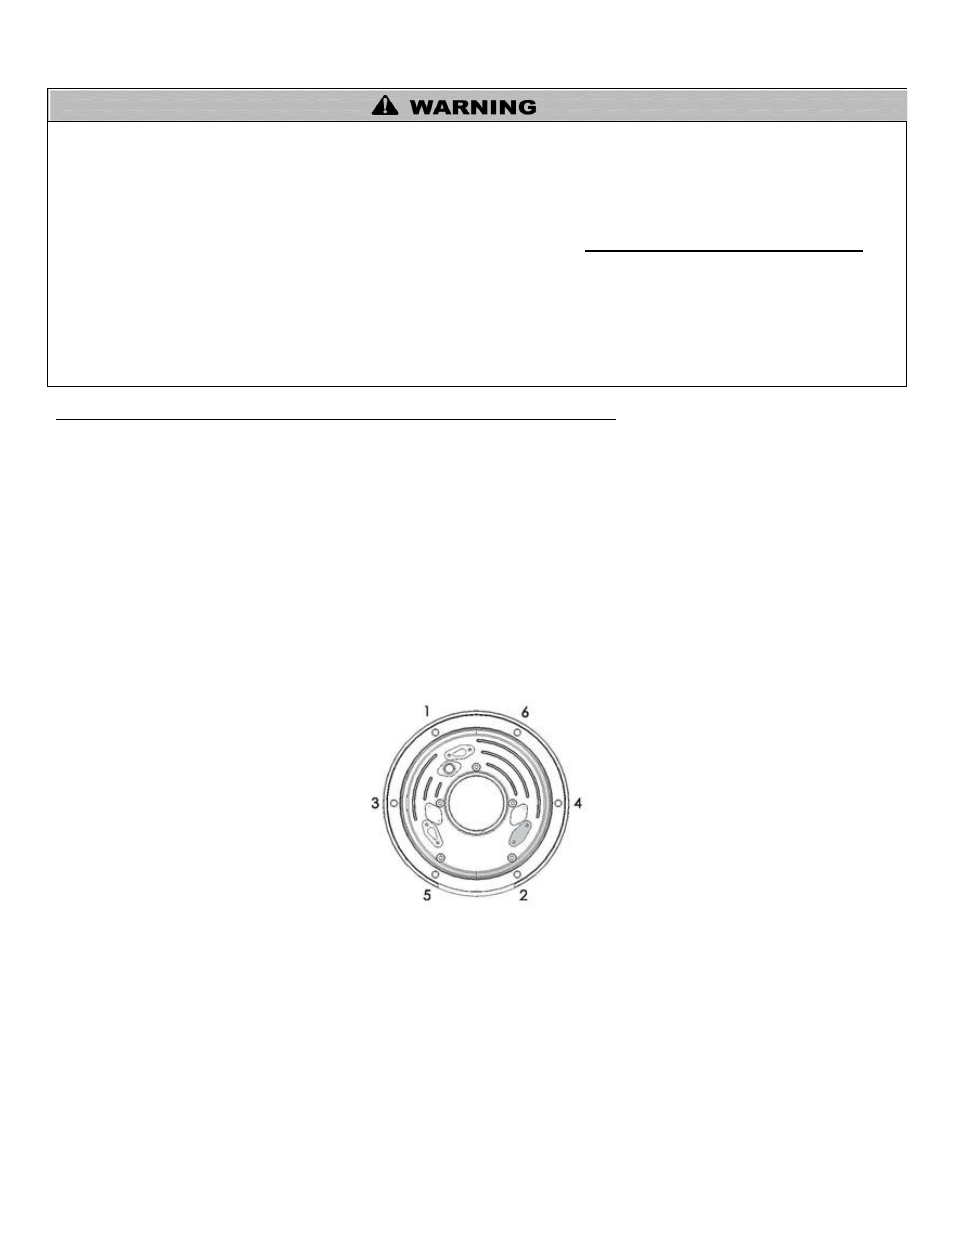
f. Remove the (6) 10MM nuts from the burner plate assembly.
Figure 31
g. Gently pull the entire burner plate assembly with blower attached towards you, while removing or pushing aside any wiring
to allow the removal of the assembly.
h. Disconnect the wire harness from the bottom of the blower to completely release the burner assembly.
NOTE: This will be easier to accomplish after the burner assembly is loose.
2. Using a spray bottle filled with the FDA approved lime scale remover or water, spray liberally on the coils, making sure the solution
penetrates and funnels down through the condensate system. If the condensate system is blocked, let the solution penetrate for at least
15 minutes or until it drains.
3. Use the nylon, stainless steel or brass brush (do not use steel) and scrub coils to remove any buildup. Then vacuum the debris from
the coils.