Luminex FLEXMAP 3D Hardware User Manual User Manual
Page 45
DANGER:
To avoid serious injury or death by electric shock, you must turn
off the FLEXMAP 3D instrument and unplug it from the wall
before replacing a fuse.
To replace a fuse:
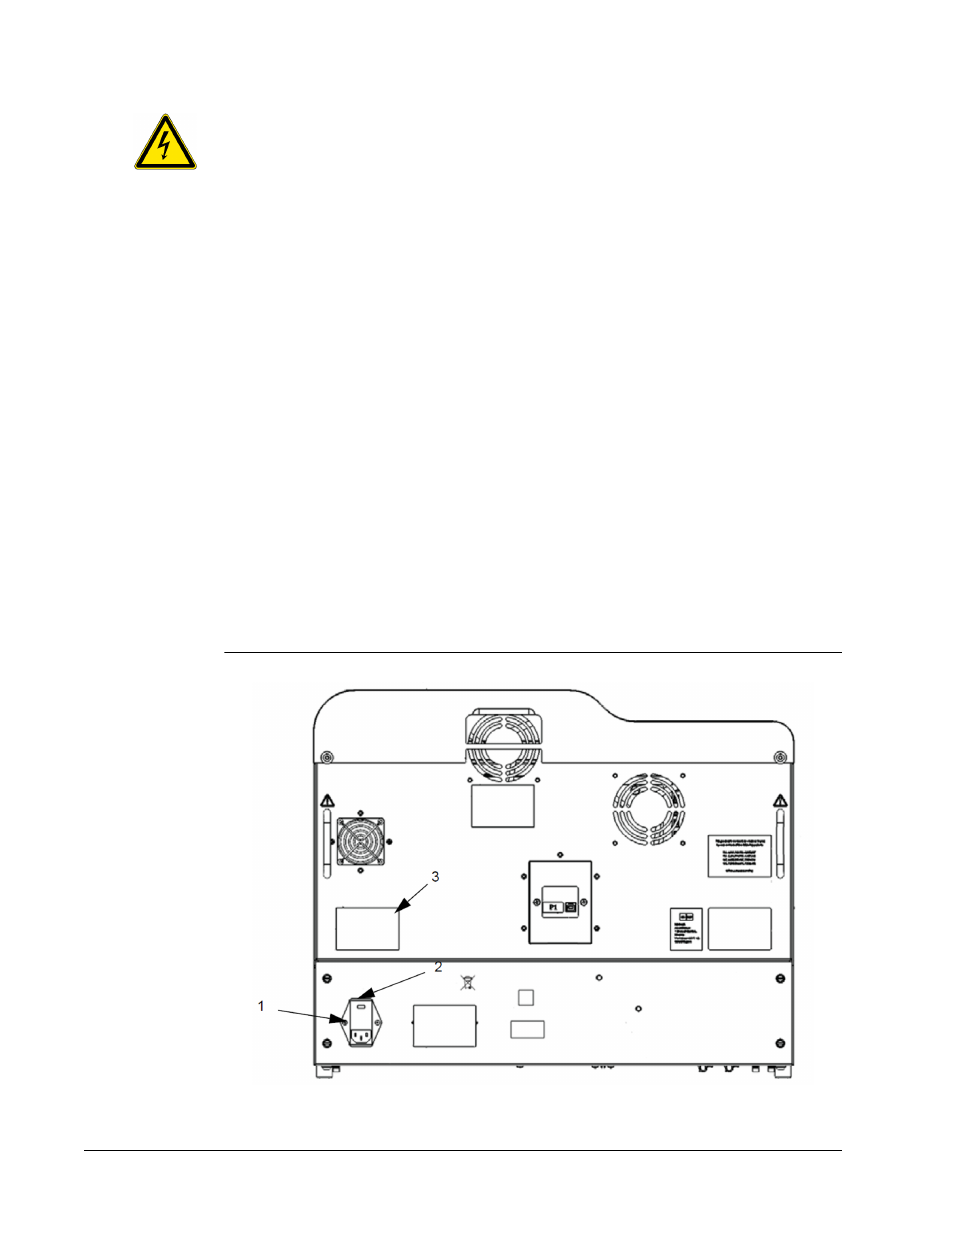
1. Unplug the power cable from the instrument.
2. Use a small, flat-blade screwdriver to open the module door on the lower left corner of
the back of the instrument. The door opens downward. Inside are two cartridges, a red
one on top and a black one on the bottom.
3. Use the screwdriver to remove the red cartridge.
4. Check both of the fuses in the cartridge for damage. A fuse can display physical evidence
of damage, for example, broken wire or blackened glass; if it displays no physical
evidence, test it for continuity with a voltmeter.
5. Replace damaged fuses with the type specified on the sticker to the right of the power
input module.
6. Replace the red cartridge.
7. Shut the module door.
8. Plug in the power cord and turn on the FLEXMAP 3D instrument.
NOTE: If your FLEXMAP 3D instrument is not on a swivel base and it
requires moving in order for you to access the back of the
instrument, use the software to re-calibrate and re-verify the
instrument after it is restored to its original location.
FIGURE 21.
Back of the FLEXMAP 3D Instrument
FLEXMAP 3D
®
Hardware User Manual
34