Web configuration – eLine Technology SIP-FB User Manual
Page 13
15
16
Configuration
6. WEB CONFIGURATION
The camera includes a built-in web interface that can be accessed using a
web browser.
6.1 Supported Browsers
• Google Chrome, Mozilla Firefox, and Apple Safari® (via Adobe Flash
Player)
• Microsoft Internet Explorer® 7.0 or later, 32-bit version (via ActiveX®)
6.2 Chrome, Firefox, and Safari Setup
1. Connect the camera to your local network and find the camera’s IP
address. See “4. Finding the Camera’s IP Address” on page 7.
2. Open your browser and enter the camera’s IP address in the address bar
in the following format:
http://
http://
192.168.0.120
:
80
Colon
Camera IP address
HTTP port number
NOTE: You can also connect to the camera using a DDNS address (DDNS
setup and port forwarding required; see “5. Configuring Remote
Connection” on page 10 for details).
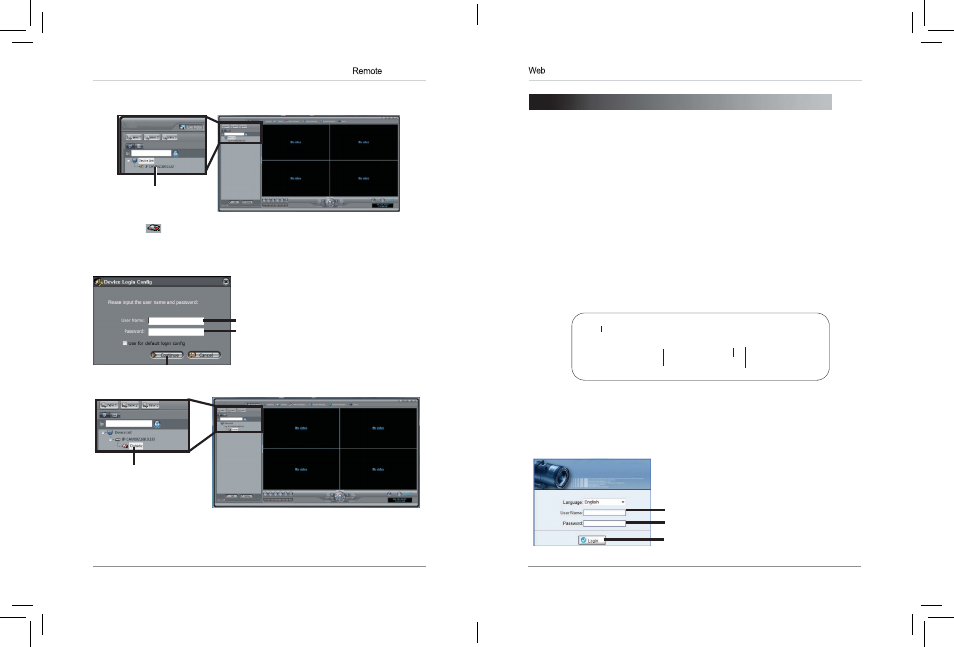
3. Under User Name and Password, enter the camera’s User Name
(default:
admin) and Password (default: admin) and click Login.
Enter Camera User Name (default:
admin)
Enter Camera Password (default:
admin)
Click Login
Configuring
Connection
8. Close Device Maintenance and Device Manager, and return to the Live
Video screen. The newly added camera will appear in Device List.
Found camera
NOTE: A
icon is shown for all cameras outside of the LAN. This does
not affect your ability to connect to the camera remotely.
9. Click on the camera in Device List to login. Enter the User Name (default:
admin) and Password (default: admin) and then click Continue.
Enter Camera User Name (default:
admin)
Enter Camera Password (default:
admin)
Click Continue
10.Click and drag the camera to a display grid screen to open it.
Click and drag the
camera to the display
grid to open it
NOTE: For detailed instructions on using NVMS, see the NVMS
manual on the CD.
eLineTechnology