eLine Technology EYS-SIP User Manual
eLine Technology Camcorders
eLineTechnology.com/support/documents Support 303.938.1133 Page 1
Technical Support Knowledge Base
eyStream Installation of eLine SIP Cameras – Quick Setup
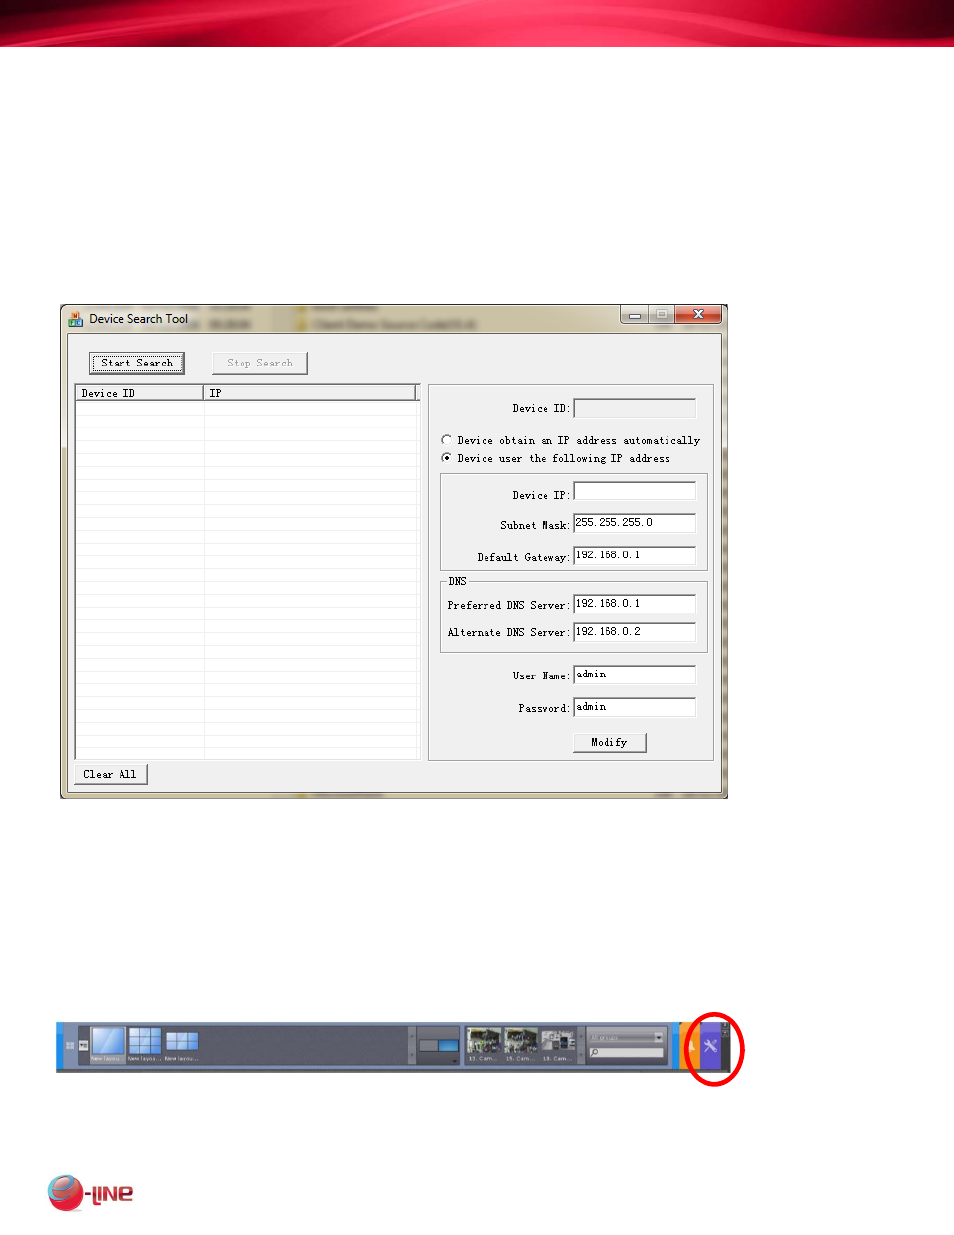
First Step is to run the SIP camera utility. This allows you to set up an IP address on each camera.
eyStream software does not allow this function, and will not work with cameras that are not addressed
within the local LAN Network ID scheme.
On the eyStream server – open the Windows Start Menu > All Programs > eyStream > IP Utils.
This will open a window – Open the SIP Series directory and run ‘IPSearch.exe’
1. Click
‘Start
Search’
2. Camera IP will appear in this box.
3. Click
‘Stop
Search’
4. Select the IP and modify it in the
Address area on the right
*Be sure to place a check in ‘Device
Uses the following IP address’.
5. Click the ‘Modify’ button and wait for
Message from camera.
6. Click ‘OK’ on the message to close it.
7. Wait 30 seconds and ‘Start Search’
Again. When address returned shows
The new address – the camera has
Rebooted and is ready.
Open Internet Explorer and enter the IP address of the camera in the ‘Address Bar’.
Default User and Password for SIP cameras = admin / admin.
Log in to camera and set FPS and Quality to desired rates.
If Bitrate is set to ‘CBR’ – change it to ‘VBR’.
Save all camera settings.
The cameras are now ready to install on the eyStream server.
On the eyStream server – open the ‘Settings’ page. (Wrench and Screwdriver icon)