7 logo/frame management, 8 video out – Analog Way SmartMatriX2 User Manual
Page 36
36
7.2.7 Logo management
Set it manually looking at the color change into Current color. If you want, you can quickly select a color from
a color panel, clicking on CURRENT COLOR. Then click on the color itself to obtain the color panel. Once
your main color is chosen, you can define a degree of tolerance around this color. The tolerance will define,
around the main color, an area that will be keyed too. You may still need to make further adjustments to the
luminance level to complete your key effect.
- Grabber:
activate the grabber to grab the color you want to key. Move the cursor and click on the grab
button to grab the color.
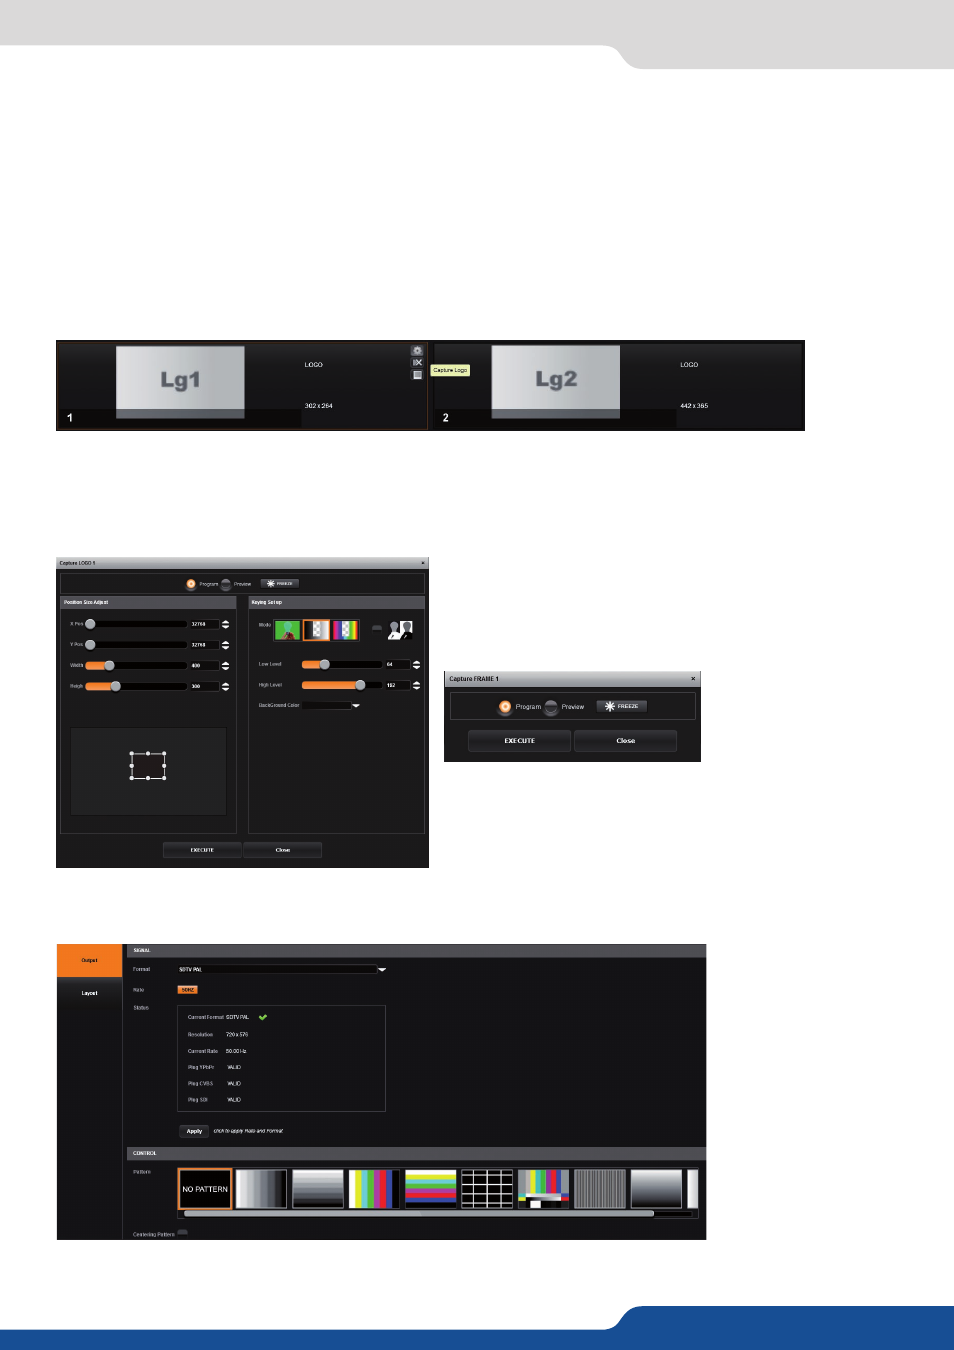
To save a logo/frame click on this button:
The next page opens.
From here you can capture from the main or from the Preview.
You can still freeze the output before saving your logo/frame.
You can also utilize the logo keying feature to key away part of the image before saving the logo.
7.2.7 Logo/frame management
Select the area you want to save using the adjustable
white square.
Once it is ok, simply click on execute to save the logo.
How to save a frame:
Choose first Program or Preview, click on FREEZE if you
want to freeze your output. Then click on EXECUTE to save
your frame into the selected slot.
Into this section, choose the output format of the video output.
You will find the status of your output and the possibility to choose the test pattern. In addtition, you can
adjust:
7.2.8 Video out