Step 2: create a new project, Step 2 : create a new project, Software setup, cont’d – Extron Electronics MLC 104 IP Series Setup Guide User Manual
Page 14
MLC 104 Series MediaLink Controllers • Software Setup
Software Setup, cont’d
3-4
MLC 104 Series MediaLink Controllers • Software Setup
3-5
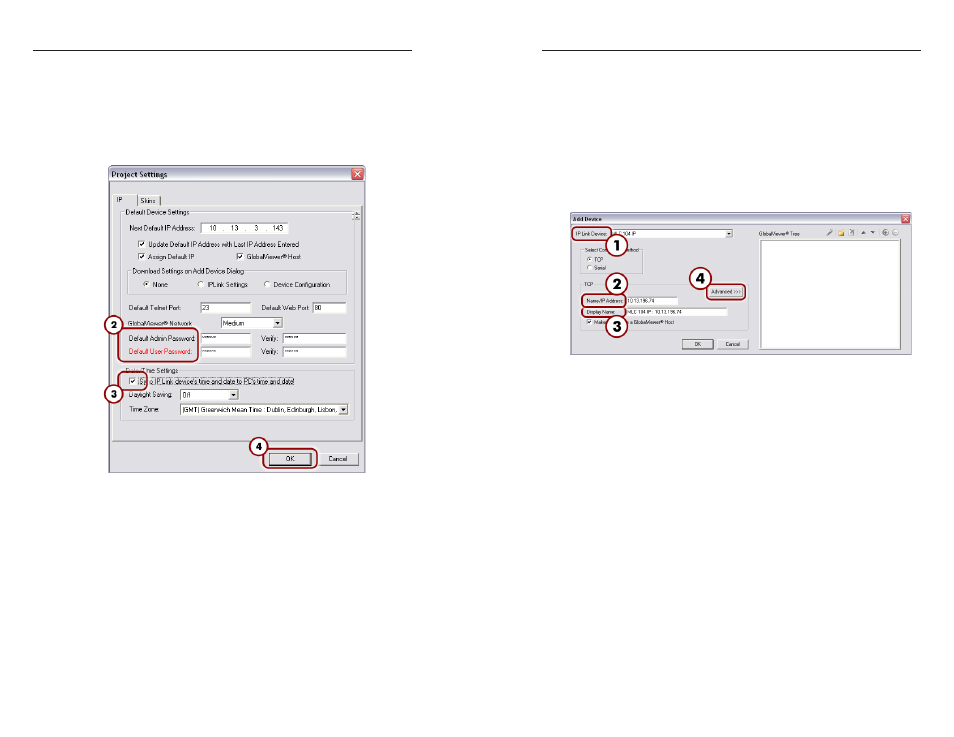
Step 2: Create a New Project
1.
If the GC 2 Start Options dialog is displayed, select the
"Create a New Project" option and click the OK button.
The Project Settings dialog box appears, as shown below.
N
You can also access the Project Settings dialog box via
the Edit menu.
Project Settings dialog box
2.
If passwords have been set on the MLC, enter the
administrator and user passwords. Ensure that both
passwords are repeated in the Verify fields.
N
If a password has been set on the MLC 104 series controller
but none is entered here, you will be unable to upload a
new configuration. By default, there is no password set on
the controller.
3.
Click the Sync IP Link device’s time and date to PC’s
time and date
check box and fill in the appropriate
Daylight Saving time zone values in the menu drop boxes,
if necessary.
4.
Click the OK button. The Add Device dialog box appears.
Step 3: Add an MLC 104 IP or MLC 104
Controller and Define ts Locaton
The most essential step in creating a configuration in a GC
project is to add an IP Link device. The following instructs how
to add an MLC 104 IP and MLC 104 controller to
Global Configurator.
N
If the Add Device dialog box is not displayed, select
Add Device
from the Edit menu.
To add the MLC 104 IP, do the following:
Add Device dialog box (Basic)
(for IP version only)
1.
From the IP Link Device drop-down menu, select
MLC 104 IP.
2.
Enter or edit the host name or IP address in the
Name/IP Address
text box so that it matches the one
assigned to the product by your network administrator.
3.
In the Display Name box, enter an easy to remember,
descriptive name (e.g., MLC104IP GC). You may choose
to keep the default name.
4.
Click the Advanced button.