Rack mounting, Table or wall mounting, Rack mounting table or wall mounting – Extron Electronics MPS 601 User Guide User Manual
Page 50
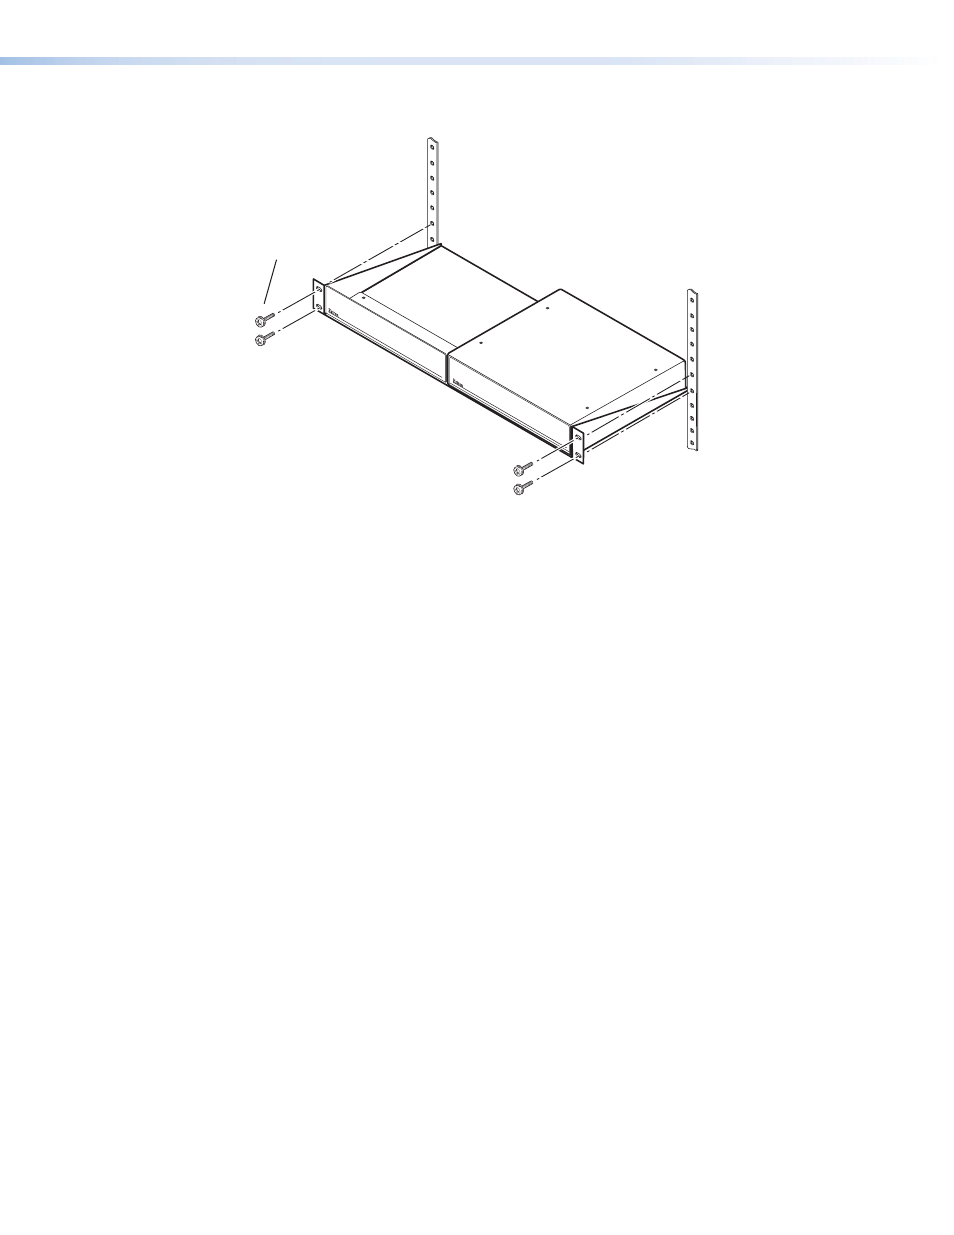
Rack Mounting
#10-32 Screw
w/ Nylon Captive
Cap Washer
Figure 38.
Mounting the Switcher
Table or Wall Mounting
The table or wall mounting brackets extend approximately 1/4 inch (6.4 mm) above the top
surface of the switcher enclosure allowing for an air space between the enclosure and the
surface. Table or wall mount the switcher as follows:
1.
Attach the table or wall mounting brackets to the switcher with the eight #8 machine
screws (figure 38.
2.
Hold the switcher with the attatched brackets against the underside of the table or other
furniture, or against the wall. Mark the location of the screw holes of the bracket on
the mounting surface.
3.
Drill 3/32 inch (2 mm) diameter pilot holes, 1/4 inch (6.4 mm) deep in the mounting
surface at the marked screw locations.
4.
Insert #8 wood screws into the four pilot holes. Tighten each screw into the mounting
surface until just less than 1/4 inch of the screw’s head protrudes.
5.
Align the mounting screws with the slots in the brackets and place the switcher against
the surface, with the screws through the bracket slots.
6.
Slide the switcher slightly forward or back, then tighten all four screws to secure the
switcher in place.
MPS 601 • Reference Information
44