Step eleven: set monitored conditions, Step eleven: set monitored conditions. -20, Software setup, cont’d – Extron Electronics IPL T PC1i Setup Guide User Manual
Page 22
IPL T PC1 Interface • Software Setup
Software Setup, cont’d
3-20
IPL T PC1 Interface • Software Setup
3-21
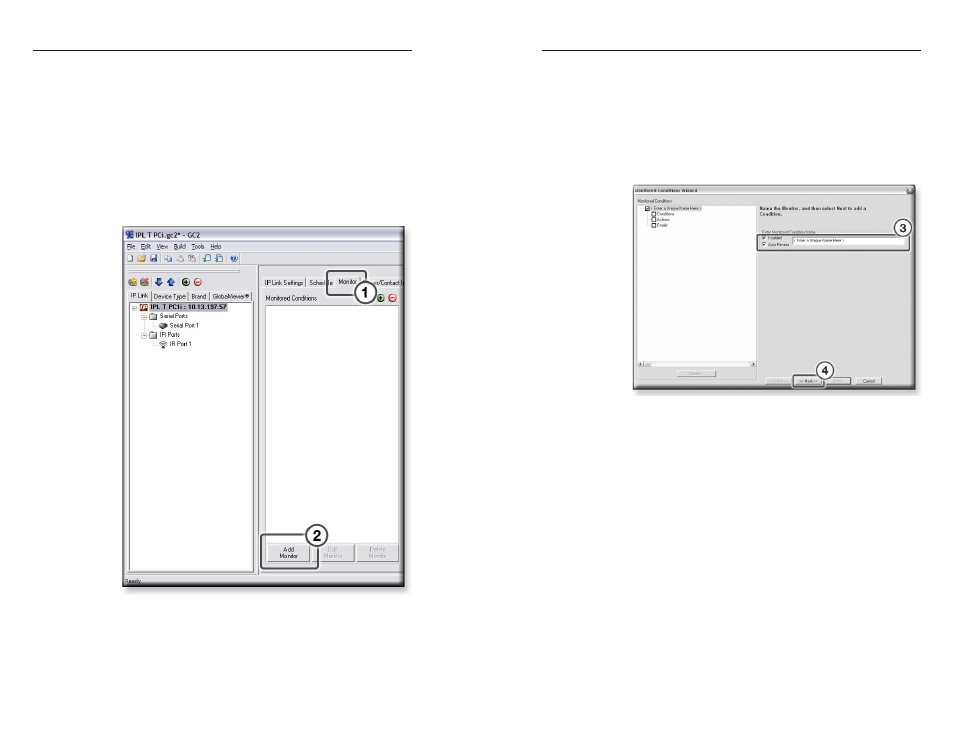
Step Eleven: Set monitored conditions.
The Monitor tab is used to set up a response (action and/or
e-mail) to a specified condition or event.
Actions vary by selected device and include options such as
Enable/Disable PINs, Lockout Front Panel, and Time Delay.
Custom e-mails can be created and sent to specified e-mail
addresses following specified conditions or events.
To add a monitored condition,
1
.
Select the Monitor tab.
2
.
Click the Add Monitor button.
The Monitored Conditions Wizard opens (see next page).
3
.
Enter a unique monitored condition name. The two
check boxes next to the Enter a Monitored Condition Name
field are automatically selected:
•
Enabled: When selected, indicates that monitoring is
enabled.
•
Re-arm: When checked, means that the specified
action occurs every time the condition(s) are met.
4
.
Click Next.
5
.
Select a Subject Port (device).
6
.
Select an Available Option (condition) to monitor.
7
.
Edit the condition Name field (if desired).
8
.
Set the desired Condition Test Parameters (if available).
For an example of test parameters, see the screen on the
next page.
9
.
If the Apply Condition button is grayed-out, click on the
condition name in the Monitored Conditions pane.
10
. Click the Apply Condition button.