Installation of the compass – Armasight NAM601500126DH1 PVS14/6015 GEN 2+ HD Multi-Purpose Night Vision Monocular User Manual
Page 35
35
(4) Check the position of the monocular by holding the weapon in your normal firing position. Adjust
the fore/aft position of the monocular as necessary by loosening the clamping knob and repositioning
the weapon mount on the weapon’s mounting rail.
3.3.11. INSTALLATION OF THE COMPASS
CAUTION
:
• Use of the compass with the plastic headmount or the plastic helmet mount will result in inac-
curate compass readings. The magnet cannot be removed from these mounts.
• The magnet must be removed from the ruggedized metal helmet mount before installation of
the compass. Failure to do so will result in inaccurate compass readings.
• If the magnet is not removed, contact Customer Support for instructions on returning the rugge-
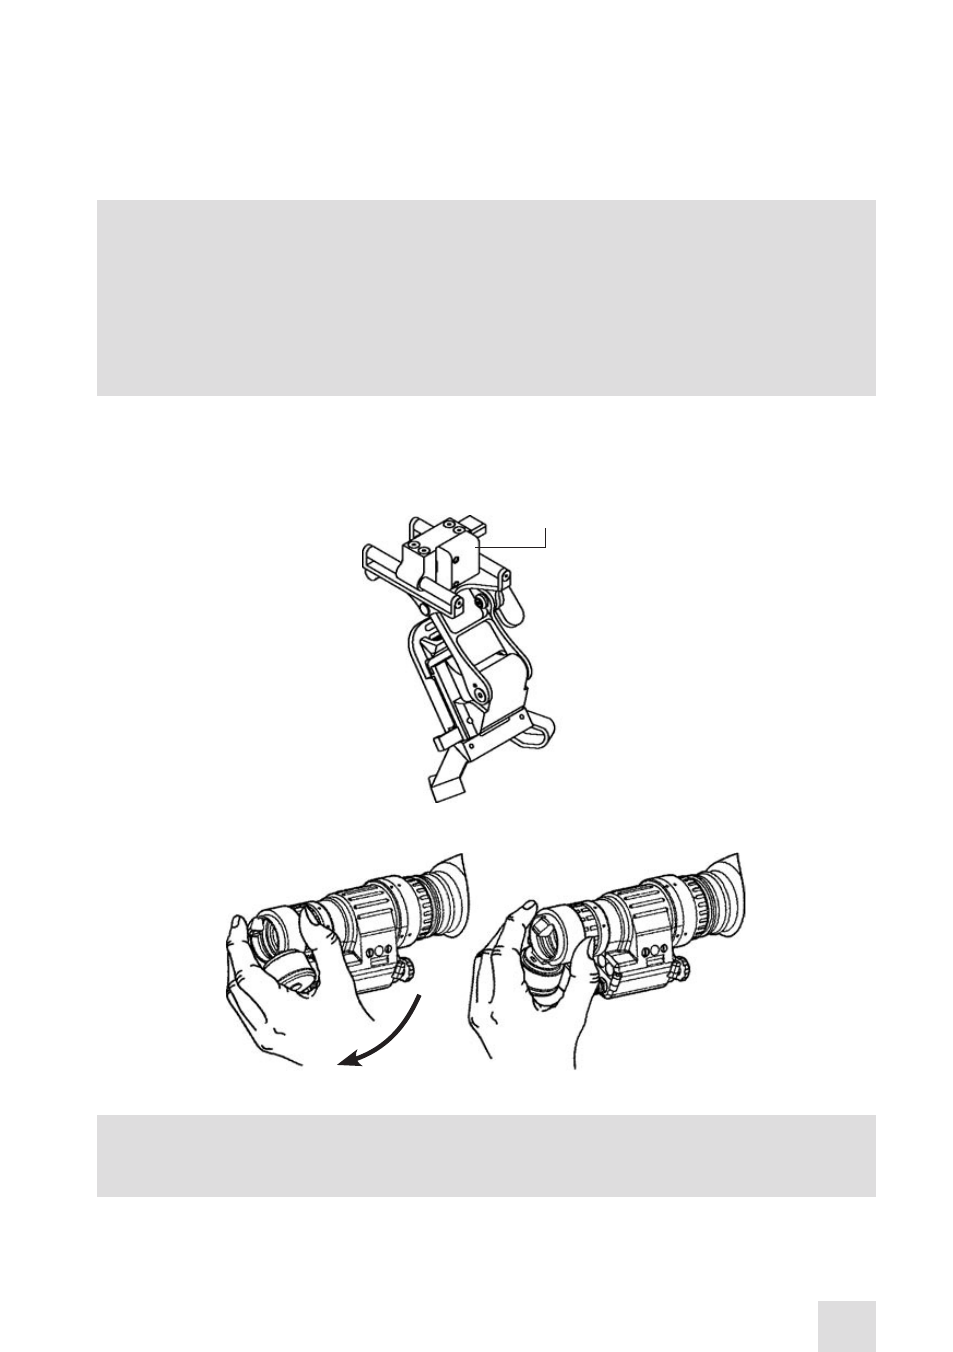
dized metal helmet mount for magnet removal. See Figure 3-15 for the location of the magnet.
(1) If the sacrificial window or objective lens cap is in place, remove it.
(2) Turn the monocular on.
(3) While looking through the monocular, rotate the objective lens focus completely counterclock-
wise.
NOTE
:
The o-ring must be correctly placed in the compass in order for the compass to fit properly.
(4) Press the compass onto the objective lens at an angle using your left hand. Slowly turn the com-
pass counterclockwise until it is in the vertical position, with the compass illumination button pointing
down (see Figure 3-16).
MAGNET
Figure 3-15. Locating the Magnet
Figure 3-16. Compass Installation