Installation of the eyecup or eyeguard, Installation of the demist shield, Installation of the sacrificial window – Armasight NAM601500126DH1 PVS14/6015 GEN 2+ HD Multi-Purpose Night Vision Monocular User Manual
Page 30
30
3.3.3. INSTALLATION OF THE EYECUP OR EYEGUARD
Perform the following procedure to install eyecup or eyeguard onto the monocular. Refer to Figure
3-8.
(1) Carefully press the eyecup or eyeguard over the end of the eyepiece lens.
(2) Rotate the eyecup or eyeguard into proper viewing position. Adjust for the best fit. The eyecup must
seal around your eye, preventing the green glow from leaking out.
3.3.4. INSTALLATION OF THE DEMIST SHIELD
Perform the following to install the demist shield on the eyepiece lens. Refer to Figure 3-8.
CAUTION
:
If the demist shield needs to be cleaned, refer to paragraph 4.3.1 for instructions. Do not at-
tempt to clean the demist shield while it is wet, or using wet lens paper; doing so will damage
the coating.
NOTE
:
If inclement operating conditions are expected, (e.g. significant temperature changes, high hu-
midity, etc.), install the demist shield prior to the mission in order to reduce lens fogging.
(1) Carefully remove the eyecup or eyeguard.
(2) Carefully press the demist shield onto the eyepiece. Be careful not to smudge the eyepiece lens or
demist shield with your fingers or hands.
(3) Replace the eyecup or eyeguard (see paragraph 3.3.3).
3.3.5. INSTALLATION OF THE SACRIFICIAL WINDOW
Perform the following to install the sacrificial window. Refer to Figure 3-8.
CAUTION
:
If adverse operating conditions (e.g., large amounts of dust or sand) are expected, attach the
sacrificial window prior to the mission to protect the objective lens from scratches or other
damage.
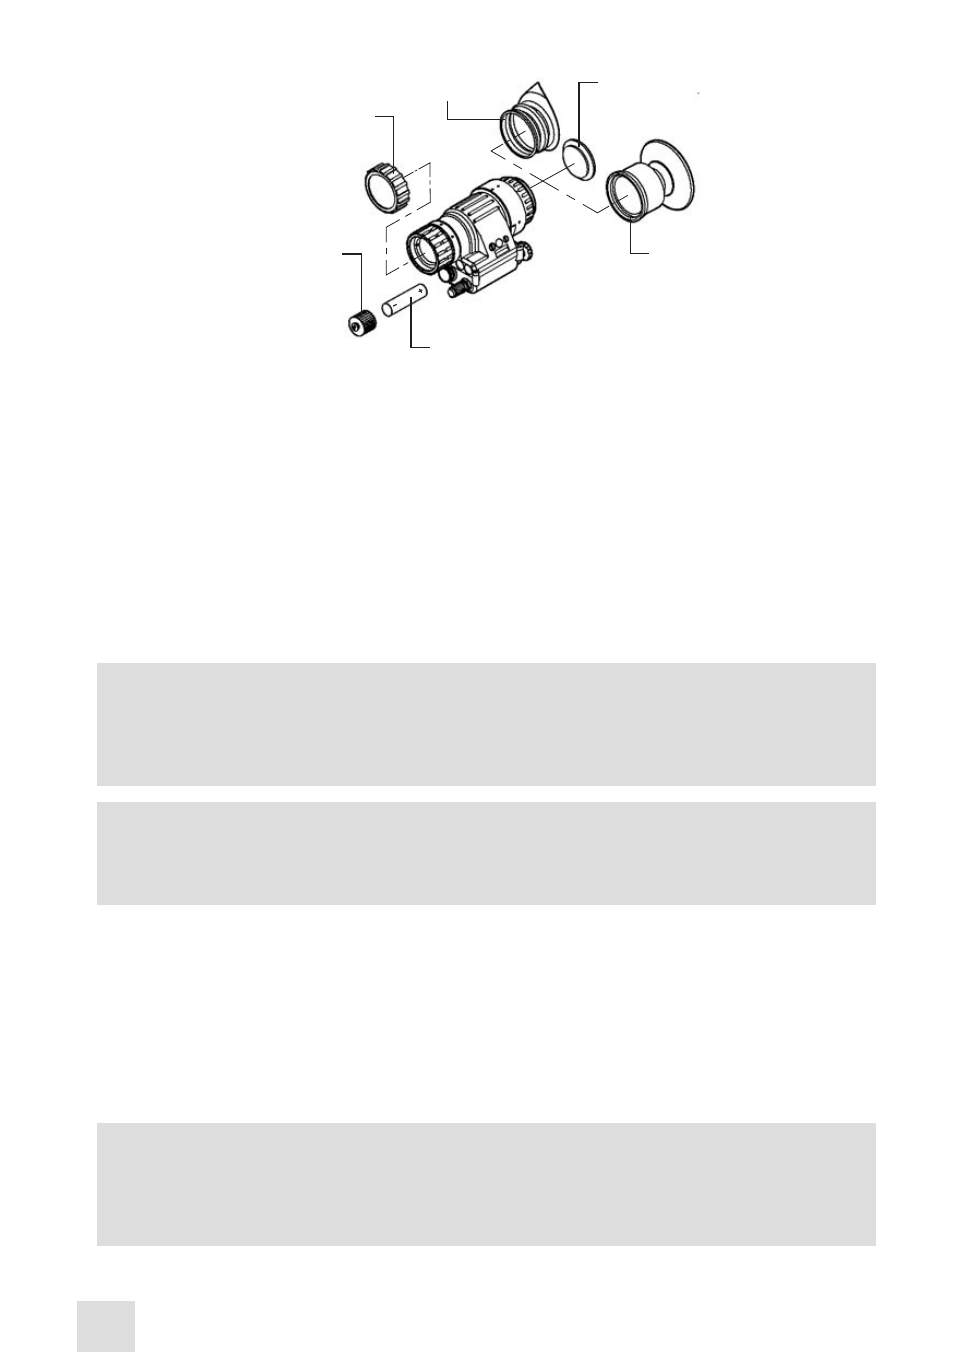
BATTERY
BATTERY CAP
SACRIFICIAL
WINDOW
EYECUP
EYEGUARD
DEMIST
SHIELD
Figure 3-8. Battery, Eyecup and Eyeguard Installation