Installation and adjustment of the headmount – Armasight NAM601500126DH1 PVS14/6015 GEN 2+ HD Multi-Purpose Night Vision Monocular User Manual
Page 31
31
(1) If the objective lens cap is in place, remove it.
(2) Carefully push the sacrificial window onto the objective lens until it stops. Turn the sacrificial win-
dow clockwise until it snaps into place.
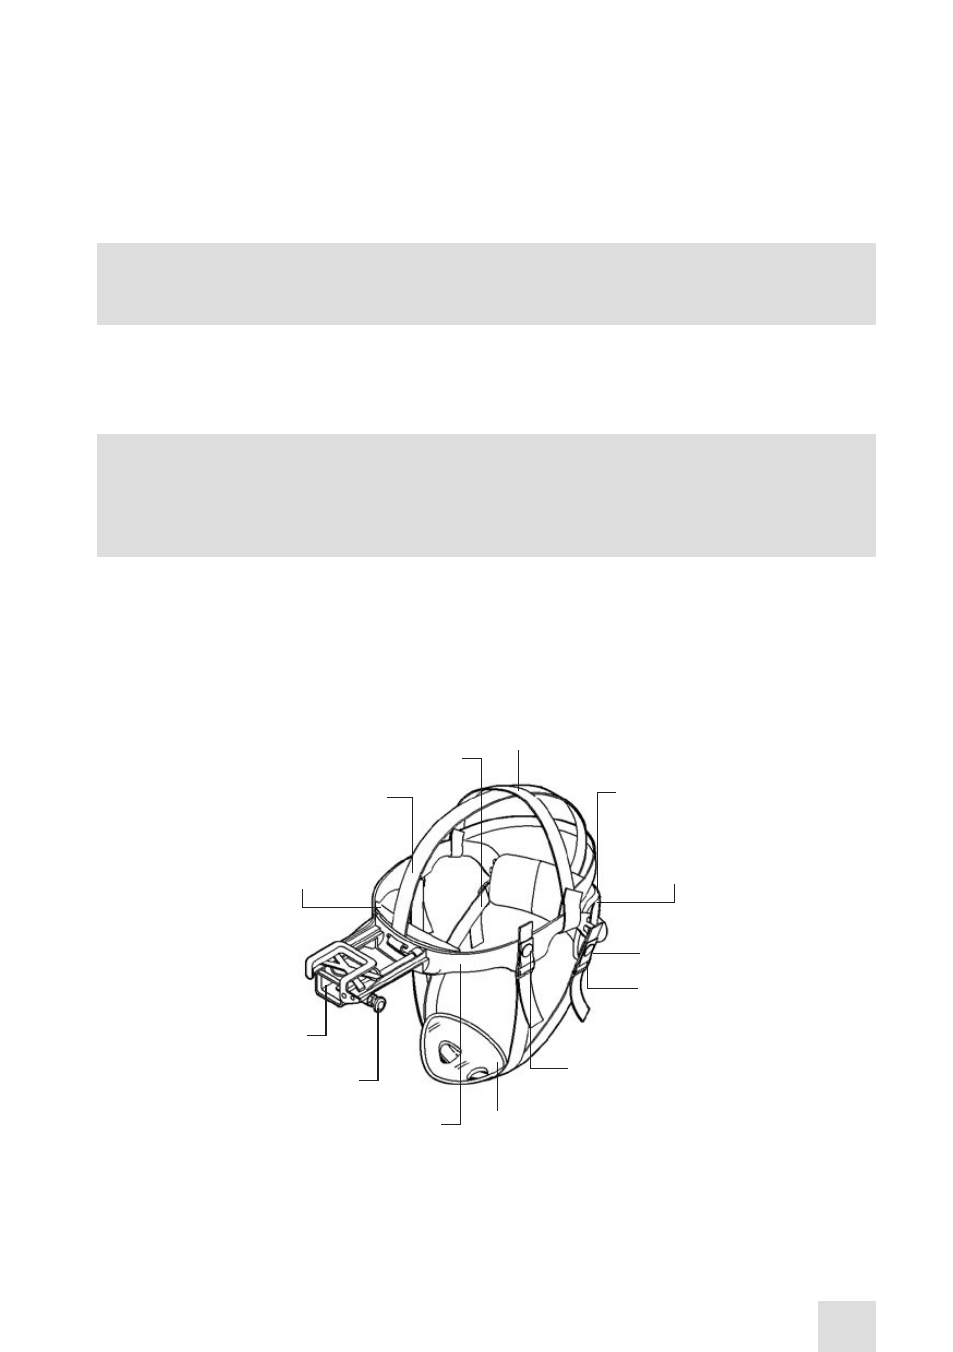
3.3.6. INSTALLATION AND ADJUSTMENT OF THE HEADMOUNT
Perform the following to install the headmount.
NOTE
:
Do not put the headmount on with the monocular attached.
(1) Before putting the headmount on, loosen the four ends of the chinstrap (approximately two inches
from the sliding bar buckles; see Figure 3-9).
(2) Snap the front and rear clasps (Figure 3-9) into place.
NOTE
:
If the headmount is too loose, remove the attached thin browpad (Figure 4-3) and replace it
with either the medium or thick browpad (these are stored in the carrying case). Refer to para-
graph 4.3.2 for removal and replacement of the browpads.
(3) Using both hands, grab the neck pad (Figure 3-9) and pull the harness over your head, sliding the
neck pad down over the back of your neck.
(4) Holding the chin cup in position, adjust both sides of the chinstrap until you feel it lightly press
against your chin. DO NOT TIGHTEN.
(5) Maintain the position of the chin cup and remove any slack from the chinstrap. DO NOT TIGHTEN.
(6) Ensure that the cross-strap is not twisted. Remove any slack by adjusting the vertical adjustment of
the neck pad.
(7) Adjust the chinstrap and vertical adjustment until the chin cup and headband are in a comfortable
but firm position.
VERTICAL
ADJUSTMENT
(HIDDEN)
NECK PAD
CHINSTRAP
ADJUSTMENT
AND SNAP
SLIDING BAR
BUCKLES
CHINSTRAP
ADJUSTMENT
AND SNAP
CHIN CUP
HEADBAND
EYE RELIEF
ADJUSTMENT
HEADMOUNT
SOCKET
BROWPAD
(THICK, MEDIUM
OR THIN)
CHINSTRAP
ADJUSTMENT
CHINSTRAP
ADJUSTMENT
CROSS-STRAP
Figure 3-9. MUNVM Headmount Adjustments