6 installing additional equipment on the drone pro – Armasight DARDROPBB05PAL1 Drone Pro 5x Digital Night Vision Riflescopes User Manual
Page 21
21
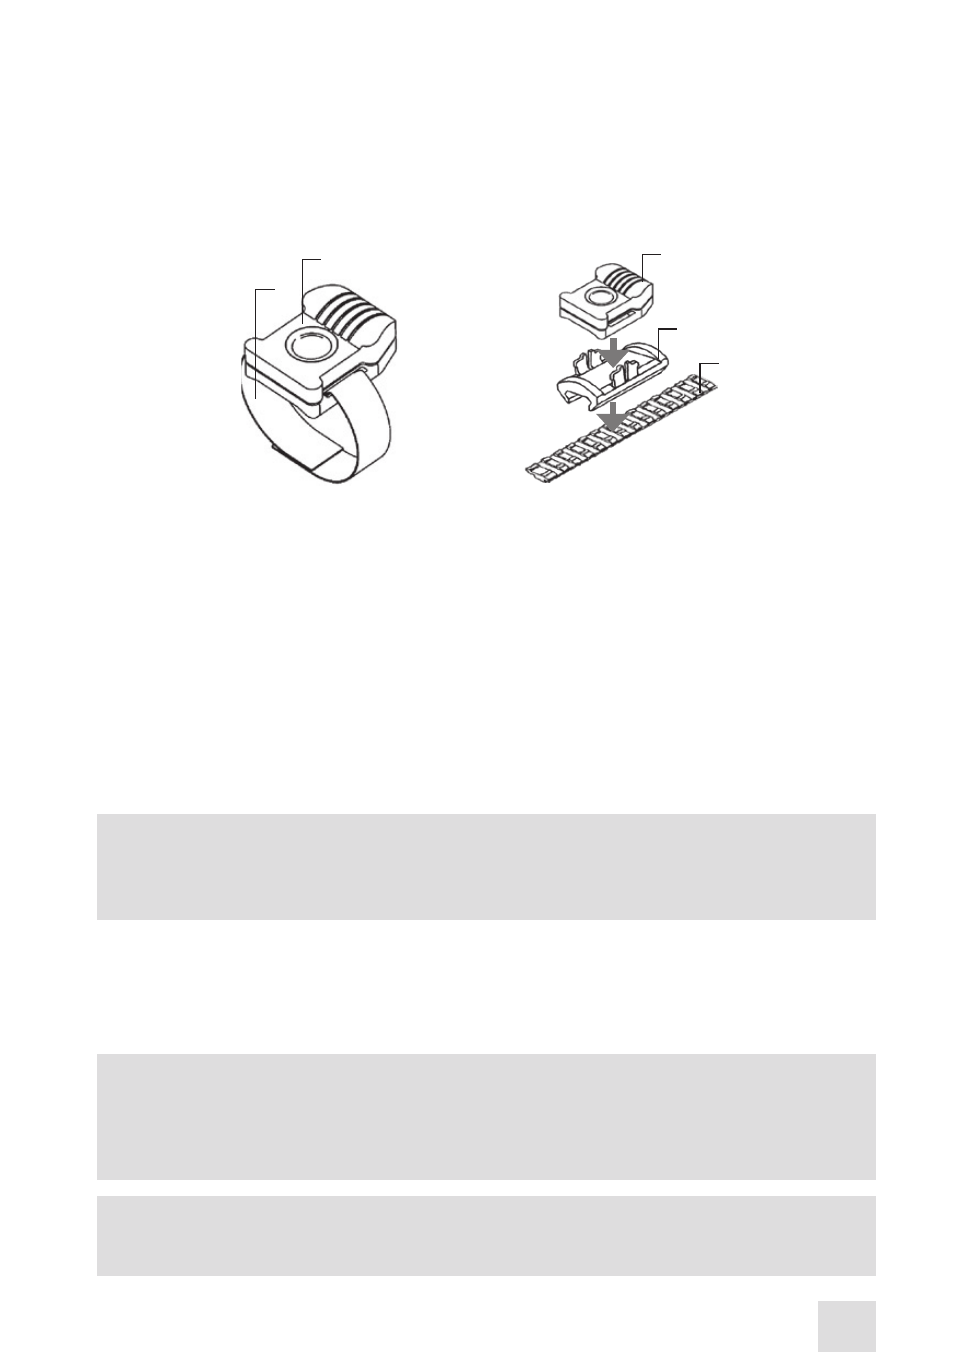
3.1.5 FASTENING AN ADVANCED WIRELESS REMOTE CONTROL TO A
WEAPON
Using Velcro tape (A, Figure 3-7), fasten the remote control (B) to your weapon in an easily accessible
place (e.g., on the front of the rifle stock).
If your rifle has a Picatinny or Weaver rail on the front end, you can use the Picatinny adaptor for the
Advanced Wireless Remote (C). Install the adaptor onto the rail (D). Insert the remote control unit into
the adapter.
FIGURE 3-7. ADVANCED WIRELESS REMOTE CONTROL
A
B
B
C
D
3.1.6 INSTALLING ADDITIONAL EqUIPMENT ON THE DRONE PRO
Use a Platform Ring to install any additional equipment, such as the Armasight MCS Miniature Collimat-
ing Sight. For adapter mounting procedures, see Part 3.1.4.
Use the side Picatinny/Weaver rail to install any additional equipment, such as the Armasight DT Digital
Video Recorder, a rangefinder, or an external power source.
3.1.7 CONNECTING AN EXTERNAL VIDEO RECORDER/DISPLAY
TO THE DRONE PRO
Use the plug A of a video cable (10, Figure 2-3) to connect an external video recorder/monitor/TV to the
input/output connector (14, Figure 2-2).
CAUTION:
Turn off the Drone PRO before you begin connecting/disconnecting any external equipment.
After removing the cable, replace the protective cap over the connector.
3.1.8 CONNECTING AN EXTERNAL POWER SOURCE TO THE DRONE PRO
Use the plug B of a video cable (10, Figure 2-3) to connect an external power source (6 VDC/1A) to the
input/output connector (14, Figure 2-2). The external power supply must have a standard 6mm OD
double-pole socket with a positive center contact.
CAUTION:
Remove the batteries before you connect any external power source.
To avoid a sudden loss of power, turn off the Drone PRO before removing the batteries or dis-
connecting the external power source.
CAUTION:
After removing the cable, replace the protective cap over the connector.