3 clamping device adjustment, 4 mounting a platform ring to the drone pro – Armasight DARDROPBB05PAL1 Drone Pro 5x Digital Night Vision Riflescopes User Manual
Page 20
20
3.1.3 CLAMPING DEVICE ADjUSTMENT
To adjust the mount’s clamping device, do the following:
1. Remove the Drone PRO from the weapon.
2. With the clamping device unlocked (as shown in Figure 3-4), push the cam (C) towards the arrow,
which will cause the nut (B) to slide out of its hole.
3. To tighten/ loosen the clamping device, push down on the cam (C) and turn the nut (B) CW/ CCW
respectively, in one-two increments (see note below). Much like when the cam (C) is released, back-
ward-moving springs will cause the nut (B) to slide back into its hole.
NOTE:
The eight-sided nuts of the mount lever-cam locks will only fit into their holes if turned in one
of the discrete positions, using increments equal to 360°/8.
4. Verify that the adjusted lever-cam lock securely holds the weapon mounting rail.
5. Repeat the procedure to adjust the clamping device’s second lever-cam lock.
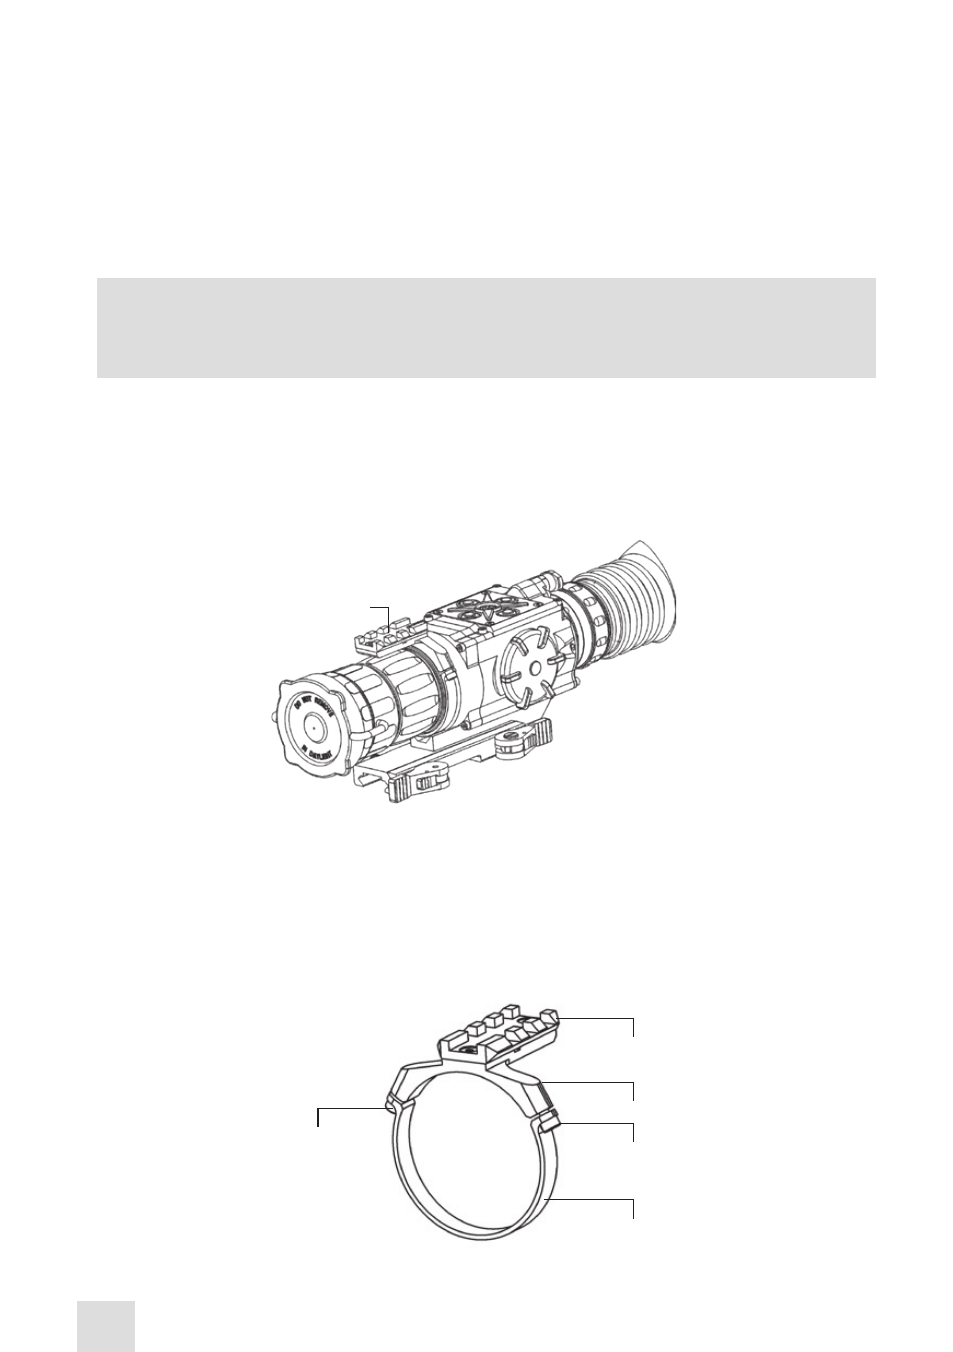
3.1.4 MOUNTING A PLATFORM RING TO THE DRONE PRO
Figure 3-5 shows the Drone PRO with the Platform Ring adapter (A, Figure 3-5) installed.
To mount the Platform Ring (optional) on the Drone PRO, do the following (refer to Figure 3-6):
1. Using a 1.5 hex key, unscrew the both clamp screws (C).
2. Place the clamps (B, D) onto the mounting tube (as in Figure 3-5). Screw the clamps together without
tightening the screws (C).
3. Adjust position of the Platform Ring until its rail (A) is level. Apply a small amount of thread lock to
the threads and tighten the screws (C).
A
FIGURE 3-5. THE DRONE PRO FULLY ASSEMBLED WITH THE PLATFORM RING
A
B
C
C
D
FIGURE 3-6. PLATFORM RING