8 installing the ir850 – Armasight NSCCOMINI139DA1 CO-Mini GEN 3+ Alpha MG Night Vision Mini Clip-On System User Manual
Page 24
24
CAUTION:
When loosening the ring (E), only utilize the two auxiliary, non-threaded holes (D). Avoid using
the threaded ones.
4. Using a turning machine, cut the inside face of the ring (E). The value of cutting (in millimeters) is
equal to the value of the turning angle (in angular degrees) divided by 360°.
5. With the cut end directed inwards, screw the ring (E) into the adapter’s body and tighten it.
6. Apply a small amount of thread lock to the threads. Affix the ring (E) with two M2×2.5 screws (F).
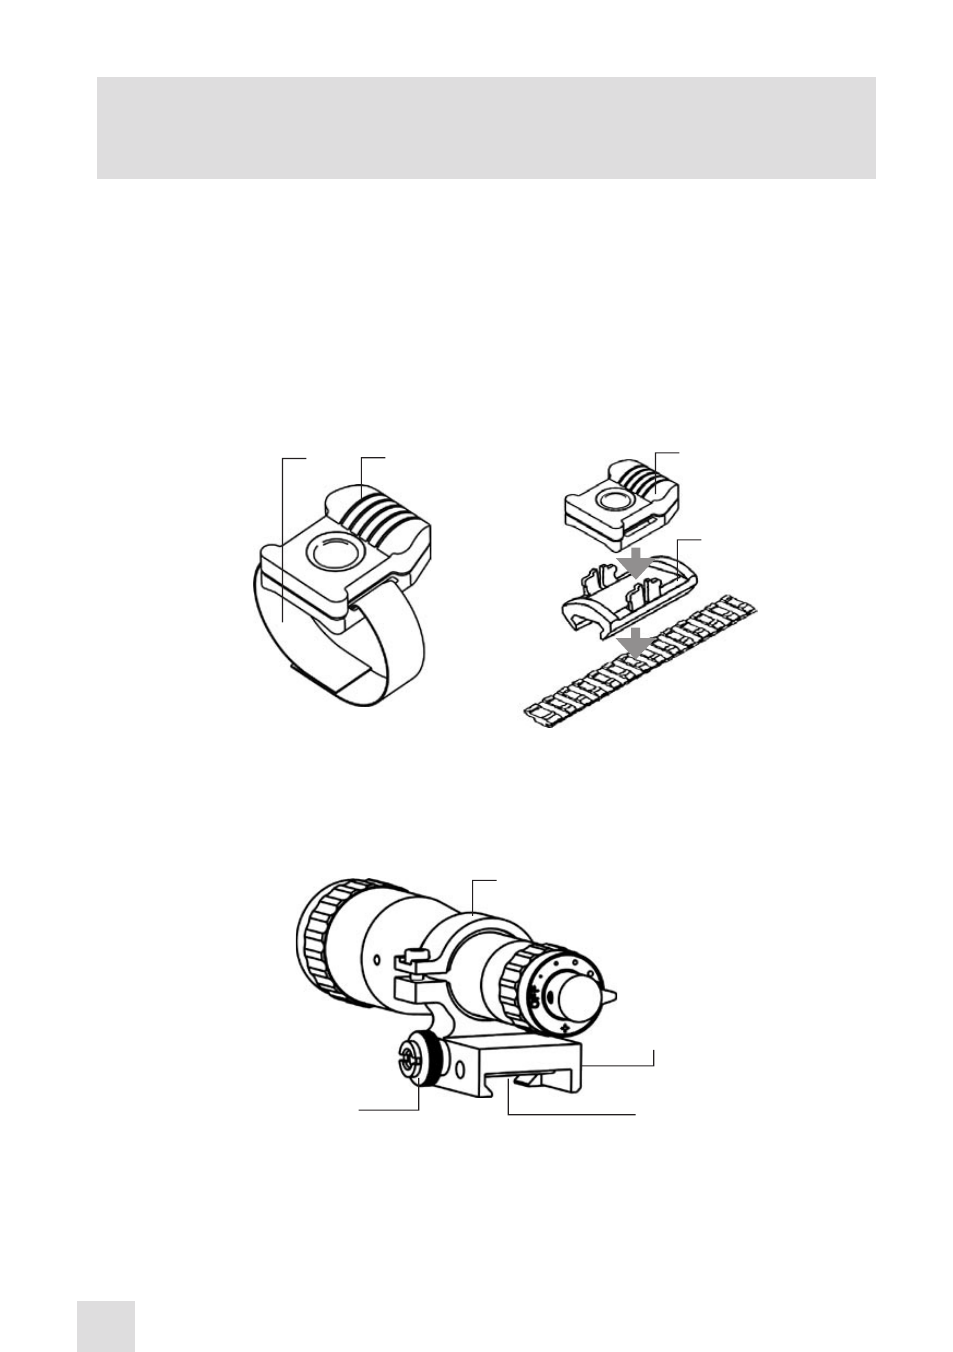
3.1.7 FASTENING A WIRELESS REMOTE CONTROL UNIT TO WEAPON
Using Velcro tape (A), fasten the remote control unit (B) (Figure 3-12) to the weapon in an easily acces-
sible place (e.g., on the front of the rifle stock) on the side of the CO-MINI’s wired cover preferably.
If your rifle has a Picatinny or Weaver rail on the forend you can use the Picatinny adaptor for Advanced
Wireless Remote (C). Install adaptor on the rail. Insert the remote control unit in the adapter.
FIGURE 3-12. ADVANCED WIRELESS REMOTE CONTROL
B
A
C
B
3.1.8 INSTALLING THE IR850
The IR850 (Figure 3-13) is delivered ready-assembled with a dedicated mount, to be installed on the
Weaver rail of the CO-MINI. The mount clamp (A) has a spherical hinge that allows the operator to tilt
the IR850 as desired.
Mount the IR850 on the Weaver rail as follows:
1. With the nut (D) loosened, install the mount (B) onto the Weaver rail so that the stop (C) slides into
one of the transverse slots of the rail.
2. Tighten the nut (D) with a screwdriver.
B
FIGURE 3-13. IR850 ILLUMINATOR
d
A
C
- NSCCOMINI1P9DA1 CO-Mini GEN 3P MG Night Vision Mini Clip-On System NSCCOMINI1G9DA1 CO-Mini GEN 3 Ghost MG Day/night vision Clip-On system Standart Definition NSCCOMINI1F9DA1 CO-Mini Flag MG Day/night vision Clip-On system Standart Definition NSCCOMINI139DB1 CO-Mini GEN 3 Bravo MG Night Vision Mini Clip-On System NSCCOMINI129DI1 CO-Mini GEN 2+ ID MG Day/night vision Clip-On system Improved Definition NSCCOMINI129DH1 CO-Mini GEN 2+ HD MG Day/night vision Clip-On system NSCCOMINI1Q9DI1 CO-Mini GEN 2+ QS MG Day/night vision Clip-On system