Armasight NSCCOMINI139DA1 CO-Mini GEN 3+ Alpha MG Night Vision Mini Clip-On System User Manual
Page 20
20
WARNING
:
Armasight recommends using an eyecup on the eyepiece of the day scope, allowing for
the eyepiece diameter and eye relief and having side paddle preferably in order to escape
detection.
NOTE
:
The optical axes of the CO-MINI and the day scope should align. The distance between the
axes should not exceed 2mm. If the difference in the axis heights of the CO-MINI and day scope
above the weapon rail exceeds 2mm, you will need to replace the day scope mounting rings
or monoblock.
Install the CO-MINI on a Picatinny/ Weaver rail in front of a day scope as follows:
1. Unscrew the output lens cap and place it in the storage case.
2. Remove the light suppressor from the storage case. Screw it into the output lens’ thread, in place of
the cap.
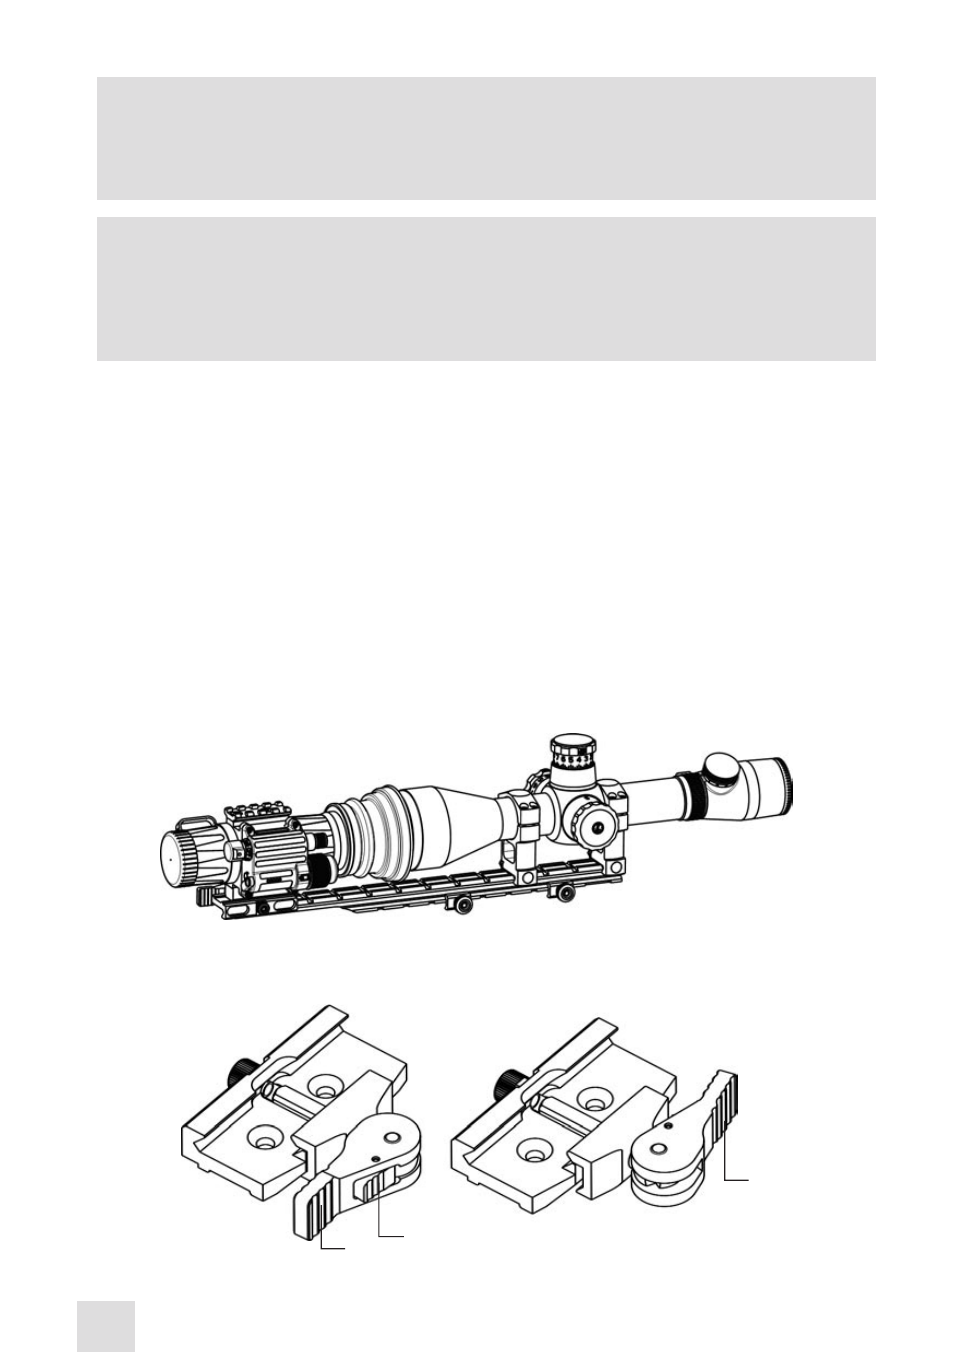
3. Unlock the clamping device of the CO-MINI mount by pushing down on the lever holder (B, Figure
3-5) and unlocking the cam lever (A).
4. Install the CO-MINI on the Picatinny/ Weaver rail in front of the day scope. The stop (B, Figure 3-6)
should slide into one of the rail’s transverse slots. The light suppressor should cover the day scope’s
objective lens.
5. Affix the CO-MINI to the rail by locking the cam lever (A, Figure 3-5).
6. Verify that the clamping device firmly holds the CO-MINI. If necessary, adjust the clamping device as
detailed in Part 3.1.4 (Clamping Device Adjustment).
Figure 3-4 shows the CO-MINI and a day scope installed with the optional Extended Rail Adapter on a
weapon, using a short-mounting Picatinny/ Weaver rail.
FIGURE 3-4. THE CO-MINI ON A PICATINNY RAIL IN FRONT OF A DAY SCOPE
FIGURE 3-5. MOUNT. TOP VIEW
B
A
A
LOCKEd
POSITION
UNLOCK
POSITION
- NSCCOMINI1P9DA1 CO-Mini GEN 3P MG Night Vision Mini Clip-On System NSCCOMINI1G9DA1 CO-Mini GEN 3 Ghost MG Day/night vision Clip-On system Standart Definition NSCCOMINI1F9DA1 CO-Mini Flag MG Day/night vision Clip-On system Standart Definition NSCCOMINI139DB1 CO-Mini GEN 3 Bravo MG Night Vision Mini Clip-On System NSCCOMINI129DI1 CO-Mini GEN 2+ ID MG Day/night vision Clip-On system Improved Definition NSCCOMINI129DH1 CO-Mini GEN 2+ HD MG Day/night vision Clip-On system NSCCOMINI1Q9DI1 CO-Mini GEN 2+ QS MG Day/night vision Clip-On system