Armasight NSCCOMINI139DA1 CO-Mini GEN 3+ Alpha MG Night Vision Mini Clip-On System User Manual
Page 23
23
2. Take off the output lens cap and place it into the storage case.
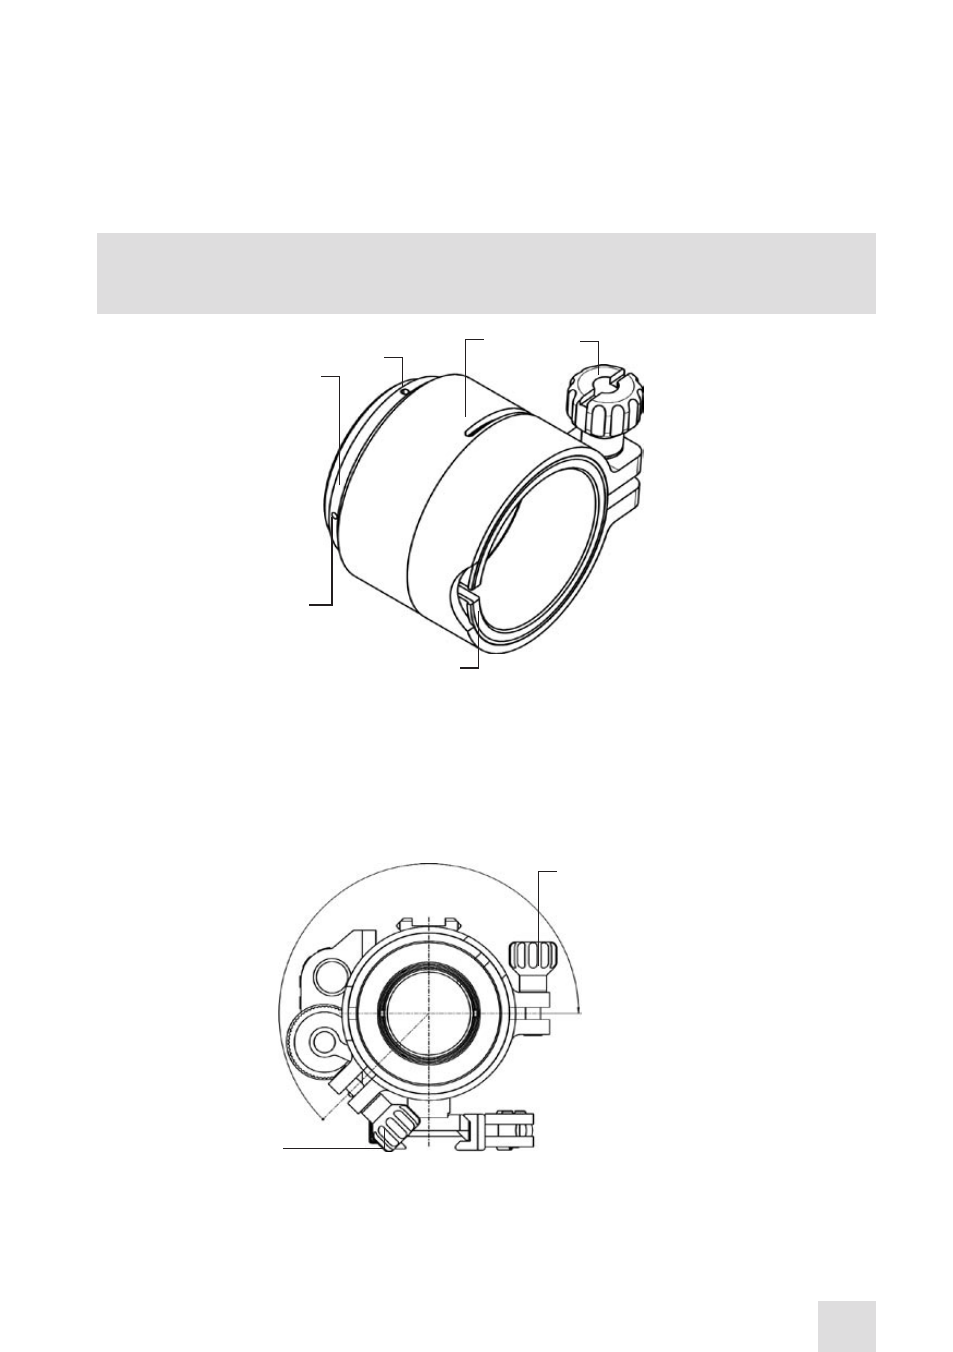
3. With the nut (B) loosened, position the insert (C) into the adapter’s clamp (A).
4. Screw the adapter into the CO-MINI’s output lens thread.
5. With the nut (B) loosened, slide the CO-MINI, with the adapter, onto the lens of the day scope as far
as it will go.
6. Tighten the nut (B) with a screwdriver.
NOTE:
The second Weaver rail can be installed in place of the removed mount.
If the position of the adapter’s clamping nut is undesirable, it can be adjusted by performing the fol-
lowing:
1. Decide on desirable position of the nut and estimate the angle through which the adapter should be
turned CW (see Figure 3-11).
2. Remove the adapter from the CO-MINI.
3. Using a screwdriver, remove both screws M2×2.5 (F, see Figure 3-10) and then unscrew the ring (E).
A
B
C
d
E
F
FIGURE 3-10. SCOPE MOUNTING SYSTEM
dESIRABLE POSITION
OF ThE NUT
NUT
FIGURE 3-11. ESTIMATION OF THE ADAPTER TURNING ANGLE
- NSCCOMINI1P9DA1 CO-Mini GEN 3P MG Night Vision Mini Clip-On System NSCCOMINI1G9DA1 CO-Mini GEN 3 Ghost MG Day/night vision Clip-On system Standart Definition NSCCOMINI1F9DA1 CO-Mini Flag MG Day/night vision Clip-On system Standart Definition NSCCOMINI139DB1 CO-Mini GEN 3 Bravo MG Night Vision Mini Clip-On System NSCCOMINI129DI1 CO-Mini GEN 2+ ID MG Day/night vision Clip-On system Improved Definition NSCCOMINI129DH1 CO-Mini GEN 2+ HD MG Day/night vision Clip-On system NSCCOMINI1Q9DI1 CO-Mini GEN 2+ QS MG Day/night vision Clip-On system