2 ir850 battery installation – Armasight NSCCOMINI139DA1 CO-Mini GEN 3+ Alpha MG Night Vision Mini Clip-On System User Manual
Page 19
19
Install the battery as follows (refer to Figure 3-1):
1. Unscrew the battery cap (C) and check the position of the adapter (D). See Figure 3-2 for the correct
positioning of the threaded adapter, which changes depending on the battery being installed.
2. If necessary, change the adapter position in the cap. Use the special wrench.
3. Install the battery (B) into the battery compartment (A). Follow the battery symbol (E).
4. Replace the battery cap (C).
3.1.2 IR850 BATTERY INSTALLATION
CAUTION
:
Ensure that the IR850 is off before installing the battery.
Install the CR123A battery as follows (refer to Figure 3-3):
1. Unscrew the battery cap (A).
2. Install the battery (B) into the battery compartment. Align the plus sign on the battery with the plus
sign on the cap face.
3. Replace the battery cap (A).
B
A
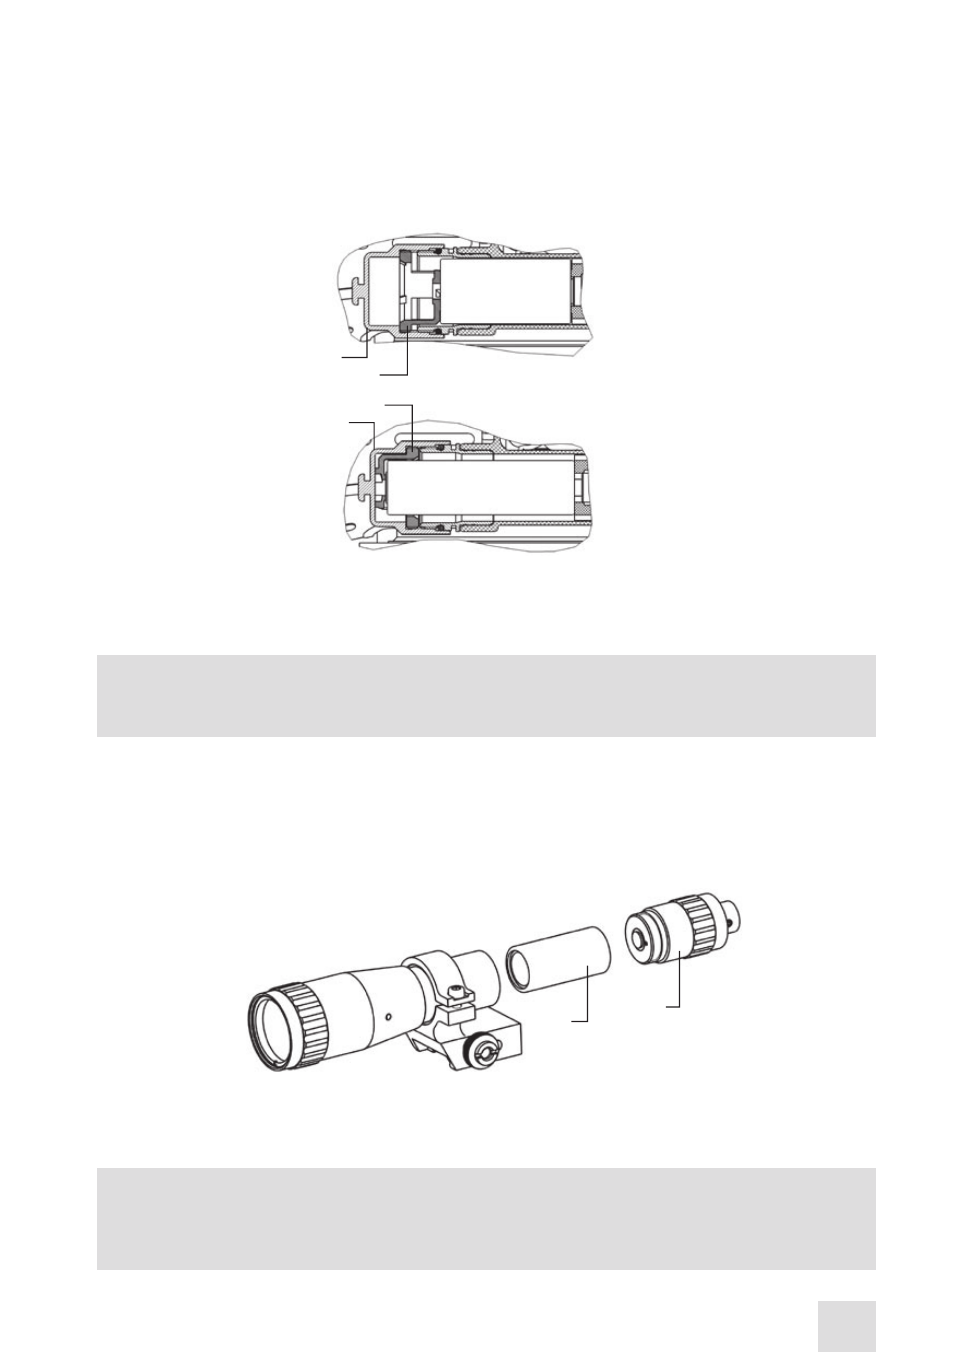
FIGURE 3-3. THE IR850. BATTERY INSTALLATION
3.1.3 INSTALLING THE CO-MINI ONTO A PICATINNY/ WEAVER RAIL
WARNING
:
When installing the equipment on a weapon, verify that the weapon is clear and that the safety
is on before proceeding.
BATTERy CAP
FIGURE 3-2. POSITIONS OF THE ADAPTER IN THE BATTERY CAP
CR123A
AA
INSERT
BATTERy CAP
INSERT
- NSCCOMINI1P9DA1 CO-Mini GEN 3P MG Night Vision Mini Clip-On System NSCCOMINI1G9DA1 CO-Mini GEN 3 Ghost MG Day/night vision Clip-On system Standart Definition NSCCOMINI1F9DA1 CO-Mini Flag MG Day/night vision Clip-On system Standart Definition NSCCOMINI139DB1 CO-Mini GEN 3 Bravo MG Night Vision Mini Clip-On System NSCCOMINI129DI1 CO-Mini GEN 2+ ID MG Day/night vision Clip-On system Improved Definition NSCCOMINI129DH1 CO-Mini GEN 2+ HD MG Day/night vision Clip-On system NSCCOMINI1Q9DI1 CO-Mini GEN 2+ QS MG Day/night vision Clip-On system