1 setting up through the console port, 2 setting up through the web interface – Asus GigaX2008EX User Manual
Page 19
9
GigaX2008EX L2 Managed Switch User Manual
“admin”. Skip the password by pressing
You can change the password at any time through CLI (see
section 5.3.1). To protect your switch from unauthorized access,
you must change the default password as soon as possible.
5. Follow these steps to assign an IP address to the switch:
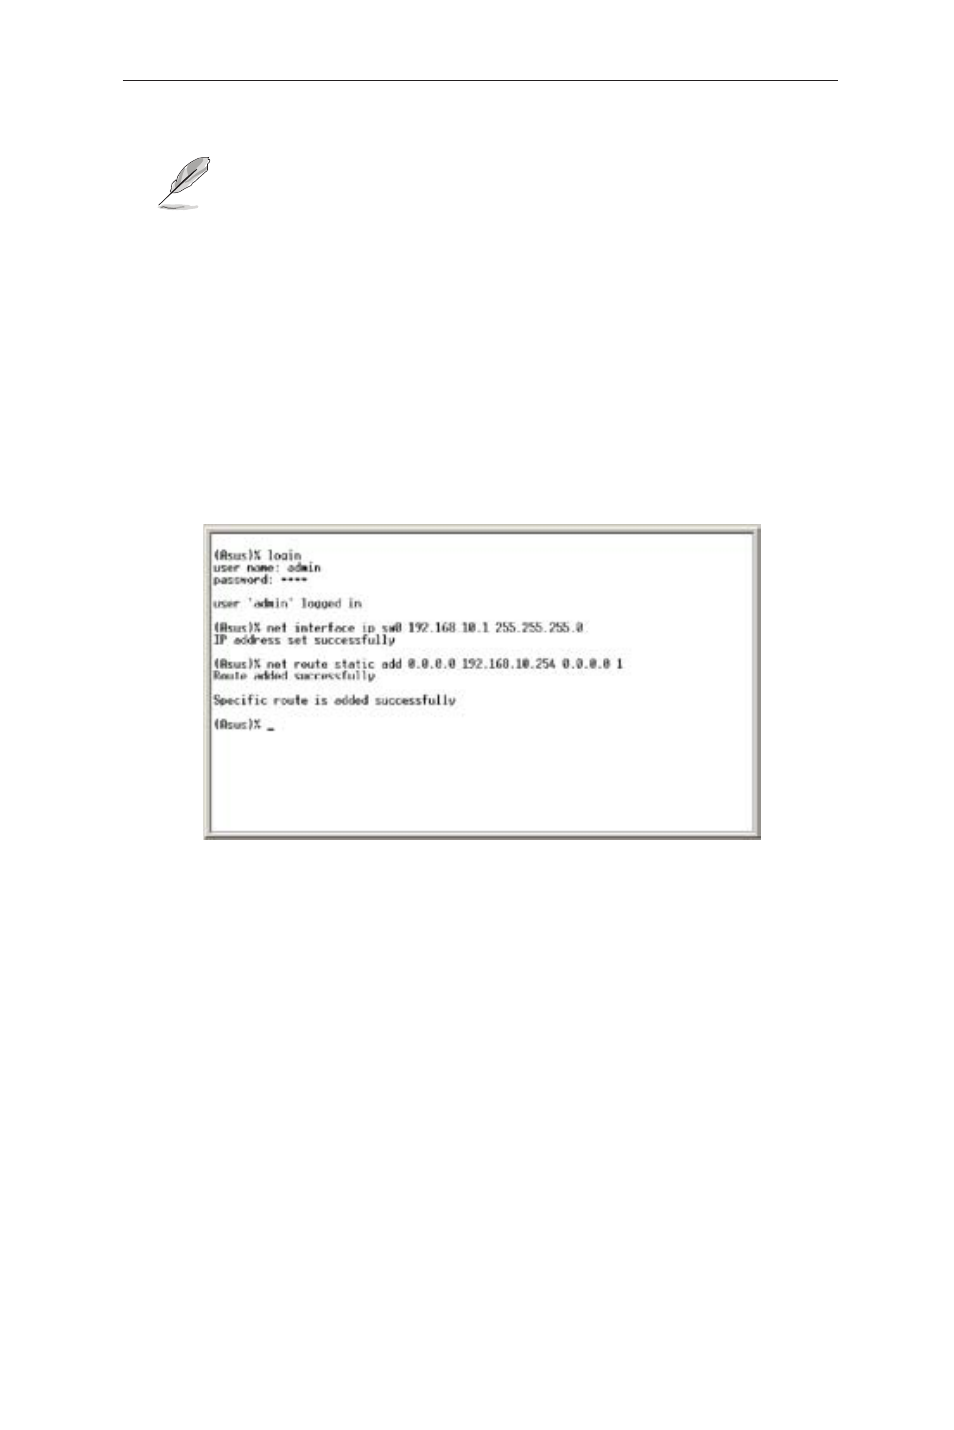
a) Type “net interface ip sw0
For example, if your switch IP is 192.168.10.1 and the network mask is
255.255.255.0. Then you should type “net interface ip sw0 192.168.10.1
255.255.255.0”.
b) If the switch has to be managed across networks, then a default gateway
or a static route entry is required. Type “net route static add 0.0.0.0 network gateway IP> 0.0.0.0 1” as your default route entry, as shown in Figure 5. Figure 5. Login and IP setup screen 3.3.2 Setting up through the Web interface To successfully connect your PC to the switch, your PC must a valid IP in your network. Contact your network administrator to obtain a valid IP for the switch. If you wish to change the default IP address of the switch, follow section 3.3.1 to change the IP address. 1. It is not necessary to login Web interface at the first time to use Web interface because the default configuration for Web access authentication is disabled. To secure the system configuration, please enable the authentication function at the Administration page under System category. Skip step 2 if the authentication is disabled. 2. At any PC connected to the network that the switch can access, open your Web browser (Internet Explorer), and type the following URL in the address/ location box, and press