Installation – Xerox WorkCentre Pro 215 User Manual
Page 15
8
Installation
(continued)
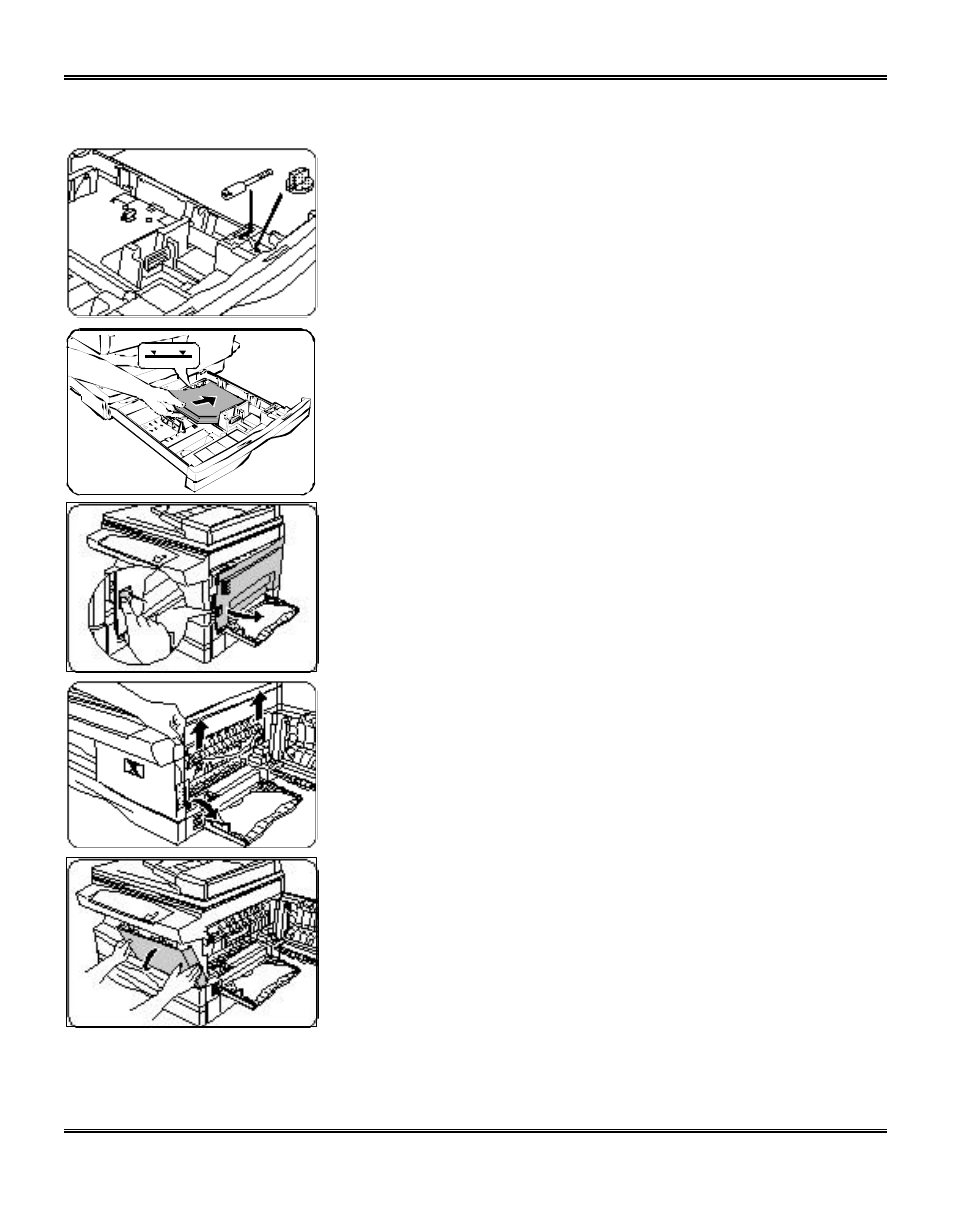
7. Secure the paper tray button and the shipping screw in
the locations shown.
•
Turn the paper tray button to secure its storage
position.
Note: Save the paper tray button and the shipping screw.
They will be needed if the Pro 215 has to be moved.
8. Load paper into the tray.
•
Refer to the Loading Paper section for additional
information.
•
Do not fill above the max line.
9. Push the paper tray firmly back into the Pro 215.
Note: Ensure that the alternate paper tray is lowered.
10. Press the release lever to open the side cover.
11. Remove the Caution tape from the cover.
12. Remove the two red fuser pins by pulling the string
upward one at a time.
•
Discard the fuser pins.
Note: Misfeeds will occur if the fuser pins are not removed.
CAUTION: Ensure that the side cover is always open before
opening the front cover.
13. Press the front cover release buttons to open the front
cover.
- 3040 (2 pages)
- Phaser 7750 (5 pages)
- Phaser 7750 (2 pages)
- 6350 (4 pages)
- Phaser 6180 (4 pages)
- Phaser 3600 (2 pages)
- Phaser 3435 (98 pages)
- ColorQube 9202 (16 pages)
- ColorQube 9203 (13 pages)
- DocuColor 242-252-260 con Creo Spire CX260-17131 (216 pages)
- DocuColor 8000AP (13 pages)
- DocuColor 8000AP (4 pages)
- DocuPrint M760 (44 pages)
- Phaser 860 (42 pages)
- Phaser 3450 (58 pages)
- Phaser 3635MFP (10 pages)
- Phaser 5500 (5 pages)
- Phaser 6100 (7 pages)
- Phaser 7300 (28 pages)
- Color Printer Phaser 7300 (3 pages)
- Phaser Color Printer 7750 (8 pages)
- 4127 (4 pages)
- 480 (352 pages)
- 3R11474 (2 pages)
- 4500 (3 pages)
- 721P85600 (116 pages)
- 721P (2 pages)
- WorkCentre XE80 Digitaler Kopierer - Laserdrucker-9588 (58 pages)
- FreeFlow DST2-NL (23 pages)
- FaxCentre F12 (4 pages)
- 4182 (39 pages)
- Copycentre C175 (2 pages)
- ColorStix 8200 Ink Sticks 016-2045-00 (9 pages)
- DocuColor CX250 (276 pages)
- HP Toner Cartridges C9722A (2 pages)
- DocuColor 40CP (82 pages)
- 4850 (90 pages)
- Phaser 016-1300-00 (2 pages)
- X2 (41 pages)
- M123 (12 pages)
- 6130N (3 pages)
- WorkCentre PE120-120i-3133 (20 pages)
- 7300 (4 pages)
- Color Printer Phaser 6280 (158 pages)