Network connection, 1 install the software, 2 network connection via lan – Velleman Central Management System User Manual
Page 5
2
2. NETWORK CONNECTION
Note: The screen capture displayed in the manual may vary from the one you
actually see because different device with different model number may have
different display. However, the system configuration method should be the
same.
2.1 Install the software
Step1: Place the supplied CD into your CD-ROM or DVD-ROM drive. The program will be
automatically run.
Step2: Click “Licensed Software AP” to install Video Viewer, or click “Download The Latest
Version” under “Licensed Software AP” to download the latest version of Video Viewer
from the Internet (if your PC is connected to Internet).
Step3: Follow the on-screen instructions to finish the installation. When the installation is
completed, a shortcut icon “
” will be placed on your PC desktop.
2.2 Network Connection via LAN
Step1: Connect your device (such as a DVR or network camera) and PC via a RJ45 network
cable, and make sure the device is powered on.
Step2: Set the PC’s IP address as “192.168.1.XXX” (1~255, except 10).
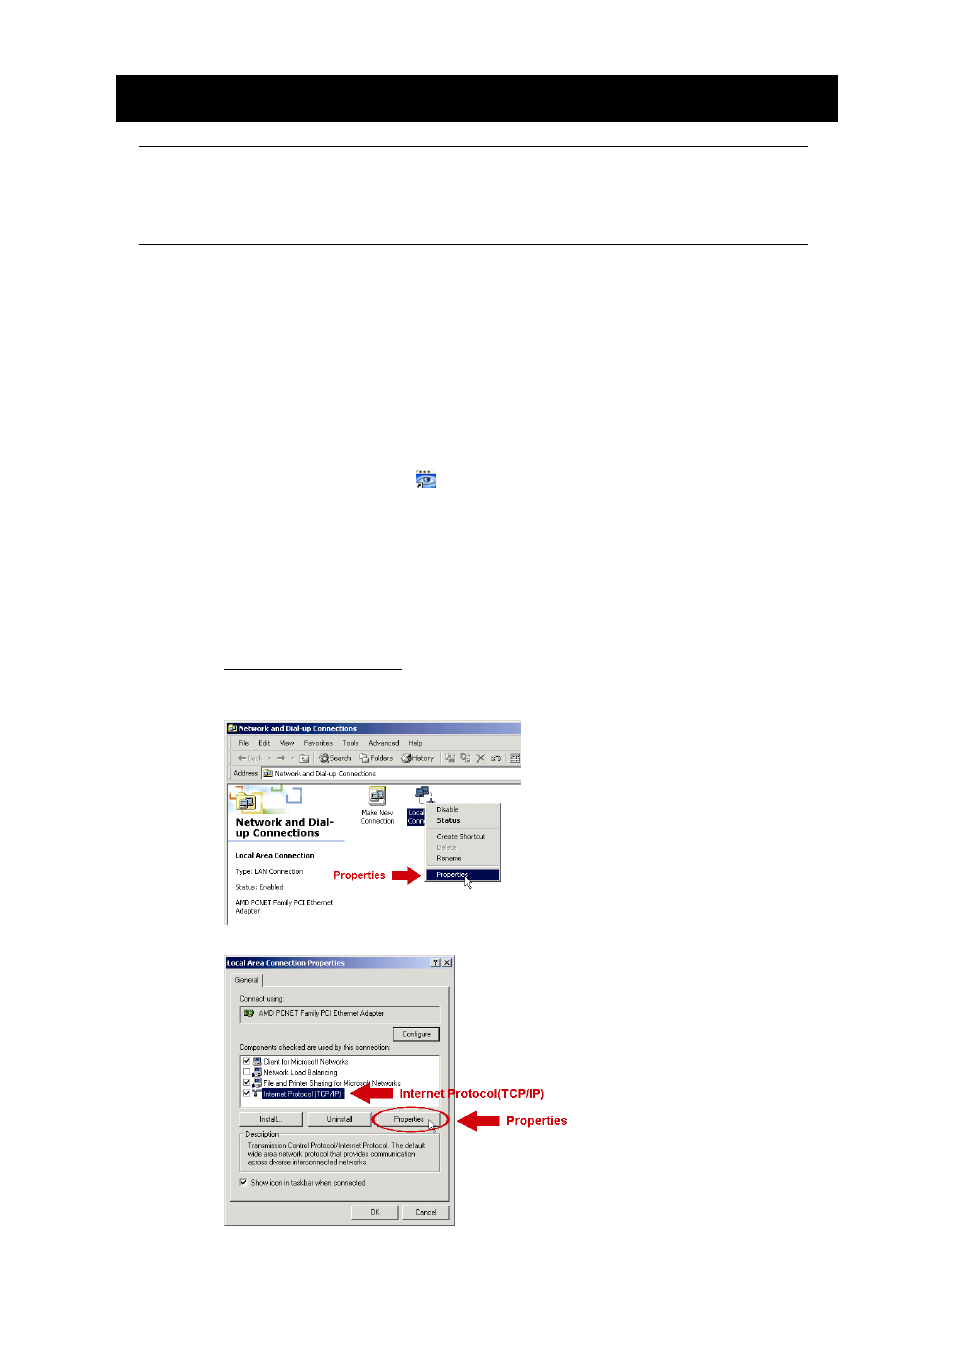
For Windows 2000 users:
a) Select
“Start”
“Settings” “Network and Dial-up Connections”.
b) Right-click on “Local Area Connection”, and select “Properties”.
c) In the “General” tab, select “Internet Protocol (TCP/IP)”, and select “Properties”.