Installation guide, Terminating the h8238, H8238 – Veris Industries H8238 Install User Manual
Page 6
H8238
Z202837-0H
PAGE 6
©2012 Veris Industries USA 800.354.8556 or +1.503.598.4564 / [email protected]
11124
Alta Labs, Enercept, Enspector, Hawkeye, Trustat, Veris, and the Veris ‘V’ logo are trademarks or registered trademarks of Veris Industries, L.L.C. in the USA and/or other countries.
TM
INSTALLATION GUIDE
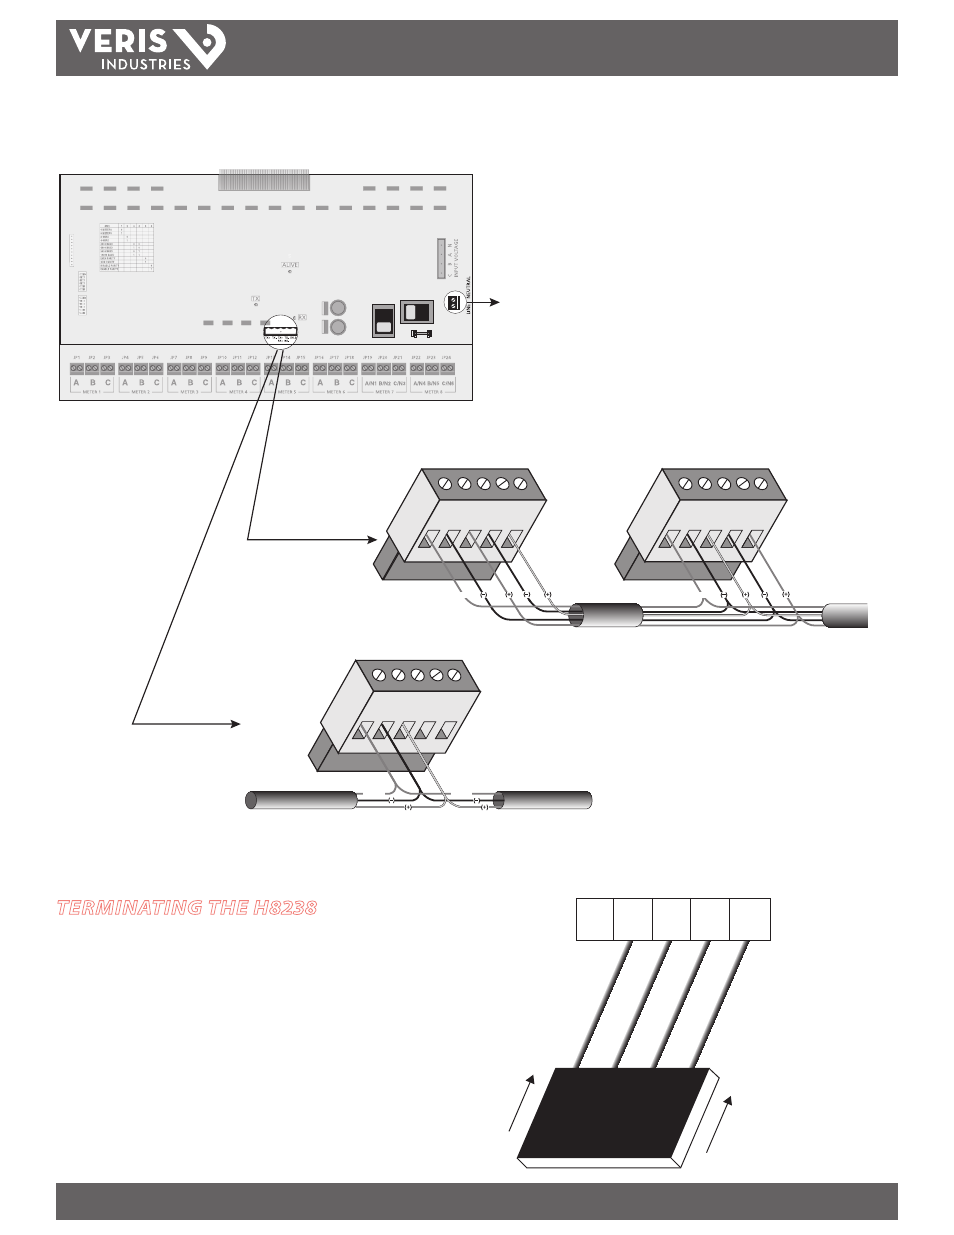
7. Connect communications wiring. Follow diagrams below. Wire the RS-485
connection consistent with the 2/4 wire configurations made in step 4.
2-Wire RS485
4-Wire RS485
PowerWiring
120VAC*
*For 240VAC power connection version, order catalog number H8238E
Master (H8936)
Slave (H8238)
Master or Slave
TX+
SHLD
TX+
RX+
TX–
RX–
TX–
SHIELD
SHIELD
TX+
SHLD
TX+
RX+
TX–
RX–
TX–
TX+
SHLD
TX+
RX+
TX–
RX–
TX–
SHIELD
SHIELD
TERMINATING THE H8238
If the H8238 is the last device on the network, terminate it to ensure reliable
communications.
1. Insert the wires of the daisy chain and the wires of the terminator into the holes of
the RS-485 communications connector.
2. Using a small flat blade screwdriver, tighten the connector’s screws. Torque the
connector screws 4 lbs-in. (0.45 N-m).
3. Reinstall the connector back into the signal acquisition board.
4. Secure the communications cable in the enclosure.
Shield
TX-
TX+
TX-
RX-
TX+
RX+