B.4 sealing (cont.) – Ohaus CKW WASHDOWN CHECKWEIGHING SCALES_INDICATOR Manual en User Manual
Page 61
CKW-55 CHECKWEIGHER
APPENDIX B
EN-57
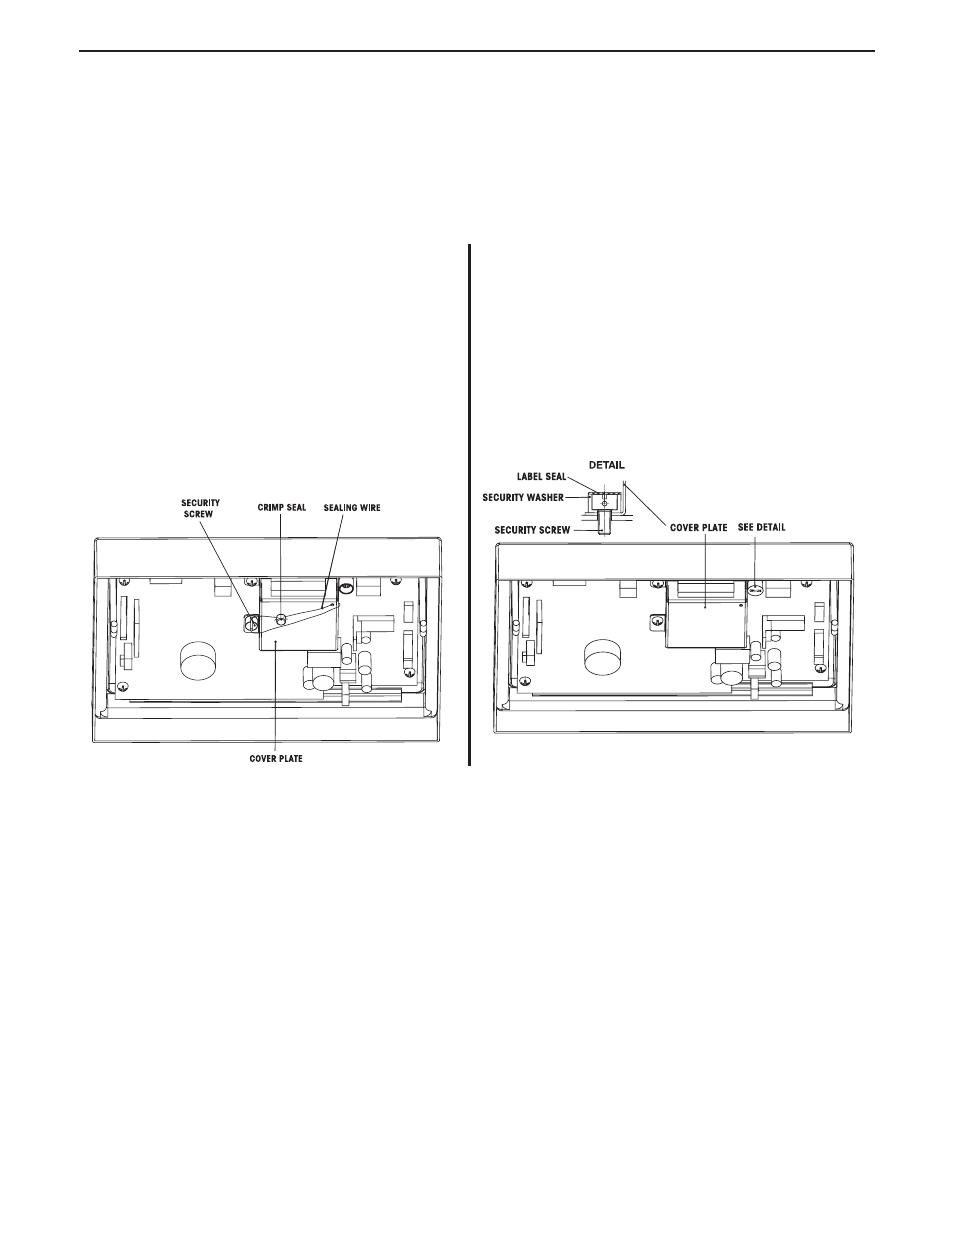
Wire Sealing
Refer to Figure B-2 and seal the Cover Plate as shown.
IMPORTANT: Trim any excess wire length protruding from the
crimp seal to prevent the wire from touching the printed circuit
board.
Make sure the internal sealing gasket is in place and
unobstructed. Assemble the Indicator and replace the
screws on both sides of the housing.
Figure B-2. Internal Wire Seal.
Tamper Proof Adhesive Sealing
Refer to Figure B-3 and seal the Cover Plate by placing a
sealing label as shown over the security washer and security
screw. Make sure the internal sealing gasket is in place and
unobstructed. Assemble the Indicator and replace the screws
on both sides of the housing.
Figure B-3. Internal Sealing Label.
Internal Sealing
When the internal sealing method is used, first remove all AC power from the scale system. On scales containing an
optional rechargeable battery system, set the scale Off using the ON/ZERO
Off button. Remove the four flat head screws at
the left and right sides of the Indicator housing and pull the front panel of the Indicator forward. There are two different
methods for the internal seal, a crimped wire seal or a tamper evident label. The LFT kit supplied with the Indicator contains
the wire seal components.
B.4 Sealing (Cont.)