2 linearity calibration – Ohaus CKW WASHDOWN CHECKWEIGHING SCALES_INDICATOR Manual en User Manual
Page 44

EN-40
CKW-55 CHECKWEIGHER
% kg lb g oz B/G Net Tare PT
% kg lb g oz B/G Net Tare PT
% kg lb g oz B/G Net Tare PT
% kg lb g oz B/G Net Tare PT
% kg lb g oz B/G Net Tare PT
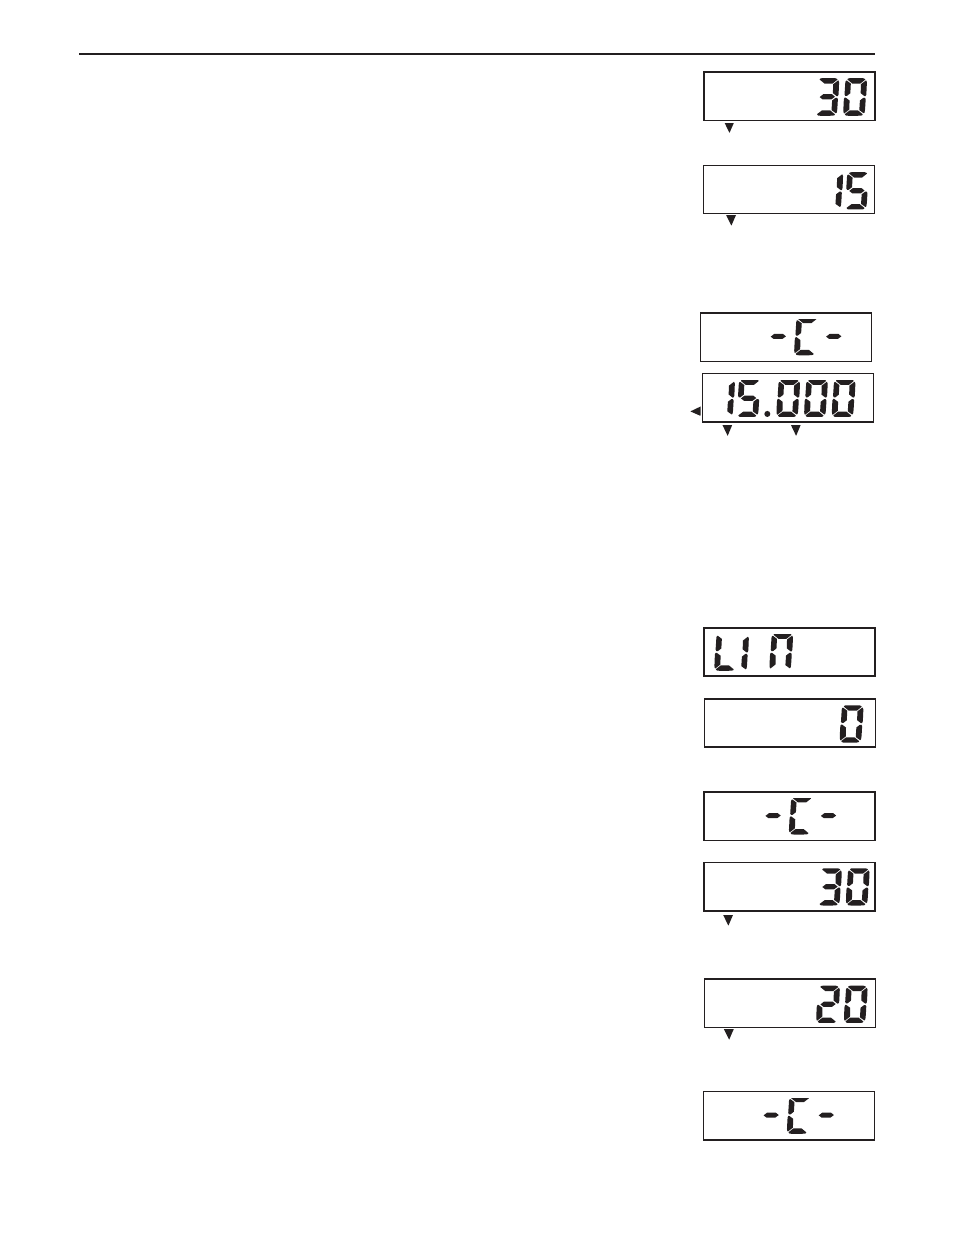
After a few seconds, the requested calibration value and unit (based on the Full Scale Capacity
and Calibration Unit setting from the Setup Menu) flashes on the display. (This sample
illustrates a Span Calibration value based on a Full Scale Capacity and Calibration Unit setting
of 30 kg.)
If a different Span Calibration value is desired, enter the new value via the numeric keypad.
(This sample illustrates a new Span Calibration value of 15 kg.)
Note: Allowable range capacity 1 kilogram or 1 pound to 100% full scale are accepted,
(whole numbers only). Note that values closer to the full span capacity will usually yield the
most accurate calibration.
Place the corresponding mass on the platform, then press the Yes button. -C- is momentarily
displayed while the reading is stored.
If calibration was successful, the calibration weight is displayed and the scale exits
automatically to the active weighing mode. remove the weight and begin weighing operations.
Remove the weight and begin weighing operations.
4.1.2 Linearity Calibration
Linearity Calibration uses three points, zero, mid range and full scale. The mid range value can be optionally changed by
the user. Mid-range values closest to 1/2 full scale capacity are recommended to give the best performance over the entire
weighing range. Before calibrating the scale, check that the weighing base is correctly leveled. When any selection within
the Read-GMP menu is enabled, calibration results are automatically printed.
With CAL displayed, press the Yes button. SPAN is displayed. Press the No button to skip and
proceed to the next sub-menu item LIN.
Press the Yes button to select and perform Linearity Calibration.
The display flashes 0, indicating that nothing should be placed on the platform at this time.
After ensuring that the scale platform is clear, press the Yes button. -C- is displayed while the
zero point is established.
After a few seconds, the requested mid-point calibration value and unit (based on the Full
Scale Capacity and Calibration Unit setting from the Setup Menu) flashes on the display. (This
sample illustrates a mid-point Linearity Calibration value of 30 kg, based on a Full Scale
Capacity and Calibration Unit setting of 30 kg.)
If a different mid-point Linearity Calibration value is desired, enter the new value via the
numeric keypad. (This sample illustrates a new mid-point Linearity Calibration value of 20 kg.)
Note: Allowable range is 25% to 75% full scale Capacity, (whole numbers only).
Note that values closer to 1/2 full span capacity will usually yield accurate calibration.
Place the corresponding mass on the scale platform, then press the Yes
Yes
Yes
Yes
Yes button.-C- is
momentarily displayed while the reading is stored.
