Acroprint Attendance Rx User Manual
Page 8
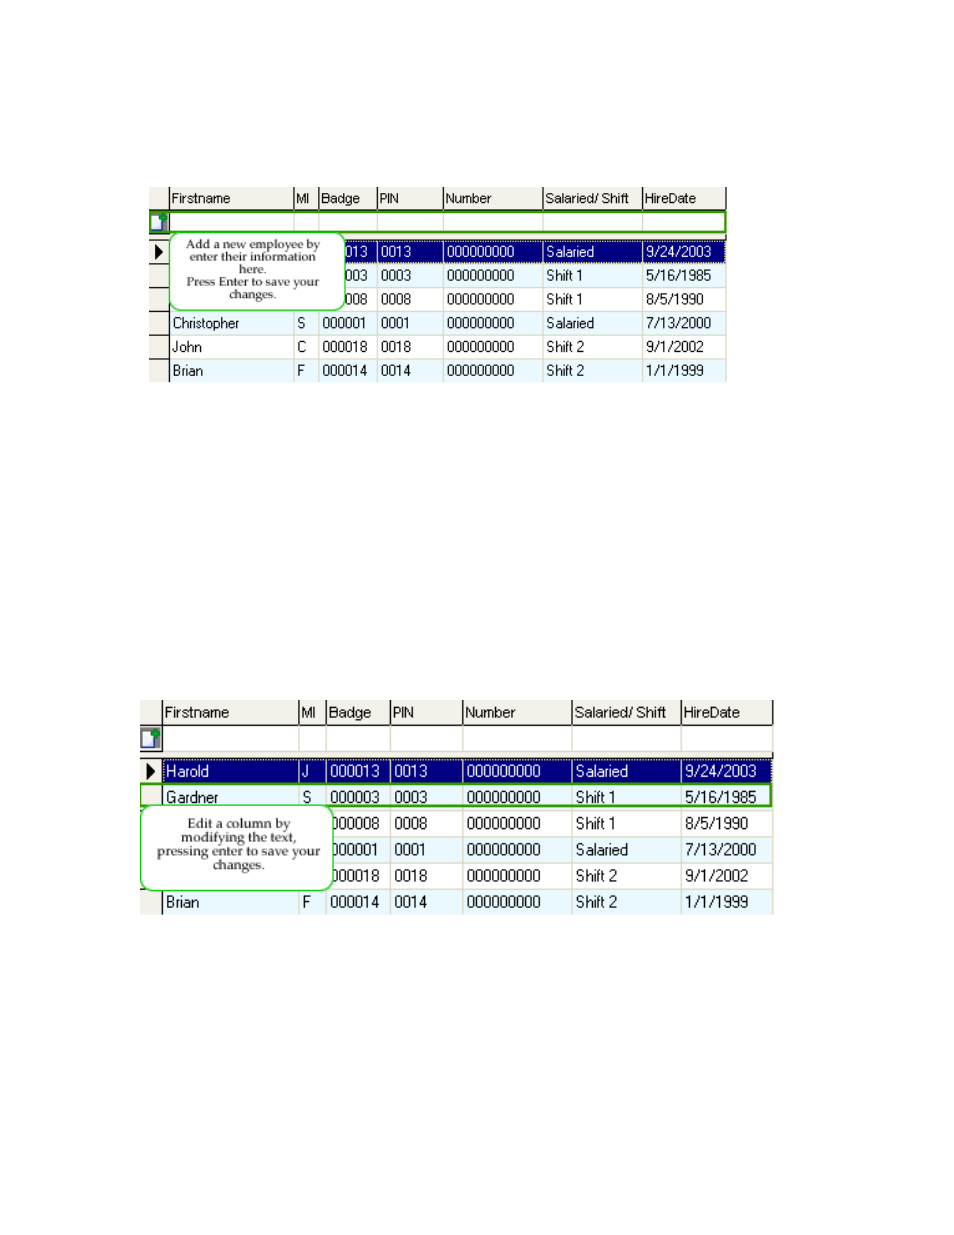
Adding a new Employee
From the main window of Attendance Rx, click the Employees icon or enter the View menu and
select Employees.
• There are two ways to enter an employee. You may place cursor in the first field
available in the row, Last name and begin typing. Option two, use the Wizard, and click
the Wizard button in the top right-hand corner of the window.
• Enter the employee's name, badge number, PIN, employee Number, shift number, Export
ID and Hire Date. (Some of these numbers can be set to auto-increment by adjusting the
Employee Options.)
• Press Enter to accept the new employee information if using manual entry, or press Finish
to accept if using the Wizard.
• To erase changes made before adding a new employee, click Delete if using manual entry,
or Cancel is using the Wizard.
Select another option from the left hand menu to exit this screen.
Editing an Employee
From the main window of Attendance Rx, click the Employees icon or enter the View menu and
choose Employees.
• Select the row containing the employee that needs to be edited.
• Click Detail in the bottom right hand corner of the window.
• Make the desired changes to the employee’s information
• Click Save to save the changes and return to the Employees Window. Click Cancel to lose
the changes and return to the Employees Window.
Select another option from the left hand menu to exit this screen.