Add user – Acroprint TQ600F (software version 4.x and above) User Manual
Page 17
13
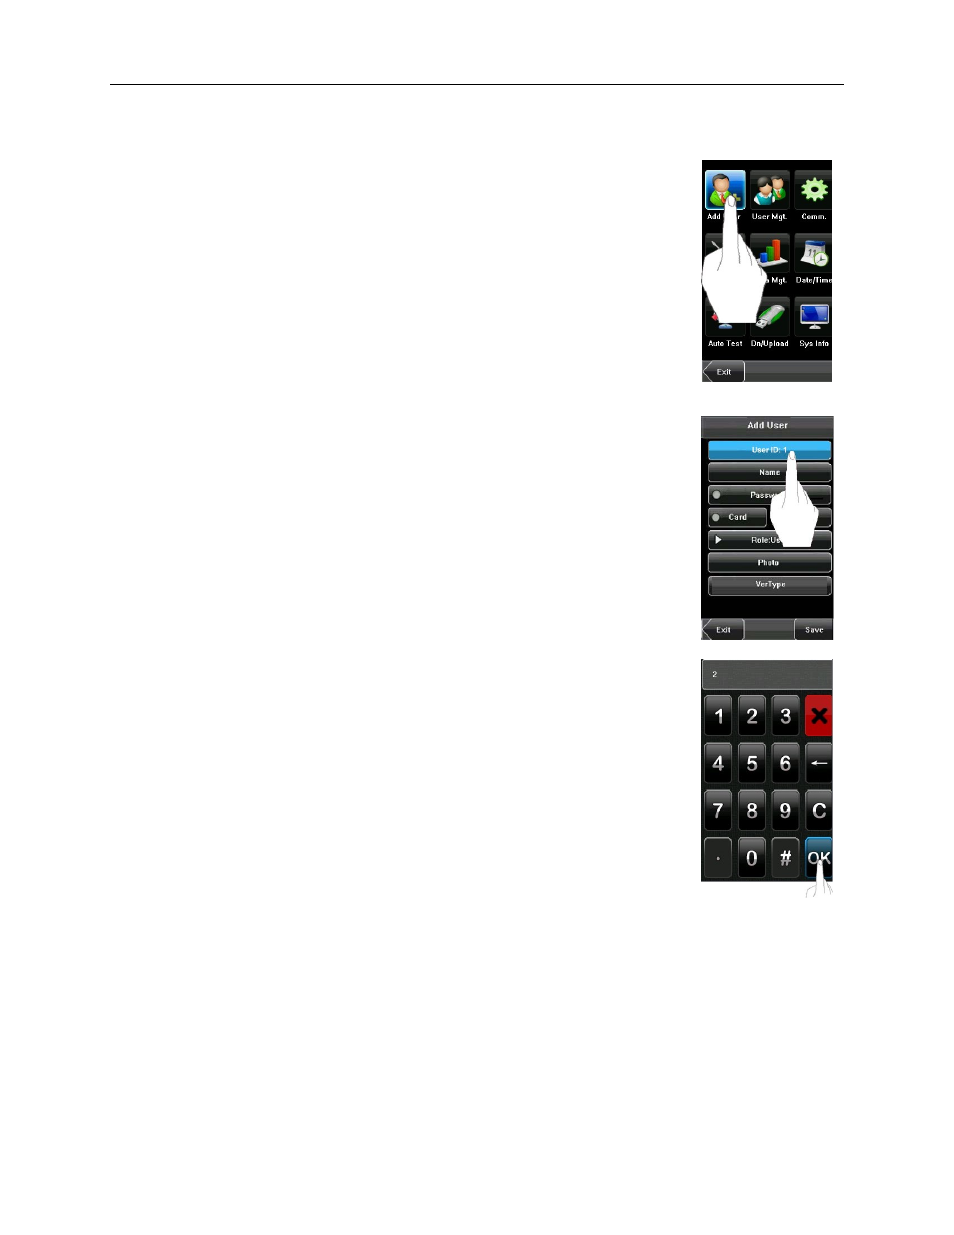
3. Add User
Press [Add] on the User Mgt. screen to display the Add User screen as shown to the right.
•
User ID: Enter a user ID. 1 to 9 digit user IDs are supported by default.
•
Name: Enter a user name. 12 characters user names are supported by default.
•
Password: Enroll a user’s password. The device supports 1 to 8 digit passwords by default.
•
Card: Enroll a Badge.
•
Face: Enroll a user’s face.
•
Role: Set the rights of a user. A user is set to ordinary user by default and can also be
set to administrator. Ordinary users are only granted the rights of face or password
verification, while administrators are granted access to the main menu.
•
Photo: Enroll a user’s photo. The user’s photo is displayed on screen after a successful
verification.
•
VerType: Select the method of User verification.
3.1 Entering a User ID
The device automatically allocates user IDs starting from 1. If you use the user ID allocated
by the device, you may skip this section.
• Press
[User ID] on the Add User screen to display the user ID management screen.
Note
: The user ID can be modified during initial enrollment, but once enrolled, it
cannot be modified.
• Using the keypad screen, enter a user ID and press [OK]. If the message “User ID
exists!” is displayed, enter another ID.
Note
: The device supports 1 to 9 digit user IDs by default.
•
After the user ID is entered, press [Save] to save the current information and return to
the previous screen. Press [Exit] to return to the previous screen without saving the
current information.