Icons assembly, Seesnake® lt1000 – RIDGID SeeSnake LT1000 User Manual
Page 9
SeeSnake® LT1000
7
Icons
Assembly
Mounting the LT1000
The LT1000 mounts to any Standard or Mini SeeSnake
reel quickly and easily. Assembly requires a Phillips
head screwdriver and a
7
/
16
” / 11 mm box wrench. The
mounting sequence for the SeeSnake Mini is different
than the sequence for the SeeSnake Standard.
Note that for the Standard SeeSnake reel, the curved por-
tions of the mounting brackets are oriented to the out-
side of the LT1000 while for the Mini’s narrower frame,
the curved portions of the brackets point inward.
Mounting the LT1000 to the SeeSnake
Mini Reel
1. Remove the two mounting brackets from the sides
of the LT1000.
2. Before mounting the LT1000 on the frame, lead the
SeeSnake System Cable up to the SeeSnake System
Connector. The SeeSnake System Cable has a guide
ridge molded into the top of the cable connector.
With the guide ridge aligned with the guide pin at
the top of the receptacle, insert the System Cable
into the System Connector firmly and turn the lock-
ing sleeve clockwise to tighten it in position.
NOTICE
When connecting/disconnecting the SeeSnake
system cable, turn only the locking sleeve. To prevent dam-
age, do not bend or twist the connector or cable.
3. The Mini SeeSnake has the curved portions of the
mounting brackets face inward. Position the LT1000
with the opening in the side plate seated over the
“foot” on the SeeSnake Reel frame and hold it in
its approximate position while starting the attach-
ing machine screws on one side of the LT1000. The
SeeSnake may be laid on its back for easier installa-
tion of the front side panel.
Do not sit on the LT1000.
Do not stand on the LT1000.
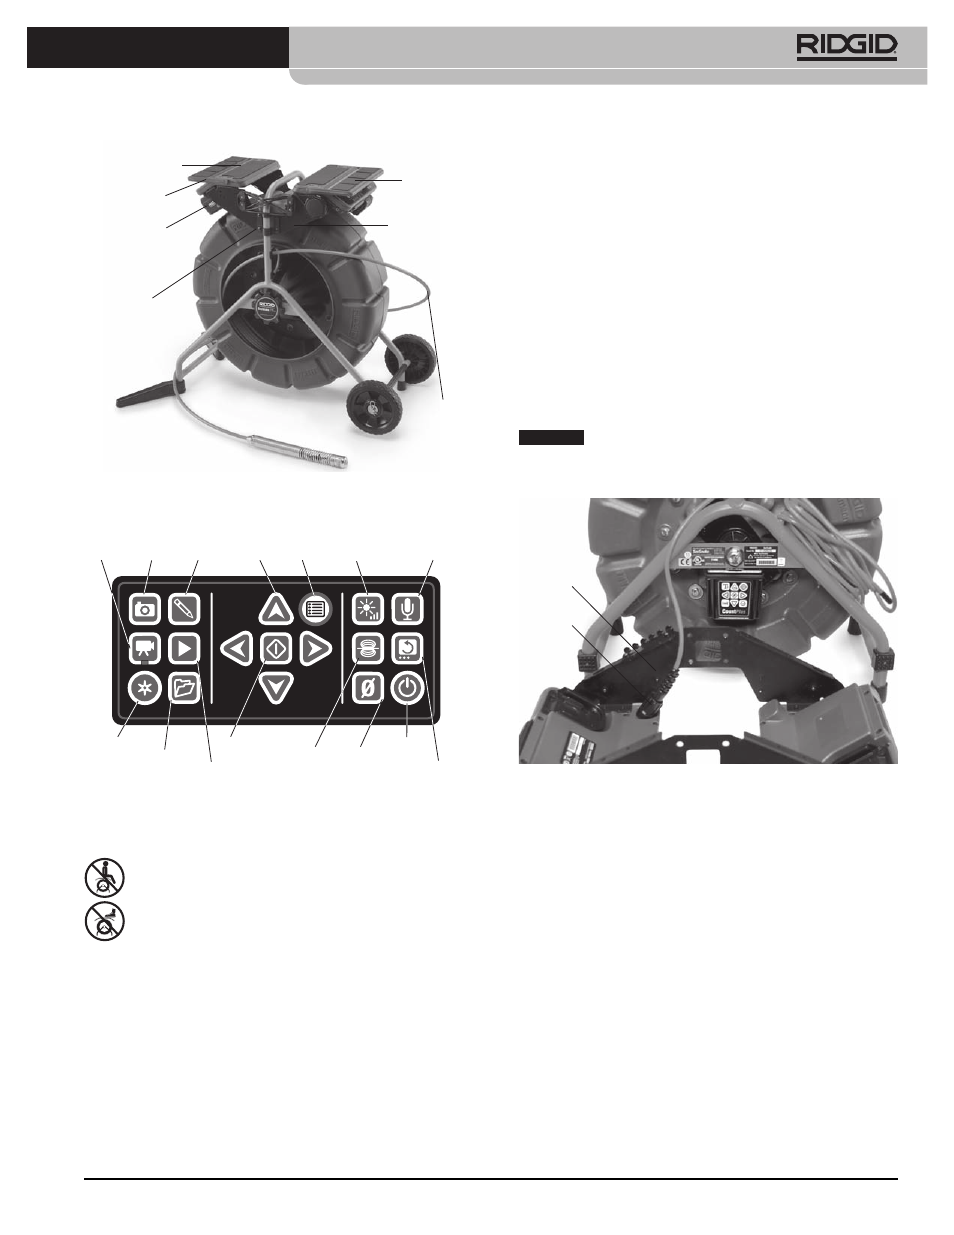
Microphone
Mute Key
Brightness
Key
Menu
Key
Arrow
Keys
Photo
Tag Key
Photo
Key
Autolog
Key
Video
Key
Job
Management
Key
Playback
Key
Select
Key
Sonde
Key
Zero
Key
Power
Key
Image Flip
Key
Figure 3 – LT1000 Keypad
Guide
Locking
Sleeve
Figure 4 – Connecting System Cable Before Mounting
Laptop Platform
Platform
Wings
Platform
Wings
Side Plate
SeeSnake
System
Cable
18V Battery
Mounting
Brackets
Figure 2 – LT1000 Components
Platform Wings Extended