RIDGID SeeSnake LT1000 User Manual
Page 11
SeeSnake® LT1000
9
7. Insert the four screws through the mounting brack-
et and side plate into their individual nuts and hand
tighten.
8. Repeat the process with the other side plate and
mounting bracket. The two side plates should be
level.
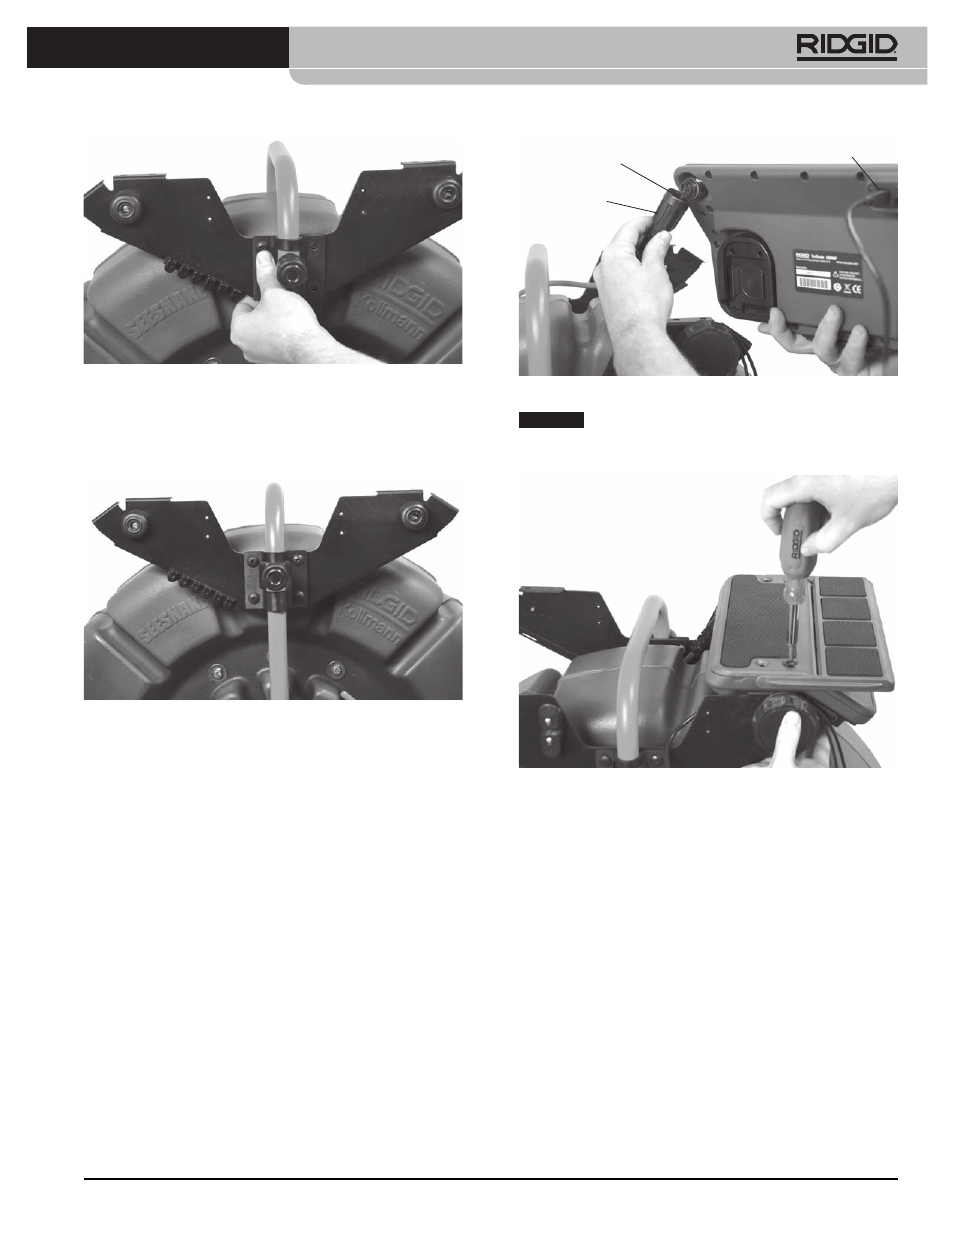
9. Route the SeeSnake System Cable from the See-
Snake between the side plates and connect it to
the SeeSnake Connector on the bottom of the
right-hand platform. The SeeSnake System Cable
has a guide ridge molded into the top of the cable
connector. With the guide ridge aligned with the
guide pin of the receptacle, insert the System Ca-
ble into the System Connector firmly and turn the
locking sleeve clockwise to tighten it in position.
NOTICE
When connecting/disconnecting the SeeSnake
system cable, turn only the locking sleeve. To prevent dam-
age, do not bend or twist the connector or cable.
10. Mount the right hand (keyboard) platform by align-
ing it with the mounting holes in the flanges of the
side plates and screw it hand tight with four screws.
Adjust the platform so it is level.
Figure 10 – Aligning the Bracket to the Side Plate
Figure 11 – Near Side-Plate Mounted
USB Connector
Locking Sleeve
Guide Ridge
Figure 12 – Attaching the SeeSnake System Cable
Figure 13 – Mounting Right-Hand Platform