Setting copy functions, P.16 “setting copy functions – Toshiba multifunctional digital color systems e-STUDIO4540C User Manual
Page 18
1 SETTING ITEMS (USER)
16 Setting Copy Functions
Setting Copy Functions
You can change the initial settings (defaults) for copy jobs.
1
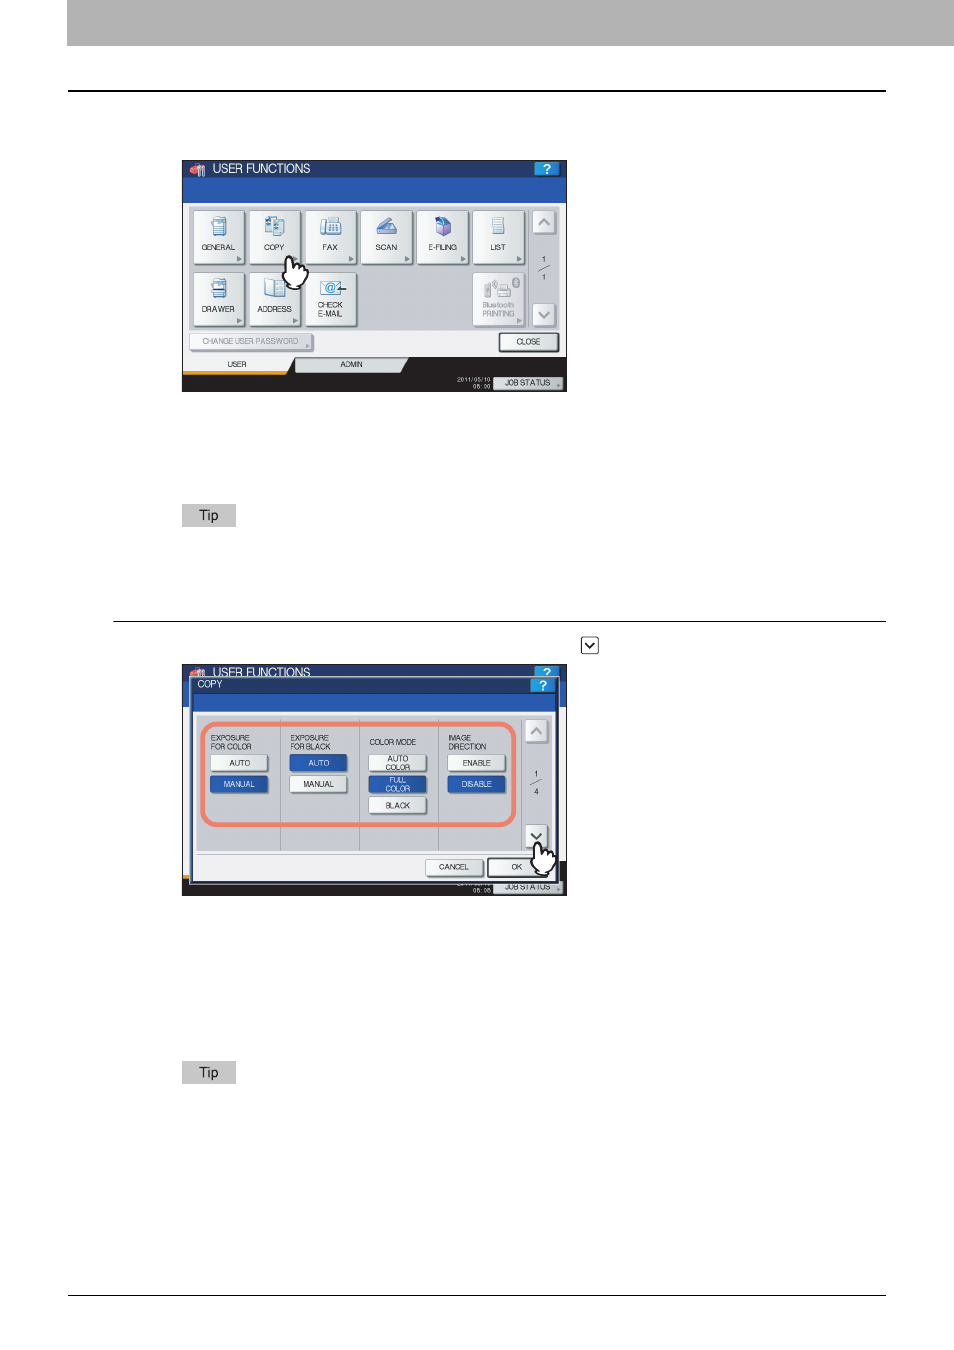
Press [COPY] in the USER menu.
The COPY screen is displayed.
y
When you are using the e-STUDIO6550C Series or e-STUDIO4540C Series, see the following page:
P.16 “Setting Copy Functions (e-STUDIO6550C Series, e-STUDIO4540C Series)”
y
When you are using the e-STUDIO456 Series or e-STUDIO856 Series, see the following page:
P.18 “Setting Copy Functions (e-STUDIO456 Series, e-STUDIO856 Series)”
To display the USER menu, see the following page:
Setting Copy Functions (e-STUDIO6550C Series, e-STUDIO4540C Series)
1
Specify the following items as required and press
.
EXPOSURE FOR COLOR — Select the default exposure for color copies. Press [MANUAL] to set the desired
contrast manually, or [AUTO] for allowing the equipment to automatically detect the contrast of the original.
EXPOSURE FOR BLACK — Select the default exposure for black copies. Press [MANUAL] to set the desired
contrast manually, or [AUTO] for allowing the equipment to automatically detect the contrast of the original.
COLOR MODE — Select the default color mode for copying. Only [BLACK] can be selected when the No Limit
Black function ( P.240) is enabled.
IMAGE DIRECTION — Select whether to use the IMAGE DIRECTION option. Press [ENABLE] to use it, or
[DISABLE] to not use it.
For details on the IMAGE DIRECTION option, refer to the Copying Guide “Chapter 4: EDITING
FUNCTIONS”.