Input source selection and surround setup, Selecting the digital/analog audio input, Using the front panel – Onkyo TX-DS656 User Manual
Page 30: Preset tuning surround parameter
30
Selecting the digital/analog audio input
You can select the DIGITAL INPUT connector to which the digital audio input source is connected using the on-screen display or the front panel switches.
The setting will be recalled automatically every time the same digital audio input source is selected.
Example of digital audio input connector (DIGITAL INPUT) setting
If your input source components have been connected to the three digital audio input connectors as shown below, for example, select the digital
audio input connector by the connector number.
Connected input source (Ex.)
DIGITAL INPUT connector used
Setting
DVD player
DIGITAL-1 (OPTICAL)
1
CD player
DIGITAL-2 (COAXIAL)
2
Video disc player
DIGITAL-3 (COAXIAL)
3
Analog input source
ANALOG
Note:
• Before performing the following procedure, carefully check the DIGITAL INPUT connector to which the input source is connected. An
improper setting causes no sound or sound output from a wrong input source.
• Pressing the DIGITAL AUDIO SELECTOR button to select a digital audio input channel when no digital audio input source is connected may
cause the DOLBY DIGITAL indicator to appear on the display. This occurs when the TX-DS656's built-in microprocessor cannot set the correct
surround mode after investigating the connected digital input source and is not a failure.
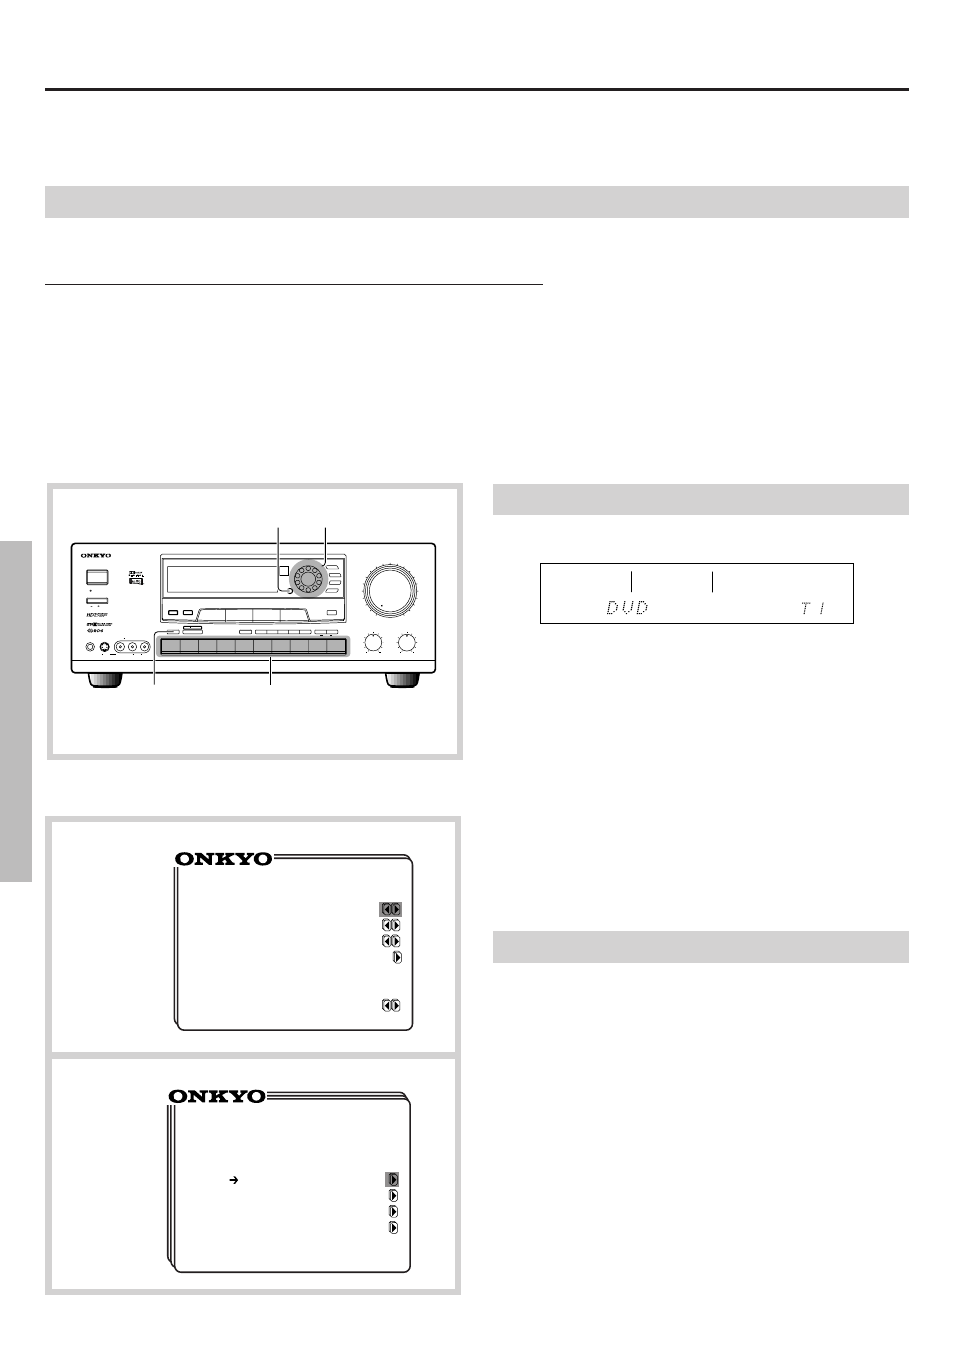
Using the front panel
1. Select the digital audio input source using the input selector buttons.
The selected digital audio input source is shown on the display.
MASTER VOLUME
MAX
MIN
TREBLE
SYSTEM
PHONES
DISPLAY
PTY/ TP
CHARACTER
SCAN
GROUP
MEMORY FM MUTE / MODE
CLEAR
TI CH INPUT
MUL
VIDEO CAM INPUT
/
3
VIDEO
VIDEO
AUDIO
L
R(MONO)
BASS
DIGITAL AUDIO
SELECTOR
S VIDEO
STAND-BY
AUTO TUN
SMART SCAN CONTROLLER
ENTER
3-D BASS
MAIN
REMOTE
SPEAKERS
PRESET
TUNING
SURROUND
PARAMETER
CD
PHONO
AM
FM
TAPE-2
MONITOR
TAPE-1
M D
VIDEO-3
CAM
VIDEO-2
VCR-2 / TV
VIDEO-1
VCR-1
DVD
MIDNIGHT
THEATER
Re-EQ
MULTI SOURCE
REC OUT
AUDIO VIDEO CONTROL RECEIVER
TX-DS
656
POWER
OFF
ON
Note:
Do not select the FM, AM VIDEO-3 CAM, PHONO, MULTI-CH
INPUT or TAPE-2 input source. Otherwise, you cannot perform the
following setting.
2. Press the DIGITAL AUDIO SELECTOR button.
The currently selected digital audio input channel is shown.
3. Select the digital audio input channel using the SMART SCAN
CONTROLLER.
The digital audio input channel shown on the display changes in the
following sequence:
ANALOG
→
Digital 1 OPT
→
Digital 2 CXL
→
Digital 3 CXL
→
(Returns to ANALOG)
4. Press the ENTER button to confirm the setting.
You are taken out of the digital audio setting mode if a button or
control other than the ENTER button has been operated or a certain
time has elapsed. If so, repeat the entire procedure starting from step 1.
SPEAKERS
V-DVD
2
MAIN
DIGITAL
SURROUND MODE
REC OUT
STUDIO
Input source selection and surround setup
a
b
**
Input Selector
**
Picture = VIDEO-3
Sound = DVD
TAPE-2 Moni. = OFF
Input Mode=Digital-2
Surround
Mode= LIVE
*
Digital Selector
*
Sound = DVD
Analog
Digital-1 OPT
Digital-2 CXL
Digital-3 CXL
Using the on-screen Menu
In the following procedure, use the remote controller unless otherwise specified.
1. Press the ENTER button.
The Menu appears on the TV screen.
2. Select "Input Selector" using the y or u cursor button, then
press the s cursor button.
The Input Selector screen appears. (a)
3. Select "Input Mode" using the y or u cursor button and then press
the s cursor button to display the Digital Selector screen. (b)
4. Select the desired digital audio input channel using the y or u button,
then press the s cursor button to confirm the setting.
5. Press the ENTER button.
Note:
• If the input source for which you have conducted the above digital
audio input setting is not connected to the correct DIGITAL INPUT
connector, sound from the input source will not be output.
• If you set a digital audio input mode for an input source which is
also connected to the VIDEO-2 input connector, the IPM feature
(power interlocking with TV) is automatically disabled.