Osd settings menu, Change scan dwell time – Network Technologies CAT5 User Manual
Page 27
22
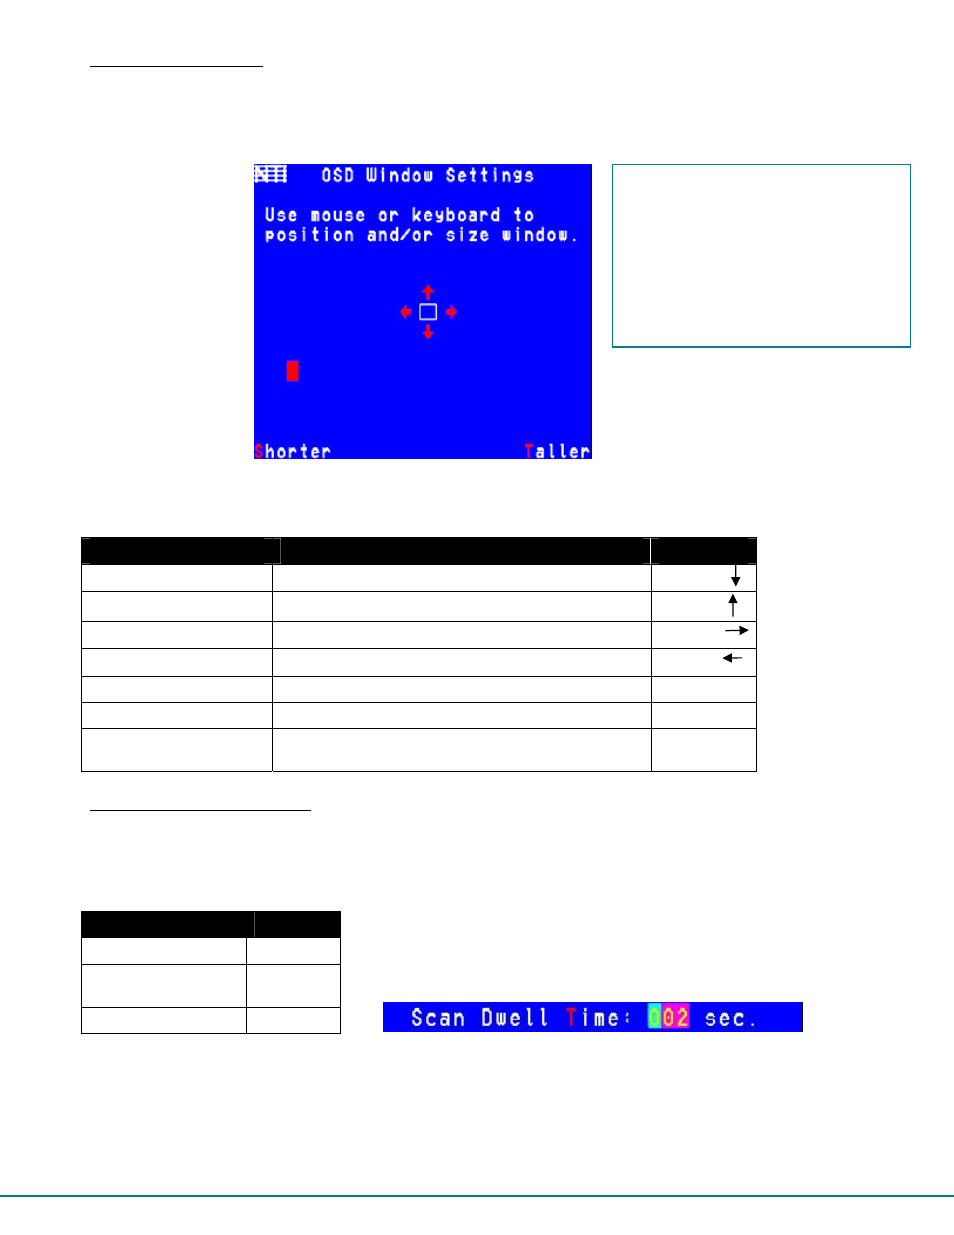
OSD Settings Menu
To enter the OSD Settings Menu, press <
O
> from the Settings Menu. (From the Command Mode menu press <
T
> - <
O
>.) Using
the OSD Settings, the user can resize and reposition the OSD window on the monitor as desired. Changes to the OSD settings
will only affect the logged-in user.
Figure 19- OSD Settings Menu
Function
Description
Keystroke
Move OSD Window Down
Moves the OSD window down on the monitor
D or
Move OSD Window Up
Moves the OSD window up on the monitor
U
or
Move OSD Window Right
Moves the OSD window to the right on the monitor
R
or
Move OSD Window Left
Moves the OSD window to the left on the monitor
L
or
Make OSD Window Taller
Makes the OSD window taller on the monitor
T
Make OSD Window Shorter
Makes the OSD window shorter on the monitor
S
Esc
Exit the OSD Settings menu. Any changes are
automatically saved.
Esc
Change Scan Dwell Time
The scan dwell time determines how long the PRIMUX will stay connected to a Host Adapter (in Scan Mode- page 20) while the
user is idle before switching to the next Host Adapter. When the <
T
> is pressed from the Settings Menu (From the Command
Mode menu press <
T
> - <
T
>), a field will appear around the current value for the scan dwell time. The user can enter any value
between 2 and 255 (seconds). The default scan dwell time value is 5 seconds.
Figure 20- Scan Dwell Time field
Function
Keystroke
Enter value
002-255
Save the new value
Enter
or
Tab
Exit
Esc
The default resolution of the OSD menu
is much lower than the average CPU
display setting. We recommend
adjusting the size of the OSD menu
before connecting to a CPU (i.e. make
adjustment immediately after powering
on the User Station, before connecting
to a CPU). Once a CPU connection is
made, the OSD menu will appear smaller
due to the higher resolution setting.