Chip tray & cast iron stop – Woodstock M1013 User Manual
Page 17
-15-
M1013 Owner's Manual (Mfg. Since 6/09)
SE
TU
P
Chip Tray & Cast Iron
Stop
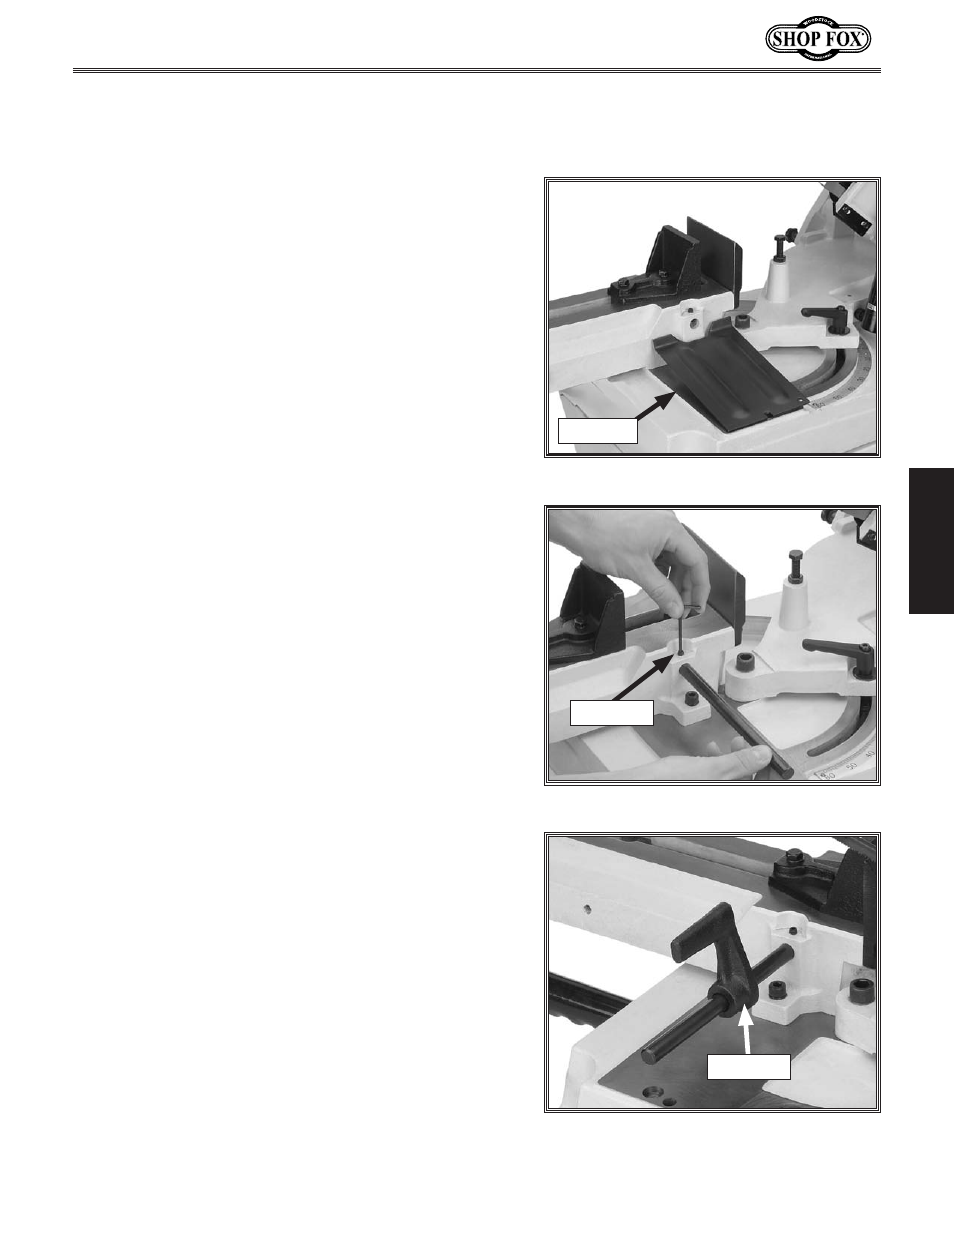
The chip tray directs small workpieces into a bucket when
the cut is complete. The cast iron stop allows you to
repeat cuts at the same length.
To install the chip tray and cast iron stop, do these
steps:
1. Position the chip tray, as shown in Figure 12.
2. Insert the stop rod approximately
3
⁄
4
" into the saw
until the end of the rod is just flush with the inside
casting surface, as shown in
Figure 13.
3. Use a 4mm hex wrench to tighten the set screw
shown in
Figure 13.
4. Slide the cast iron stop onto the stop rod and tighten
the set screw in the side of the stop, as shown in
Figure 14.
Figure 12. Chip tray installed.
Chip Tray
Figure 13. Installing stop rod.
Set Screw
Figure 14. Cast iron stop installed.
Set Screw