Wheels, feet, and cabinet – Woodstock M1013 User Manual
Page 14
-12-
M1013 Owner's Manual (Mfg. Since 6/09)
SE
TU
P
Wheels, Feet, and
Cabinet
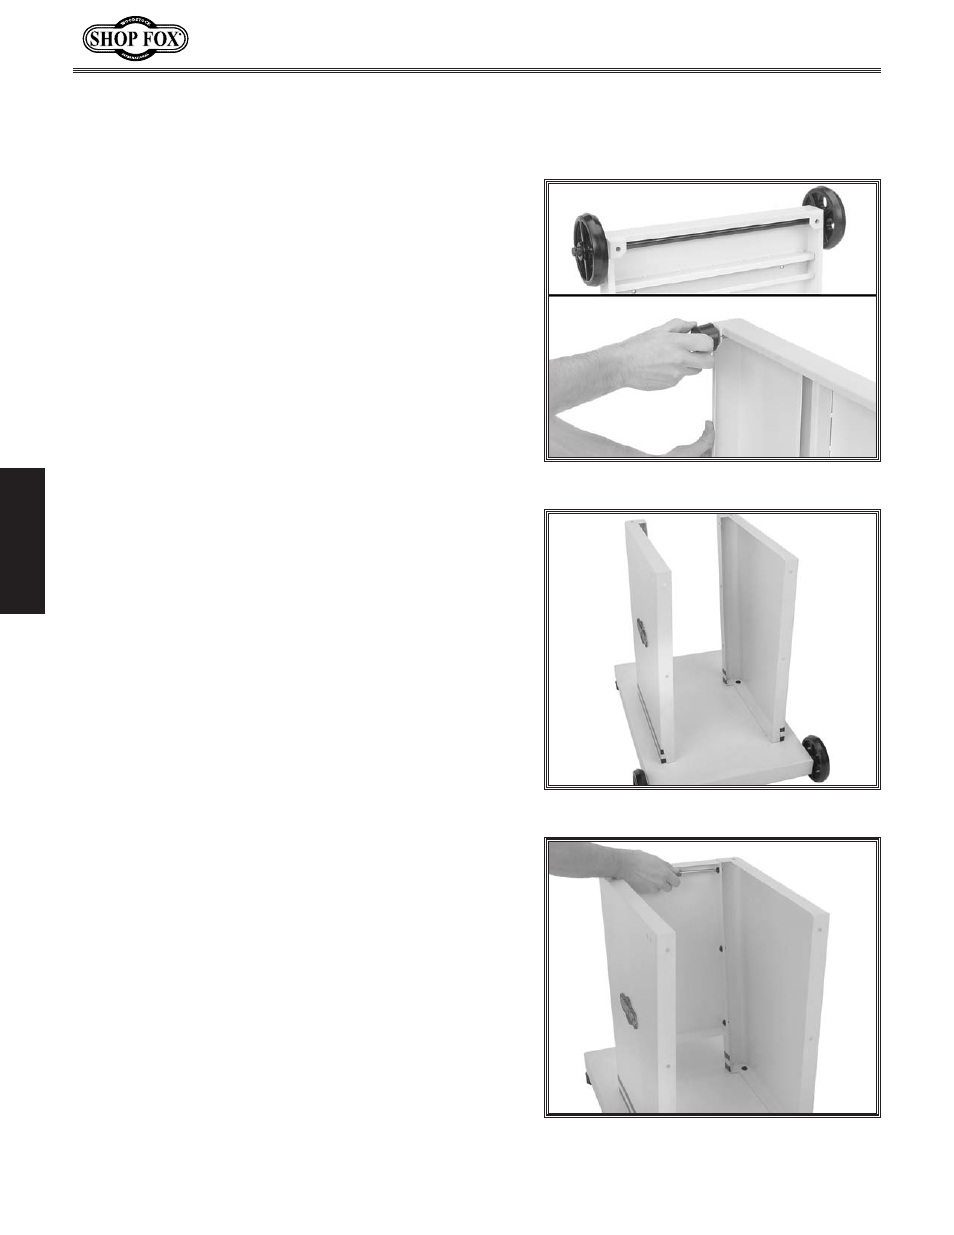
Figure 4. Installing wheels and feet.
Figure 5. Front and rear panels installed.
Figure 6. Left panel installed.
This bandsaw is shipped with four rubber feet with posts
and two wheels with an axle. It is your option to install
four rubber feet if you do not need to move the bandsaw,
or install the axle and wheels if you need to move the
bandsaw regularly.
To install the wheels, feet, and the cabinet, do these
steps:
1. At the end of the base with the axle holes, insert
the axle into the base (see
Figure 4).
2. Slide a 17mm flat washer and wheel onto each end
of the axle, followed by another 17mm flat washer
and cotter pin.
3. Thread rubber feet into the base (see Figure 4).
4. Position the base on the floor, and adjust the feet
until the base is level and stable.
5. Tighten the hex nuts against the base to lock the
feet in position.
6. Position the front and rear panels on the base and
install the panels to the base with four M8-1.25 x 16
hex bolts, eight 8mm flat washers, and four M8-1.25
hex nuts (see
Figure 5).
7. Position the left panel between the front and rear
panels, and secure it in place with six M8-1.25 x 16
hex bolts, twelve 8mm flat washers, and six M8-1.25
hex nuts (see
Figure 6).